Please Consider Donating us
We are helping millions of Beginners and Professionals to learn new programming technologies.
Please consider donating us:


How to Read Excel in ASP.NET MVC and show it in Grid manner with Paging

When reading large size excel files, and showing their data in the form of HTML Grid, on your View then make sure you provide paging links also. Through these paging links user can navigate from one sets of record to another in page-by-page manner.
Here I will create an application where users will be able to Read Excel files programmatically. First they will upload an excel file through a file upload control, then the ASP.NET MVC code will read this excel file and show it’s content on the View in Grid form.
This application contains only a Model, a Controller, a View and few CSS classes.
Create a new Model class and call it ReadExcel, add the below code to it:
public class ReadExcel
{
    [Required(ErrorMessage = "Please select file")]
    [FileExt(Allow = ".xls,.xlsx", ErrorMessage = "Only excel file")]
    public HttpPostedFileBase file { get; set; }
}
There is only one property of type HttpPostedFileBase because it will contain the uploaded excel file.
The FileExt attribute is a Custom Validation attribute class through which I will validate the file control. This validation will make sure that the users only upload excel files (of extension .xls or .xlsx).
Create a folder and name it Class. Add a class with name FileExt.cs to it, and add the below code to this class:
public class FileExt : ValidationAttribute
{
    public string Allow;
    protected override ValidationResult IsValid(object value, ValidationContext validationContext)
    {
        if (value != null)
        {
            string extension = ((System.Web.HttpPostedFileBase)value).FileName.Split('.')[1];
            if (Allow.Contains(extension))
                return ValidationResult.Success;
            else
                return new ValidationResult(ErrorMessage);
        }
        else
            return ValidationResult.Success;
    }
}
Explanation: I inherited this class from ValidationAttribute class of .NET framework. and override the IsValid function. Inside this function I check the uploaded file’s extension (making sure it is an excel file only).
Create a Controller and name it ReadExcelController. Add the Post Index Action method to it.In this Post Action the I will Read the Excel File from the C# code.
[HttpPost]
public ActionResult Index(ReadExcel.Models.ReadExcel readExcel)
{
    if (ModelState.IsValid)
    {
        string path = Server.MapPath("~/Content/Upload/" + readExcel.file.FileName);
        readExcel.file.SaveAs(path);

        string excelConnectionString = @"Provider='Microsoft.ACE.OLEDB.12.0';Data Source='" + path + "';Extended Properties='Excel 12.0 Xml;IMEX=1'";
        OleDbConnection excelConnection = new OleDbConnection(excelConnectionString);

        //Sheet Name
        excelConnection.Open();
        string tableName = excelConnection.GetSchema("Tables").Rows[0]["TABLE_NAME"].ToString();
        excelConnection.Close();
        //End

        //Putting Excel Data in DataTable
        DataTable dataTable = new DataTable();
        OleDbDataAdapter adapter = new OleDbDataAdapter("Select * from [" + tableName + "]", excelConnection);
        adapter.Fill(dataTable);
        //End

        Session["ExcelData"] = dataTable;
        ReadSession(1);
    }
    return View();
}
Explanation
- In the Post method the excel file is uploaded to the Content/Upload folder.
- Then connection string is created to Read the Excel file, and for this the Microsoft.ACE.OLEDB.12.0 provider is used.
- The excel file’s data is filled in a DataTable and this datatable is stored in a Session variable.
- In the last line the ReadSession() function is called, and it’s whose is to fetch the records for the page number that is passed to it’s parameter.
Update the HTTPGET Index Action method like shown below:
public ActionResult Index(int? page)
{
    if (Session["ExcelData"] != null)
        ReadSession(Convert.ToInt32(page));
    return View();
}
Explanation: It checks if ExcelData Session variable ‘is null or not’. If it is not null then call the ReadSession() function passing on the current page number.
In the controller add ReadSession()Explanation:
- The excel file data is fetched from the session and added to the DataTable. I have kept the page size as 10 and will show the records on page-by-page basis. Reading of records in a page is done with LINQ. The variable record holds the records of a given page number, similarly the variable columnName contains the names of the excel file’s columns.
- Next I loop through the variables – ‘columnName’ and ‘record’, and create a HTML table structure, for this I use the StringBuilder class. This HTML table is stored in a ViewBag.ExcelData variable.
- In the end I create PagingInfo class object and set it’s current page, total items and items per page. I store this class object in a ViewBag.Paging variable.
Create a new folder and name it Class. Add class called PagingInfo.cs inside this folder. The code for this class is:
public class PagingInfo
{
    public int TotalItems { get; set; }
    public int ItemsPerPage { get; set; }
    public int CurrentPage { get; set; }
    public int TotalPages
    {
        get
        {
            return (int)Math.Ceiling((decimal)TotalItems /
                ItemsPerPage);
        }
    }
}
Also add another class called PagingHelper.cs in the Class folder and put the below code to it:
public static class PagingHelper
{
    public static MvcHtmlString PageLinks(this HtmlHelper html, PagingInfo pagingInfo, Func<int, string> pageUrl)
    {
        StringBuilder result = new StringBuilder();
        string anchorInnerHtml = "";
        for (int i = 1; i <= pagingInfo.TotalPages; i++)
        {
            TagBuilder tag = new TagBuilder("a");
            anchorInnerHtml = AnchorInnerHtml(i, pagingInfo);

            if (anchorInnerHtml == "..")
                tag.MergeAttribute("href", "#");
            else
                tag.MergeAttribute("href", pageUrl(i));
            tag.InnerHtml = anchorInnerHtml;
            if (i == pagingInfo.CurrentPage)
            {
                tag.AddCssClass("active");
            }
            tag.AddCssClass("paging");
            if (anchorInnerHtml != "")
                result.Append(tag.ToString());
        }
        return MvcHtmlString.Create(result.ToString());
    }
    public static string AnchorInnerHtml(int i, PagingInfo pagingInfo)
    {
        string anchorInnerHtml = "";
        if (pagingInfo.TotalPages <= 10)
            anchorInnerHtml = i.ToString();
        else
        {
            if (pagingInfo.CurrentPage <= 5)
            {
                if ((i <= 8) || (i == pagingInfo.TotalPages))
                    anchorInnerHtml = i.ToString();
                else if (i == pagingInfo.TotalPages - 1)
                    anchorInnerHtml = "..";
            }
            else if ((pagingInfo.CurrentPage > 5) && (pagingInfo.TotalPages - pagingInfo.CurrentPage >= 5))
            {
                if ((i == 1) || (i == pagingInfo.TotalPages) || ((pagingInfo.CurrentPage - i >= -3) && (pagingInfo.CurrentPage - i <= 3)))
                    anchorInnerHtml = i.ToString();
                else if ((i == pagingInfo.CurrentPage - 4) || (i == pagingInfo.CurrentPage + 4))
                    anchorInnerHtml = "..";
            }
            else if (pagingInfo.TotalPages - pagingInfo.CurrentPage < 5)
            {
                if ((i == 1) || (pagingInfo.TotalPages - i <= 7))
                    anchorInnerHtml = i.ToString();
                else if (pagingInfo.TotalPages - i == 8)
                    anchorInnerHtml = "..";
            }
        }
        return anchorInnerHtml;
    }
}
Explanation: The PagingHelper class is a static class. It will be called from the View where paging links have to be created.
Create Index View and add the following code:
@using ReadExcel.Class;
@model ReadExcel.Models.ReadExcel

@using (Html.BeginForm("Index", "ReadExcel", FormMethod.Post, new { enctype = "multipart/form-data" }))
{
    @Html.TextBoxFor(m => m.file, new { type = "file" })
    <button id="submitButton" type="submit">Submit</button>
    @Html.ValidationMessageFor(model => model.file)
}
<div class="excelDiv">
    @(new HtmlString(ViewBag.ExcelData))
</div>
<div class="pagingDiv">
    @{
        PagingInfo pagingInfo = (PagingInfo)ViewBag.Paging;
        if (pagingInfo != null)
        {
            @Html.PageLinks(pagingInfo, x => Url.Action("Index", "ReadExcel", new { page = x }))
        }
    }
</div>
Explanation:
- When you are uploading a file, make sure to put enctype = “multipart/form-data” on the form.
- The excel file’s data is shown inside the excelDiv control from the ViewBag.ExcelData variable.
- The paging links are shown inside the pagingDiv. First the ViewBag.Paging variable data is converted to PagingInfo class then PageLinks function of the static class is called.
So in this way the paging links are created.
To style the View add the following CSS:
<style>
    .pagingDiv {
        background: #f2f2f2;
    }

        .pagingDiv > a {
            display: inline-block;
            padding: 0px 9px;
            margin-right: 4px;
            border-radius: 3px;
            border: solid 1px #c0c0c0;
            background: #e9e9e9;
            box-shadow: inset 0px 1px 0px rgba(255,255,255, .8), 0px 1px 3px rgba(0,0,0, .1);
            font-size: .875em;
            font-weight: bold;
            text-decoration: none;
            color: #717171;
            text-shadow: 0px 1px 0px rgba(255,255,255, 1);
        }

            .pagingDiv > a:hover {
                background: #fefefe;
                background: -webkit-gradient(linear, 0% 0%, 0% 100%, from(#FEFEFE), to(#f0f0f0));
                background: -moz-linear-gradient(0% 0% 270deg,#FEFEFE, #f0f0f0);
            }

            .pagingDiv > a.active {
                border: none;
                background: #616161;
                box-shadow: inset 0px 0px 8px rgba(0,0,0, .5), 0px 1px 0px rgba(255,255,255, .8);
                color: #f0f0f0;
                text-shadow: 0px 0px 3px rgba(0,0,0, .5);
            }
</style>
Add the following routes to the RouteConfig.cs file. This will create the SEO Friendly paging links like.
- /ReadExcel
- /ReadExcel/2
- /ReadExcel/3
routes.MapRoute("ReadExcelPageOne", "ReadExcel", new { controller = "ReadExcel", action = "Index", page = 1 });

routes.MapRoute(
    name: "ReadExcelLinks",
    url: "ReadExcel/{page}/",
    defaults: new { controller = "ReadExcel", action = "Index", page = "" },
    constraints: new { page = @"^[0-9]+$" }
);

routes.MapRoute(
    name: "Default",
    url: "{controller}/{action}/{id}",
    defaults: new { controller = "ReadExcel", action = "Index", id = UrlParameter.Optional }
);
If you now run your application and upload an excel file, this is how its data will look on the view:
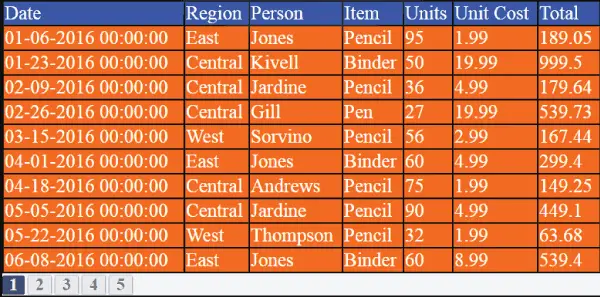
I hope you liked this Read Excel file application. It is very powerful and can also read very large size excel files too. The paging links feature gives extra benefit because users do not have to scroll down to view all the records.
Sharing is Caring – I Request you to share this Read Excel tutorial on your social accounts. Thank you!
Download the Source codes:
SHARE THIS ARTICLE
Related Tutorials:


ABOUT THE AUTHOR
I hope you enjoyed reading this tutorial. If it helped you then consider buying a cup of coffee for me. This will help me in writing more such good tutorials for the readers. Thank you.
HELLO EVERYONE
 Welcome to YogiHosting - A Programming Tutorial Website. It is used by millions of people around the world to learn and explore about ASP.NET Core, Blazor, jQuery, JavaScript, Docker, Kubernetes and other topics.
SUBSCRIBE TO NEWSLETTER
Enter your email address to subscribe to this blog and receive notifications of new posts by email.
Join 90K other subscribers