Filters in ASP.NET Core – Beginner to Expert level

Filters in ASP.NET Core are used to run code before or after certain stages in the request processing pipeline. There are many built-in filters for authorization, logging, caching, exception handling and so on. Filters also help to avoid code-duplication in our projects.
What is difference between middleware and filters in .NET Core? Middlewares operate on each and every request coming to a .NET Core app on the other hand Filters operated only on request coming to MVC pipeline. Middlewares do not have access to HttpContext but filters have. We can run filters on specified actions and controllers (cannot do this on Middlewares) unless we register the filter globally in the program class.
Page Contents
You can also create custom filters to handle concerns for your application in the way you want.
Create the Example Project
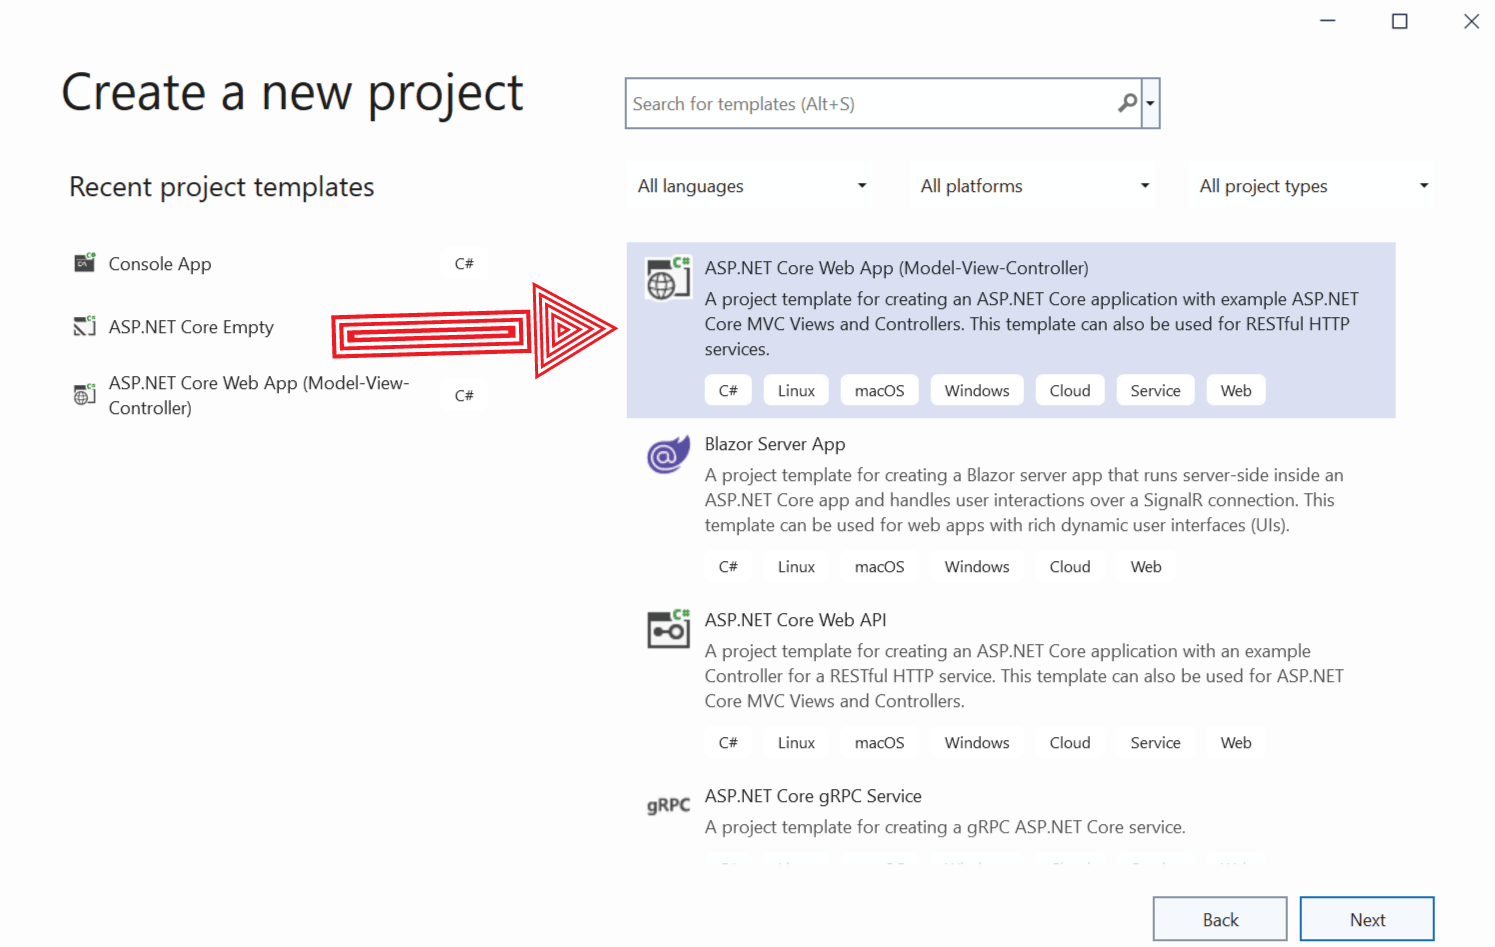
We will create an example project to understand Filters. In Visual Studio, create a new project by selecting the ASP.NET Core Web App (Model-View-Controller) template. Name this project as Filters and select the latest ASP.NET Core version which at the time of writing this tutorial is Dot Net 6.0.
Built-in Filter – [RequireHttps]
The [RequireHttps] attribute is a built-in filter which on applying to a controller or an action method allows only HTTPS requests to reach them. This means non-HTTPS requests are simply blocked.
When we created the app with Model-View-Controller template it will automatically redirect all requests made towards non-https endpoints to their respective HTTPS endpoints.
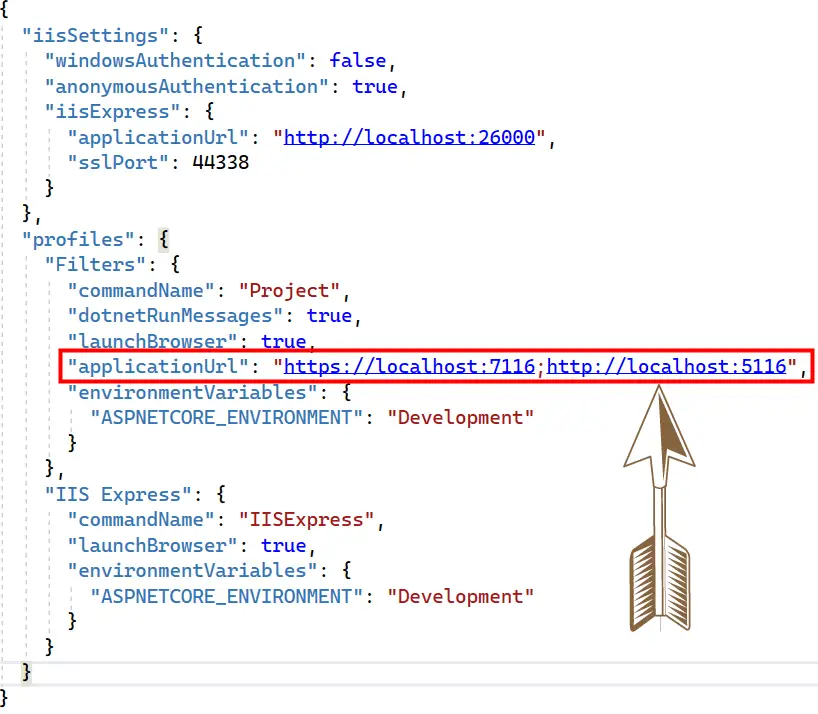
Open and check the launchSettings.json file given inside the “Properties” folder. Here 2 urls are given for the “applicationUrl” property under “profiles”. The second url is the non-https url for the app, which in our case here is http://localhost:5116.
Now run the app and open the non-https based url on the browser. We will see the browser immediately redirects us to the HTTPS based url or the app.
In order to understand [RequireHttps] filter we first need to disable this redirection. So open the Program.cs file and comment the code line app.UseHttpsRedirection(); which does this redirection. Simply add 2 “//” in front of it.
//app.UseHttpsRedirection();Now re-run the app and open the non-https url on the browser, and this time it will not get redirected.
Next, we change the Index Action method of Home Controller to return a string message as shown below:
public string Index()
{
    return "This is the Index action on the Home controller";
}
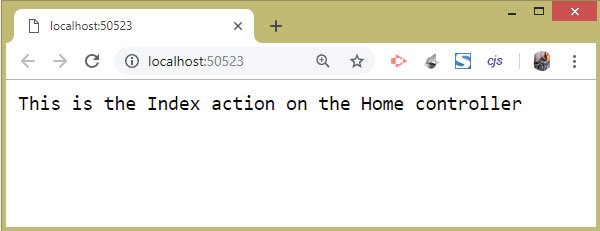
Now run your application and open the “non-https” url of the app on the browser. We will see the message on the browser, see the below image:
Now we make this action method to only be accessed from an HTTPS request, we do this by adding the [RequireHttps] attribute over the action method.
[RequireHttps]
public string Index()
{
    return "This is the Index action on the Home controller";
}
Re-run the app and once again open the non-https url of the app. We will get another message saying – This site can’t be reached, as shown in the image given below:
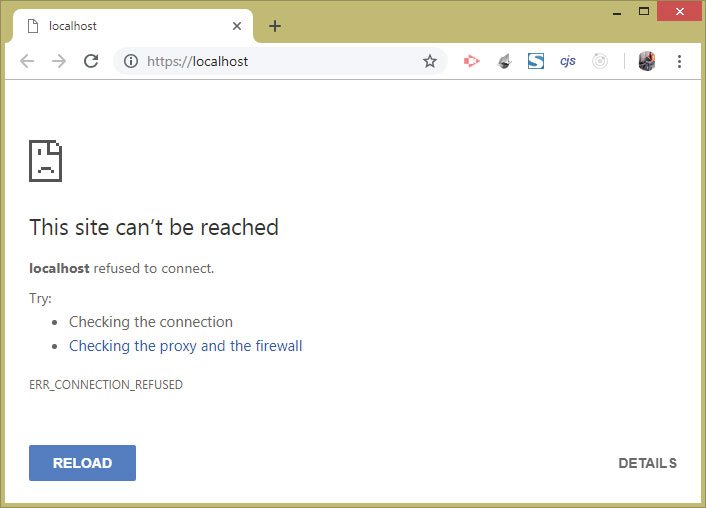
The reason is because we are trying to invoke the action method with a Non-HTTPS request but the [RequireHttps] attribute blocks it.
I hope you must have understood how redirection works and how we can use RequireHttps to filter out requests.
The [RequireHttps] built-in filter can also be applied on the controllers class. In that case all the controller’s action methods will get this attribute and they will block all non-https requests. In the below example all the 3 action methods will get RequireHttps attribute.
[RequireHttps]
public class HomeController : Controller
{
    public string Index()
    {
        return "This is the Index action";
    }

    public string List()
    {
        return "This is the List action";
    }

    public string Hello()
    {
        return "This is the Hello action";
    }
}
Different Types of Filters
How many types of filters are there in .NET Core? There are 4 major types of filters in .NET Core. These are Authorization, Action, Result and Exception. A filter can work both in synchronous and asynchronous way. Below table describes them in details.
| Filter | Interfaces that contains them | Description |
|---|---|---|
| Authorization | IAuthorizationFilter, IAsyncAuthorizationFilter | Used to apply authorization and security policy |
| Action | IActionFilter, IAsyncActionFilter | Used to perform a specify work immediately before or after an action method is performed |
| Result | IResultFilter, IAsyncResultFilter | Used to perform a specify work immediately before or after the result from an action method is processed |
| Exception | IExceptionFilter, IAsyncExceptionFilter | Used to handle exceptions |
How do I create a custom filter in .NET Core? We create a custom filter class by deriving it from Dot Net “Attribute” class and a corresponding filter interface. Next we apply the filter as an attribute over any controller or it’s action method.
Notice that each of the filter can be implemented by using any of the 2 interfaces – Synchronous or Asynchronous one.
Order of Execution of Filters
Filters are executed in the following order:
- Authorization Filters are the first to execute.
- Next comes the Action Filters.
- At the last the Result Filters are executed.
The Exception Filters are executed only when exceptions occur.
ASP.NET Core Authorization Filters
What are Authorization Filters? The Authorization Filters are used for authorization purpose and creating security policy. These filters run first in the pipeline. Authorization Filters are contained by IAuthorizationFilter and IAsyncAuthorizationFilter interfaces.
Definition of IAuthorizationFilter interface:
namespace Microsoft.AspNetCore.Mvc.Filters {
    public interface IAuthorizationFilter : IFilterMetadata {
        void OnAuthorization(AuthorizationFilterContext context);
    }
}
Definition of IAsyncAuthorizationFilter interface:
using System.Threading.Tasks;
namespace Microsoft.AspNetCore.Mvc.Filters {
    public interface IAsyncAuthorizationFilter : IFilterMetadata {
        Task OnAuthorizationAsync(AuthorizationFilterContext context);
    }
}
The IAsyncAuthorizationFilter interface is used for creating Asynchronous Authorization Filters.
The methods of the interfaces which are – OnAuthorization() and OnAuthorizationAsync() are used to write codes to authorize incoming requests.
The parameter – AuthorizationFilterContext context, receives the context data that describes the request. AuthorizationFilterContext contains a property called Result (of type IActionResult) which is set by the authorization filter.
Custom Authorization Filter Example
Let’s create a Custom Authorization Filter example to restrict the requests that are not made from Https protocol. This filter can be applied to any action method or on the Controller class itself.
Create a folder called CustomFilters on the root of the app and add a new class called HttpsOnly.cs to it. Next add the following code to this class:
using Microsoft.AspNetCore.Mvc;
using Microsoft.AspNetCore.Mvc.Filters;

namespace Filters.CustomFilters
{
    public class HttpsOnly : Attribute, IAuthorizationFilter
    {
        public void OnAuthorization(AuthorizationFilterContext context)
        {
            if (!context.HttpContext.Request.IsHttps)
                context.Result = new StatusCodeResult(StatusCodes.Status403Forbidden);
        }
    }
}
Note that the HttpsOnly class derives from the Attribute class so it can be applied as an attribute on the action methods and controllers. Also, it is derived from the IAuthorizationFilter interface inorder to create an Authorization Filter.
The main work is done inside the OnAuthorization method which checks to see if the incoming requests are made from an Https Protocol or not. When requests comes from non-Https sources then we are setting the context.Result to 403 forbidden. This prevents execution of the action method or the controller, and users will see forbidden message on their browser.
Now apply this HttpsOnly attribute to the Index action method of the HomeController.cs:
using Filters.CustomFilters;
using Filters.Models;
using Microsoft.AspNetCore.Mvc;
using System.Diagnostics;

namespace Filters.Controllers
{
    public class HomeController : Controller
    {
        [HttpsOnly]
        public string Index()
        {
            return "This is the Index action on the Home controller";
        }
    }
}
Finally, run the app and open the non-https url of the app on the browser. We will see HTTP ERROR 403. The reason, as we can guess correctly, is because the request is made from a non-https URL.
This is shown by the image below:
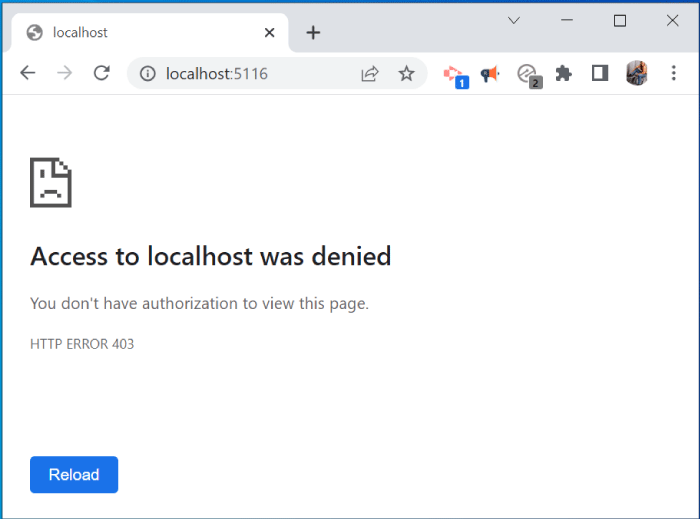
When we open the HTTPS url of the app on the browser then the Authorization filter will not stop the execution. The Result property of the AuthorizationFilterContext object is not set and the code inside the Index Action method is executed.
This example very well explains the working of an Authorization filter. Next, we will create an Action Filter.
ASP.NET Core Action Filters
What are Action Filters? The Action Filters are executed before and after an action method is executed. They are second in the order of execution in the filter pipeline i.e. are executed after the Authorization Filters.
Action filters are derived either from the IActionFilter or asynchronous IAsyncActionFilter interface.
Definition of IActionFilter interface:
namespace Microsoft.AspNetCore.Mvc.Filters {
    public interface IActionFilter : IFilterMetadata {
        void OnActionExecuting(ActionExecutingContext context);
        void OnActionExecuted(ActionExecutedContext context);
    }
}
When we apply an Action Filter on an Action method, the OnActionExecuting method is called just before the action method is invoked, and the OnActionExecuted method is called just after the action method has finished execution.
The OnActionExecuting method has a parameter of ActionExecutingContext type. The important properties of the ActionExecutingContext object are:
| Name | Description |
|---|---|
| Controller | The name of the controller whose action method is about to be invoked. |
| Result | When this property is set a value of type IActionResult then Dot Net renders the IActionResult instead of invoking the action method. |
The OnActionExecuted method has a parameter of ActionExecutedContext class type. The important properties of the ActionExecutedContext class are:
| Name | Description |
|---|---|
| Controller | The name of the controller whose action method was invoked. |
| Exception | Contains the Exception that occurred in the Action method. |
| ExceptionHandled | When set to true the exceptions will not be propagated further. |
| Result | Returns the IActionResult returned by the action method, and we can change or replace it based on our needs. |
Custom Action Filter Example
We will now create an Action filter that will measure the number of milliseconds an action method takes to execute. For doing this we will start a timer in the OnActionExecuting method and stop it in the OnActionExecuted method.
Create a class called TimeElapsed.cs inside the CustomFilters folder and add the following code to it:
using Microsoft.AspNetCore.Mvc;
using Microsoft.AspNetCore.Mvc.Filters;
using System.Diagnostics;

namespace Filters.CustomFilters
{
    public class TimeElapsed : Attribute, IActionFilter
    {
        private Stopwatch timer;
        public void OnActionExecuting(ActionExecutingContext context)
        {
            timer = Stopwatch.StartNew();
        }

        public void OnActionExecuted(ActionExecutedContext context)
        {
            timer.Stop();
            string result = " Elapsed time: " + $"{timer.Elapsed.TotalMilliseconds} ms";
            IActionResult iActionResult = context.Result;
            ((ObjectResult)iActionResult).Value += result;
        }
    }
}
We created an object of Stopwatch class to measure the time. The time is started in the OnActionExecuting method and stopped in the OnActionExecuted method.
Next see the Result property of the ActionExecutedContext object (i.e. context.Result). We get the IActionResult returned by the action method. It contains the string value returned by the action which is a string message we set earlier – This is the Index action on the Home controller.
Finally we cast it to ObjectResult type and add the Elapsed time to it’s value property.
To apply this filter, add the [TimeElapsed] attribute to the Index method of the Home Controller class as shown below:
public class HomeController : Controller
{
    [TimeElapsed]
    public string Index()
    {
        return "This is the Index action on the Home controller";
    }
}
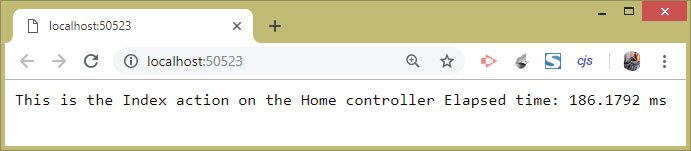
Run your application to see the message that tells the number of milliseconds the action method takes to execute. See below image:
The Action Filter can also be created by deriving them from asynchronous IAsyncActionFilter interface. This interface is given below:
using System.Threading.Tasks;
    namespace Microsoft.AspNetCore.Mvc.Filters {
        public interface IAsyncActionFilter : IFilterMetadata {
            Task OnActionExecutionAsync(ActionExecutingContext context,
ActionExecutionDelegate next);
    }
}
There is only 1 method which runs before and after the action method has been executed.
The ActionExecutingContext object provides context data to the filter, and the ActionExectionDelegate object contains the action method (or the next filter) to be executed.
Now using the IAsyncActionFilter interface we can re-create the asynchronous version of the TimeElapsed filter as shown in the below code:
using Microsoft.AspNetCore.Mvc.Filters;
using System.Diagnostics;
using System.Text;

namespace Filters.CustomFilters
{
    public class TimeElapsedAsync : Attribute, IAsyncActionFilter
    {
        public async Task OnActionExecutionAsync(ActionExecutingContext context,
            ActionExecutionDelegate next)
        {
            Stopwatch timer = Stopwatch.StartNew();
            await next();
            timer.Stop();
            string result = "<div>Elapsed time: "
                + $"{timer.Elapsed.TotalMilliseconds} ms</div>";
            byte[] bytes = Encoding.ASCII.GetBytes(result);
            await context.HttpContext.Response.Body.WriteAsync(bytes, 0, bytes.Length);
        }
    }
}
ASP.NET Core Result Filters
The Result Filters are executed before and after the Action method is executed successfully. The action method is the one where the result filter is applied as an attribute.
Result filters are 3rd in the filter pipeline and execute after action filters. They are created using the IResultFilter and IAsyncResultFilter interfaces.
The definition of IResultFilter interface:
namespace Microsoft.AspNetCore.Mvc.Filters {
    public interface IResultFilter : IFilterMetadata {
        void OnResultExecuting(ResultExecutingContext context);
        void OnResultExecuted(ResultExecutedContext context);
    }
}
Note: The Result Filters have the same defination like the Action Filters.
The IResultFilter interface has 2 methods – OnResultExecuting & OnResultExecuted. The OnResultExecuting method is called just before the result from the action method is processed while the OnResultExecuted method is called just after the result from the action method is processed.
The OnResultExecuting method has parameter of type ResultExecutingContext whose properties are listed in the below table:
| Name | Description |
|---|---|
| Controller | The name of the controller whose action method is invoked. |
| Result | This property is of type IActionResult and contains the IActionResult object returned by the action method. |
| Cancel | Setting this property to true will stop the processing of action result and will give 404 response. |
The OnResultExecuted method has parameter of type ResultExecutedContext whose properties are:
| Name | Description |
|---|---|
| Controller | The name of the controller whose action method is invoked. |
| Canceled | A read-only property that tells if the request is cancelled. |
| Exception | Contains exceptions that are thrown in the action method. |
| ExceptionHandled | When this property is set to true then exceptions are not propagated further. |
| Result | A read-only property that contains the IActionResult generated by the Action method. |
Result Filter Example
We now will create a Result Filter Example whose work will be to change the rendered View when invoked by the Action method.
So create a class called ChangeView.cs inside the CustomFilters folder with the code shown below:
using Microsoft.AspNetCore.Mvc;
using Microsoft.AspNetCore.Mvc.Filters;

namespace Filters.CustomFilters
{
    public class ChangeView : Attribute, IResultFilter
    {
        public void OnResultExecuting(ResultExecutingContext context)
        {
            context.Result = new ViewResult
            {
                ViewName = "List"
            };
        }

        public void OnResultExecuted(ResultExecutedContext context)
        {
        }
    }
}
The above Result Filter sets the ViewName to ‘List’ in the OnResultExecuting() method. This means when this filter is applied to an action method then List view will be rendered instead of the default view.
Let’s move forward and test it. So create a new action method called Message in the Home controller as shown below. Also note that this action is applied with the [ChangeView] filter as an attribute:
[ChangeView]
public ViewResult Message() => View();
You can clearly see that this action method invokes the default view which is “Message.cshtml”.
Now create 2 Razor View files inside the Views ➤ Shared folder. These are:
<h2>Message</h2>
<p>This is Message View</p><h2>List</h2>
<p>This is List View</p>Now it’s time to run your application and test the feature. So run the app and go to the URL – /Home/Message. We will see the List View gets invoked instead of Message View, as shown by the below image:
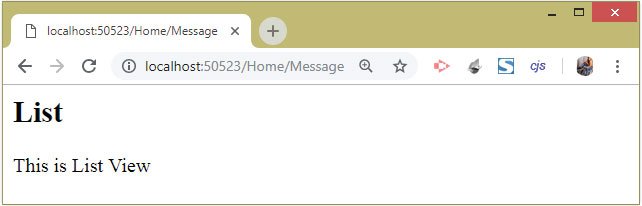
This happens because the ChangeView Result Filter changed the rendered View to List.cshtml.
We can recreate the ChangeView Result Filter by implementing the asynchronous IAsyncResultFilter interface.
The definition of IAsyncResultFilter is given below:
using System.Threading.Tasks;
namespace Microsoft.AspNetCore.Mvc.Filters {
    public interface IAsyncResultFilter : IFilterMetadata {
        Task OnResultExecutionAsync(ResultExecutingContext context,
ResultExecutionDelegate next);
    }
}
Add a new class file called ChangeViewAsync.cs to the “CustomFilters” folder with the code shown below:
using Microsoft.AspNetCore.Mvc;
using Microsoft.AspNetCore.Mvc.Filters;

namespace Filters.CustomFilters
{
    public class ChangeViewAsync : Attribute, IAsyncResultFilter
    {
        public async Task OnResultExecutionAsync(ResultExecutingContext context,
ResultExecutionDelegate next)
        {
            context.Result = new ViewResult
            {
                ViewName = "List"
            };
            await next();
        }
    }
}
We implemented the IAsyncResultFilter interface which only contains one method which is OnResultExecutionAsync.
The parameter of type ResultExecutingContext is the one which we used to set the ViewName to ‘List’.
The parameter of type ResultExecutionDelegate is a delegate that asynchronously returns an Microsoft.AspNetCore.Mvc.Filters.ResultExecutedContext object which indicates the action result or the next result filter has executed.
We manually invoked the delegate with await next() so that the action result can be rendered.
Now go to the Home controller and change the attribute of the Message action from [ChangeView] to [ChangeViewAsync] for applying this filter.
[ChangeViewAsync]
public ViewResult Message() => View();
Hybrid Action/Result Filter
A Hybrid Action / Result Filter works both as Action and Result Filter. A Hybrid Filter can easily share data from the Action to the Result stage. The simplest way to create a Hybrid Action / Result filter is to inherit the ActionFilterAttribute class that implements the interfaces for both kinds of filters.
Create a new class file called HybridActRes.cs inside the CustomFilters folder with the following code:
using Microsoft.AspNetCore.Mvc;
using Microsoft.AspNetCore.Mvc.Filters;
using Microsoft.AspNetCore.Mvc.ModelBinding;
using Microsoft.AspNetCore.Mvc.ViewFeatures;
using System.Diagnostics;

namespace Filters.CustomFilters
{
    public class HybridActRes : ActionFilterAttribute
    {
        private Stopwatch timer;
        public override async Task OnActionExecutionAsync(ActionExecutingContext context,
ActionExecutionDelegate next)
        {
            timer = Stopwatch.StartNew();
            await next();
        }

        public override async Task OnResultExecutionAsync(ResultExecutingContext context,
ResultExecutionDelegate next)
        {
            timer.Stop();
            context.Result = new ViewResult
            {
                ViewName = "ShowTime",
                ViewData = new ViewDataDictionary(new EmptyModelMetadataProvider(),
new ModelStateDictionary())
                {
                    Model = "Elapsed time: " + $"{timer.Elapsed.TotalMilliseconds} ms"
                }
            };
            await next();
        }
    }
}
This hybrid filter has 2 methods:
- 1. OnActionExecutionAsync – here the stop watch is started.
- 2. OnResultExecutionAsync – here the stop watch is stopped and the view is changed to ShowTime and Model is filled with a string that shows the elapsed time.
Next, create a List action method inside the Home controller with the code shown below:
[HybridActRes]
public IActionResult List() => View();
Finally create a Razor view called ShowTime inside the Views ➤ Shared folder with the following code:
@model string
<h2>Show Time</h2>

@Model
Now check the working of this Hybrid Filter by running the app and navigating to the URL – /Home/List. We see the ShowTime View being invoked instead of List View and it also shows the elapsed time.
The below image shows it:
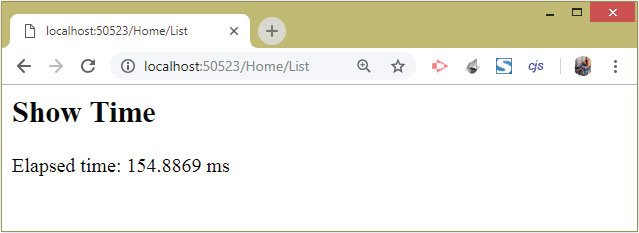
So with this hybrid filter we can do both the functionalies in a single file.
ASP.NET Core Exception Filters
Exception Filters allow catching exceptions without having to write try & catch block. They implement the IExceptionFilter or IAsyncExceptionFilter interface. The IAsyncExceptionFilter interface is used for creating Asynchronous Exception Filters.
The definition of IExceptionFilter interface:
namespace Microsoft.AspNetCore.Mvc.Filters {
    public interface IExceptionFilter : IFilterMetadata {
        void OnException(ExceptionContext context);
    }
}
The definition of IAsyncExceptionFilter interface:
using System.Threading.Tasks;
    namespace Microsoft.AspNetCore.Mvc.Filters {
        public interface IAsyncExceptionFilter : IFilterMetadata {
        Task OnExceptionAsync(ExceptionContext context);
    }
}
For both interfaces, context data is provided through the ExceptionContext class, which is a parameter to the methods – OnException & OnExceptionAsync.
The properties of the ExceptionContext class are given in the table below:
| Name | Description |
|---|---|
| Exception | The property contains the Exceptions that are thrown. |
| ExceptionDispatchInfo | It contains the stack trace details of the exceptions. |
| ExceptionHandled | A read-only property that tells if the exception is handled. |
| Result | This property sets the IActionResult that will be used to generate the response. |
Exception Filter Example
Create a class called CatchError.cs inside the CustomFilters folder. Add the following code to this class:
using Microsoft.AspNetCore.Mvc;
using Microsoft.AspNetCore.Mvc.Filters;
using Microsoft.AspNetCore.Mvc.ModelBinding;
using Microsoft.AspNetCore.Mvc.ViewFeatures;

namespace Filters.CustomFilters
{
    public class CatchError : Attribute, IExceptionFilter
    {
        public void OnException(ExceptionContext context)
        {
            context.Result = new ViewResult()
            {
                ViewData = new ViewDataDictionary(new EmptyModelMetadataProvider(),
new ModelStateDictionary())
                {
                    Model = context.Exception.Message
                }
            };
        }
    }
}
The class called CatchError is an Exception Filter as it implements the IExceptionFilter Interface. The OnException() method will be called whenever there is some error occurred in the action method having the [CatchError] attribute.
Inside the OnException() method we are setting the Model with the context.Exception.Message property. The Model value will be shown on the View.
Now create a new action method called Exception in the Home Controller and add the attribute [CatchError] to it:
[CatchError]
public IActionResult Exception(int? id)
{
    if (id == null)
        throw new Exception("Error Id cannot be null");
    else
        return View((object)$"The value is {id}");
}
This action method raises an exception if the “Id” value is null else it returns the default View with a string message – The value is {id}.
Finally create Exception view inside the Views ➤ Home folder with the following code:
@model string

<h2>Exception</h2>
@Model
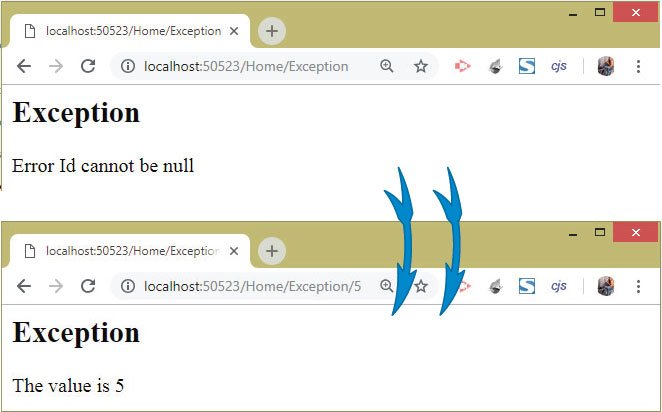
You can now check the working of this Exception Filter by running your application and going to the URL – /Home/Exception. It will show you the message – Error Id cannot be null as an exception is raised which is captured by this filter.
Now go to the URL – /Home/Exception/5 where no exception occurs and you will see the message – The value is 5.
This is illustrated by the below images:
You can download the source code using the below link:
You now have the basic to advanced knowledge of asp.net core filters and are ready to use them in your projects.
SHARE THIS ARTICLE
Related Tutorials:


ABOUT THE AUTHOR
I hope you enjoyed reading this tutorial. If it helped you then consider buying a cup of coffee for me. This will help me in writing more such good tutorials for the readers. Thank you.

HELLO EVERYONE
 Welcome to YogiHosting - A Programming Tutorial Website. It is used by millions of people around the world to learn and explore about ASP.NET Core, Blazor, jQuery, JavaScript, Docker, Kubernetes and other topics.
SUBSCRIBE TO NEWSLETTER
Enter your email address to subscribe to this blog and receive notifications of new posts by email.
Join 90K other subscribers