Introduction to Tag Helpers in ASP.NET Core

What are Tag Helpers in ASP.NET Core ? Tag Helpers are reusable components in ASP.NET Core. They are used to perform “defined transformations on HTML elements” from C# codes before being rendered on the views. With Tag Helpers we can enable server-side code to participate in creating and rendering the HTML elements. The most commonly used tag helpers are asp-controller and asp-action which assigns the controller & action for generating the URL. Example: <a asp-controller="Shop" asp-action="Clothes">Buy Clothes</a> will generate HTML <a href"/Shop/Clothes">Buy Clothes</a>.
This tutorial is a part of the series called Tag Helpers in ASP.NET Core. It contains 3 tutorials.
- 1. Introduction to Tag Helpers in ASP.NET Core
- 2. Built-In Tag Helpers in ASP.NET Core
- 3. Custom Tag Helper in ASP.NET Core
Tag Helpers are of 2 types:
- 1. Built-In Tag Helpers – that comes pre-built in the DOT NET Framework, and perform common tasks like creating forms, html controls, showing validation messages, etc.
- 2. Custom Tag Helper – that can be created by you to perform your desired transformation on HTML elements.
First we will look into Built-In tag helpers then I will explain how to create our own Custom Tag Helper.
@addTagHelper
The Tag Helpers have to be made available on the Views. For this we use @addTagHelper method which tells ASP.NET Core runtime that the application will be using Tag Helpers so make them available. Open the Views/_ViewImports.cshtml file and add the following code line which does this work.
@addTagHelper *, Microsoft.AspNetCore.Mvc.TagHelpersWhen we use Custom Tag Helpers in our app then we will have to separately instruct ASP.NET Core about them. So in this case we also have to add another code line (given below) to the _ViewImports.cshtml file:
@addTagHelper *, WebAppNameTag Helpers Example
Why do we need tag helpers ? They guarantee control over HTML elements as we can enhance them by adding extra custom logic from server side. We can write C# codes that will participate when an html tag is rendered on the browser. For example – we can make a tag helper that will design all anchor tags with the same color, font and paddings automatically without adding a “class” attribute on these anchors. This is the power of tag helpers.
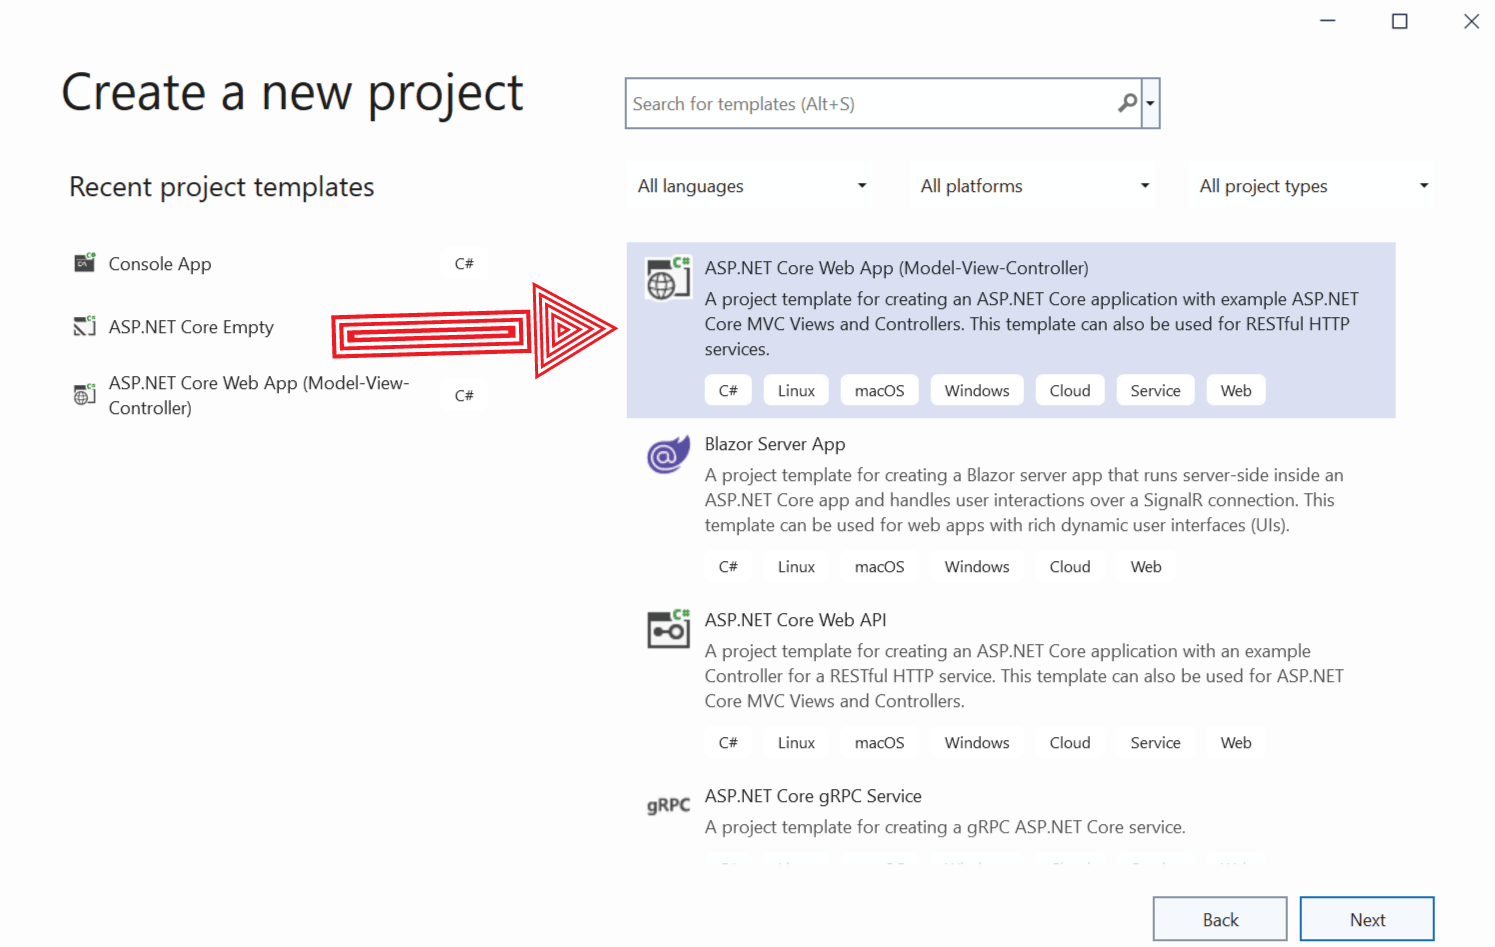
Start by creating a new app and select ASP.NET Core Web App (Model-View-Controller) template in Visual Studio. Name this app as TagHelpers.
Once the app is created open the Views/_ViewImports.cshtml file where you will find the tag helpers have already been added.
@addTagHelper *, Microsoft.AspNetCore.Mvc.TagHelpersNote: ASP.NET Core Tag Helpers will not work until you have added them in the Views/_ViewImports.cshtml file by using @addTagHelper directive. We created the app using ASP.NET Core MVC template so visual studio automatically added tag helpers to the app. If we create app using Empty template then we have to do this work by ourself.
To the Models folder add a class called Products.cs. The code of this class is given below.
namespace TagHelpers.Models
{
    public class Product
    {
        public string Name { get; set; }
        public float Price { get; set; }
        public int Quantity { get; set; }
    }
}
Next, add a new class file called Repository.cs inside the Models folder with the code given below:
namespace TagHelpers.Models
{
    public class Repository
    {
        public interface IRepository
        {
            IEnumerable<Product> Products { get; }
            void AddProduct(Product newProduct);
        }

        public class ProductRepository : IRepository
        {
            private List<Product> products = new List<Product> {
            new Product { Name = "Men Shoes", Price = 99.99F, Quantity= 100},
            new Product { Name = "Women Shoes", Price = 199.99F, Quantity= 200},
            new Product { Name = "Children Games", Price = 299.99F, Quantity= 300},
            new Product { Name = "Coats", Price = 399.99F, Quantity= 400},
        };

            public IEnumerable<Product> Products => products;
            public void AddProduct(Product newProduct)
            {
                products.Add(newProduct);
            }
        }
    }
}
This class has an IRepository interface which contains two members –
- 1. An IEnumerable property for iterating over all products.
- 2. A function called AddProduct to add products.
There is also defined a ProductRepository class which implements the IRepository Interface. The work of the ProductRepository class is to provide with a repository (in-memory storage) of products for the app. It does 2 things:
- Stores products in a private list (by name products) and has a method called AddProduct to add new products to this private list.
- Has an IEnumerable property for iterating over the products.
Go to the Program.cs and register the repository as a Singleton Service. This will help controllers to fetch the products from the repository without creating it’s object. This feature is known as Dependency Injection which I have explain in details at Dependency Injection Tutorial.
The changes which you need to make in the Program class is highlighted in the below code:
using static TagHelpers.Models.Repository;

var builder = WebApplication.CreateBuilder(args);

// Add services to the container.
builder.Services.AddControllersWithViews();
builder.Services.AddSingleton<IRepository, ProductRepository>();

var app = builder.Build();

//...
Change the HomeController code to make use of the repository we created above. See below code:
using Microsoft.AspNetCore.Mvc;
using static TagHelpers.Models.Repository;

namespace TagHelpers.Controllers
{
    public class HomeController : Controller
    {
        private IRepository repository;
        public HomeController(IRepository repo)
        {
            repository = repo;
        }

        public IActionResult Index()
        {
            return View(repository.Products);
        }
    }
}
Notice the constructor which takes an IRepository object. The dependency injection feature will automatically create the object of the ProductRepository class when the HomeController is initiated.
The Index Action simply returns the IEnumerable property that contains all the products in the repository.
Change the Views/Home/Index.cshtml view file code as shown below.
@model IEnumerable<Product>

<table class="table table-sm table-bordered">
    <thead class="bg-dark text-white">
        <tr>
            <th>Name</th>
            <th>Price</th>
            <th>Quantity</th>
        </tr>
    </thead>
    <tbody>
        @foreach (var product in Model)
        {
            <tr>
                <td>@product.Name</td>
                <td>@product.Price</td>
                <td>@product.Quantity</td>
            </tr>
        }
    </tbody>
</table>
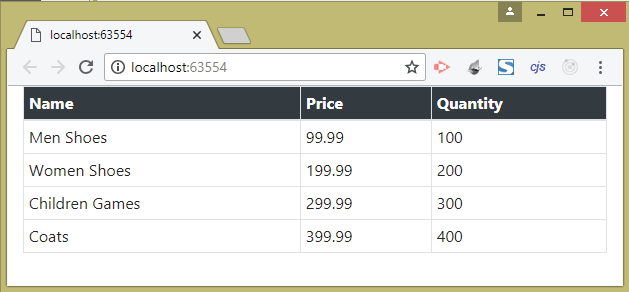
Recall the Index action of the Home controller returns an IEnumerable product type that contains all the products in the repository. Therefore in this view we have declared the Model as IEnumerable<Product> type. We can now simply show all the products in an HTML table.
Notice the code inside the tbody where we are looping through all the products to create a separate tr element for each of them. The CSS classes used inside the table and thead are Bootstrap classes for giving them text color, border and background color.
Run your application and you will see all products displayed by the View. See the below image:
Built In Anchor Tag Helper
Anchor Tag Helper is one of the most popular Built In Tag Helpers. It is used to enhance the stardard anchor tag by controlling the href. In simple terms we can used asp-controller, asp-action and asp-route-{value} attributes to create the href attribute based on the routes defined in the app. For example add the following anchor tag on the Index view:
<a class="btn btn-primary" asp-controller="Home" asp-action="Create">Create new Product</a>This will create the anchor tag targetting the Home/Create value for HREF attriube. We can check the HTML code generated for this anchor tag as given below.
<a class="btn btn-primary" href="/Home/Create">Create new Product</a>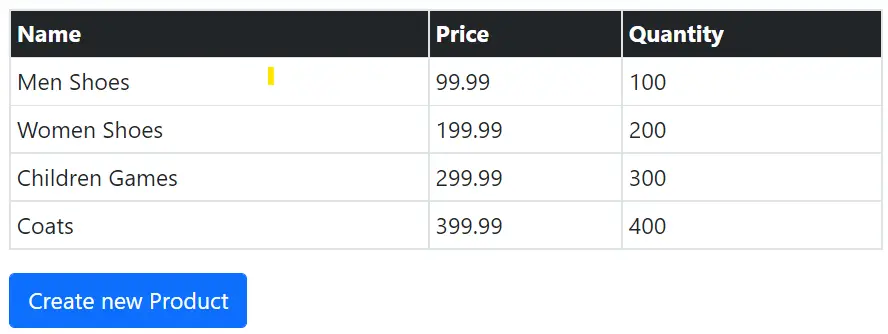
Custom Tag Helper
We can also define a custom tag helper which can create a full table of Products on the View. In short we can just add a <MyTable Products="@Model"></MyTable> for this custom tag helper on the view to generate a full table.
To create this custom tag helper, add a new folder called CustomTagHelpers on the root of the app. Next add a new class called MyTable.cs to the CustomTagHelpers folder and add the following code to it.
using Microsoft.AspNetCore.Razor.TagHelpers;
using System.Text;
using TagHelpers.Models;

namespace TagHelpers.CustomTagHelpers
{
    [HtmlTargetElement("MyTable")]
    public class MyTable : TagHelper
    {
        public IEnumerable<Product> Products { get; set; }

        public override void Process(TagHelperContext context, TagHelperOutput output)
        {
            output.TagName = "table";
            output.TagMode = TagMode.StartTagAndEndTag;
            output.Attributes.SetAttribute("class", "table table-sm table-bordered");

            StringBuilder sb = new StringBuilder();
            foreach (var product in Products)
                sb.Append("<tr><td>" + @product.Name + "</td><td>" + @product.Price
                + "</td><td>" + @product.Quantity + "</td></tr>");

            output.Content.SetHtmlContent(@"<thead class=""bg-dark text-white"">
                                            <tr>
                                                <th>Name</th>
                                                <th>Price</th>
                                                <th>Quantity</th>
                                            </tr>
                                        </thead>" + sb.ToString() + "<tbody></tbody>");
        }
    }
}
The custom tag helper derive from TagHelper base class. We have defined a property “Products” which will receive the list of products from the view. Next we are defining an html table that will be formed to show all the products on the view.
Next we will have to add the custom tag helper to the _ViewImports.cshtml file. This thing can be done by adding the below code line:
@addTagHelper TagHelpers.CustomTagHelpers.*, TagHelpersNow replace the html table code on the Index view with the custom tag helper code (given below).
<MyTable Products="@Model"></MyTable>Run the app and you will find the same HTML Table is formed but this time we have used just one line of code. If we need to show products on another view then all we have to do is add just one line of code and the whole html table will be formed. This is a great way to improve code reusability.
Download the full source code of this tutorial and see how custom tag helper works in your machine.
I have covered this topic of Custom Tag Helper in details at – Custom Tag Helper in ASP.NET Core.
Why are tag helpers better than html?
Tag Helpers can enhance HTML elements with server logics and can help us write markup that is both cleaner and easier to read. We can now perform new ways of code resuability by transfering the redundant HTML codes into tag helpers.
I hope this introductory tutorial has given you some insights in to the topic of Tag Helpers. Now you are ready to implement Tag Helpers so check the next tutorial on Tag Helpers – Built-In Tag Helpers in ASP.NET Core.
SHARE THIS ARTICLE
Related Tutorials:


ABOUT THE AUTHOR
I hope you enjoyed reading this tutorial. If it helped you then consider buying a cup of coffee for me. This will help me in writing more such good tutorials for the readers. Thank you.

HELLO EVERYONE
 Welcome to YogiHosting - A Programming Tutorial Website. It is used by millions of people around the world to learn and explore about ASP.NET Core, Blazor, jQuery, JavaScript, Docker, Kubernetes and other topics.
SUBSCRIBE TO NEWSLETTER
Enter your email address to subscribe to this blog and receive notifications of new posts by email.
Join 90K other subscribers