ASP.NET Core apps in Kubernetes
Welcome to our ASP.NET Core Kubernetes tutorial series which will guide you how to work with this technology when hosting your apps to kubernetes. So let us understand what kubernetes is, it’s different components and how to install it on your pc.
It is rightly said that Kubernetes (also known as K8s) is everywhere and if you are not using it then you are missing a big thing. Kubernetes is an open-source system developed by Google engineers and released on June 6, 2014. It took the world by storm since it can reduce the complexities of managing an app running on server.
Today every cloud service provider has Kubernetes service which developers can use to host their apps. Azure has Azure Kubernetes Service (AKS), Google Cloud has Google Kubernetes Engine (GKE), while Amazon has Amazon Elastic Kubernetes Service (Amazon EKS). Even smaller cloud providers like DigitalOcean, Vultr & linode also provides k8s service to their customers.
What is Kubernetes and it’s features
Kubernetes is rightly said as a container orchestration platform that automates many of the manual process involved in deploying, managing and scaling of containerized applications. It removes a lot of complexities and runs your app smoothly for you.
Docker is a very popular container based platform that runs apps inside containers. You can run your ASP.NET Core app inside one or more docker containers. Then you can ask your system engineer to deploy these containers to Azure and manage them.
After deployment your system engineer will have to keep on eye on these containers so that they are up and running 24×7. If any container crashes then he will restart it, if containers experience heavy loads due to heavy traffic then he will scale up the containers to meet the requirements.
These are all orchestration task which the system engineer has to do.
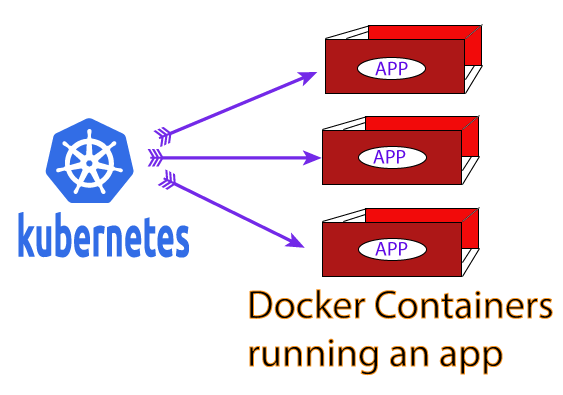
Now here comes the role of Kubernetes. K8s will play the role of orchestrator and will manage these docker containers. So if any container crashes then it will automatically restart them, it will scale up and scale down the containers if the need arises. K8s will update the app running on containers so that their is zero downtime. This reduces so much work of a system engineer. In the below diagram we have tried to explain the working of Kubernetes.
Kubernetes Components
A Kubernetes cluster is a set of node machines for running containerized applications. If you’re running Kubernetes, you’re running a cluster. When you deploy Kubernetes, you get a cluster.
So, their can be one or more clusters in a Kubernetes installation and every cluster has at least one worker node.
Kubernetes cluster is divided into 2 parts:
- 1. Control Plane
- 2. Worker Nodes (or simple “Nodes”)
Control Plane
The control plane is the brain of Kubernetes cluster. It makes decisions about what k8s has to do like scheduling, starting a new pod and many other tasks. The control plane has the following components:
kube-apiserver – it is through this component that other kubernetes components communicate with one another. Communication is done by the help of REST APIs.
etcd – it is a key-value store for all cluster data.
kube-scheduler – watches for newly created Pods and assigns Worker Nodes for them.
kube-controller-manager – it runs controller processes like Node Controller, Job Controller, Token Controller, etc.
cloud-controller-manager – it lets you link your cluster into your cloud provider’s API like linking to Azure, Google Cloud or AWS. Then you can manage the k8s cluster running in the cloud.
Worker Nodes
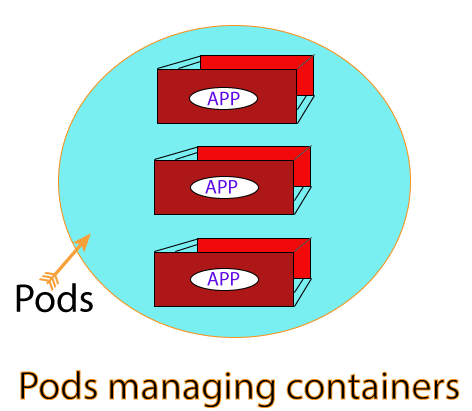
A worker node’s work is to hosts Pods. We will take the topic of Pods in just a moment, in short you can understand pods as a program that holds one or more docker containers. Recall that your app runs in one or more docker containers. So, it means pods are actually managing these docker containers and hence your app. Worker Nodes are commonly called as Nodes.
The Worker Nodes has the following components:
kubelet – it is an agent that runs on each Worker Node. It’s work is to make sure that all containers are running in Pods.
kube-proxy – it is a network proxy that runs on each node. It maintains network rules on nodes. With these network rules, network communication to the Pods are governed.
Container Runtime – it is responsible for running containers.
Installing Kubernetes
Installing Kubernetes is simple as Docker Desktop does most of the heavy lifting for us. Open Docker Desktop and go to it’s settings. Then go to the Kubernetes section given on the left area. You will be presented with a screen as shown below.
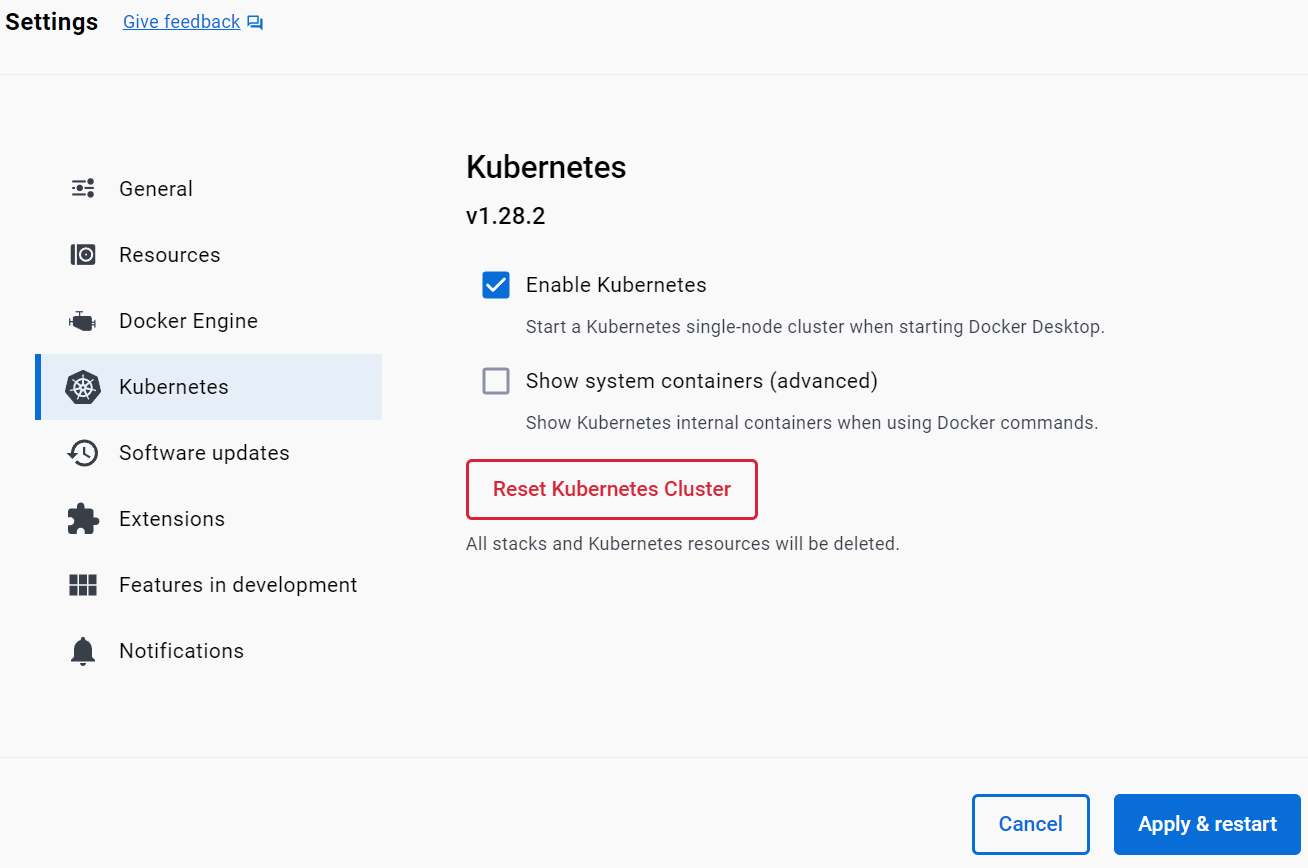
Here, check the option “Enable Kubernetes”, and click the button “Apply & Restart”. This will install Kubernetes on your system.
Kubernetes is about 1 GB in size so will take sometime to download and install on your pc.
kubectl
kubectl is a command line tool and has commands which you will run to manage your Kubernetes cluster. To verify Kubectl is installed correctly in your system, run the below command on your command prompt.
kubectl cluster-info
You will should see the messages saying Kubernetes master and CoreDNS are running successfully. See below image:

Well, that’s it. You are now ready to start using and learning Kubernetes. Check the below sections for our ASP.NET Core Kubernetes.
- Deploy ASP.NET Core App on Kubernetes
- Managing ASP.NET Core app hosted on Kubernetes
- How to use Kubernetes Ingress on an ASP.NET Core app
- Kubernetes: Host Multi-Container ASP.NET Core app to Single Pod
- Kubernetes: Host Multi-Container ASP.NET Core app to Multiple Pods
- Kubernetes Volume emptyDir and SSL Mount to volume
- Kubernetes Persistent volumes (PV) and Persistent Volume Claim (PVC)
- Kubernetes Liveness Readiness Startup Probes
- How to use Helm for ASP.NET Core with Kubernetes

 Welcome to YogiHosting - A Programming Tutorial Website. It is used by millions of people around the world to learn and explore about ASP.NET Core, Blazor, jQuery, JavaScript, Docker, Kubernetes and other topics.