Kubernetes: Host Multi-Container ASP.NET Core app to Multiple Pods

In this ASP.NET Core Kubernetes tutorial I will host a Multi-Container ASP.NET Core app to Multiple Kubernetes Pods. I will also add a Service to expose the pods. The Pods will use this service to communicate with one another.
ASP.NET Core Kubernetes series consists of the following articles:
- Deploy ASP.NET Core App on Kubernetes
- Managing ASP.NET Core app hosted on Kubernetes
- How to use Kubernetes Ingress on an ASP.NET Core app
- Kubernetes: Host Multi-Container ASP.NET Core app to Single Pod
- Kubernetes: Host Multi-Container ASP.NET Core app to Multiple Pods
- Kubernetes Volume emptyDir and SSL Mount to volume
- Kubernetes Persistent volumes (PV) and Persistent Volume Claim (PVC)
- Kubernetes Liveness Readiness Startup Probes
- How to use Helm for ASP.NET Core with Kubernetes
Page Contents
Multi Pods and communication between Pods with Service
My ASP.NET Core app has 2 projects, one is Razor pages type and the other is of type Web API. The razor pages project will call the Web API project to get a random Joke which it then displays on the browser. I will be creating 2 Docker containers for containing these 2 projects. Then I will host these 2 containers on 2 Separate Kubernetes Pods. Finally, I will create a Service which will expose the Web API project running on a Pod. This will help the other project to call the web api through this service. I have tried to explain this concept by the below image.

In this image the Service 2 is exposing the Web API running on Container 2 (container 2 is running web api project). The app running on container 1 (container 1 is running razor pages project) will call this service 2 to access the web API. There is also another service, which is service 1, and it exposes the app on container 1 to the host i.e. to the web browser.
The Multi-Container App
The app is very simple. It’s a multi-project ASP.NET Core app. I build this app from start in my previous tutorial. If you want to go into the creation part then visit – Kubernetes: Host Multi-Container ASP.NET Core app to Single Pod.
If you want to skip the development part of the app then just download the app (link given at the bottom of this tutorial).
Now open the app, and go inside the to the MultiApp project folder. There you will find the Pages folder, inside this folder find the Index.cshtml.cs file. Here on the OnGet() method the call to the web api is made. You have to change the URL of the Web API to:
http://service-2:7070/api/Joke This is done because the Web API will be running from a Docker container hosted on a Kubernetes Pod and this Kubernetes pod is exposed by this service.
Here service-2 is the name of the service and 7070 is the exposed port of the service.
I have shown this change in the highlighted way below.
public async Task OnGet()
{
    using (var client = new System.Net.Http.HttpClient())
    {
        var request = new System.Net.Http.HttpRequestMessage();
        request.RequestUri = new Uri("http://service-2:7070/api/Joke");
        var response = await client.SendAsync(request);
        var joke = await response.Content.ReadAsStringAsync();

        var details = JObject.Parse(joke);
        ViewData["Joke"] = details["name"] + ";;" + details["text"] + ";;" + details["category"];
    }
}
Also check the below image where I have explained the port mappings of the service and the container running inside the Pod.

I will build this “service-2” in just a moment so kindly be with me.
Building the Docker Images of the ASP.NET Core app
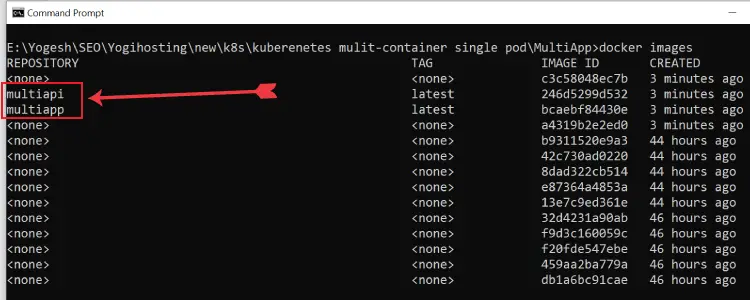
In the ASP.NET Core app there is a docker-compose.yml given on the root folder. So from your command prompt, navigate to this folder and build it by running the docker build command:
docker-compose buildTwo images of the 2 projects will be created which you can see by running the docker images command on the command prompt. The images names are:
- 1. multiapp
- 2. multiapi
Create Kubernetes Deployments and Services
Now I will create 2 Kubernetes Deployments that will create 2 Pods. Inside these Pods, one container each will run. As already discussed multiple times these containers will contain one project each of the ASP.NET Core app.
So, these are the 2 deployments configuration files (given below). One file is named as “mydep1.yaml” while the other is “mydep2.yaml”. On downloading the source code you will find all the deployments and services inside files inside the Kubernetes folder.
apiVersion: apps/v1
kind: Deployment
metadata:
  name: dep1
  labels:
    app: s1
spec:
  replicas: 1
  selector:
    matchLabels:
      app: mc-app1
  template:
    metadata:
      labels:
        app: mc-app1
    spec:
      containers:
        - name: mc1
          image: multiapp
          imagePullPolicy: Never
          ports:
            - containerPort: 8080
The deployment 1 creates a deployment by the name of dep1. It also specifies to create a pod which should contain a docker container by the name of mc1. The image for the docker container (as you might have guessed) is specified as multiapp.
Also, container port 8080 is exposed (the reason is the Dockerfile of MultiApi project exposes port 8080 kindly check the dockerfile to be sure).
apiVersion: apps/v1
kind: Deployment
metadata:
  name: dep2
  labels:
    app: s2
spec:
  replicas: 1
  selector:
    matchLabels:
      app: mc-app2
  template:
    metadata:
      labels:
        app: mc-app2
    spec:
      containers:
        - name: mc2
          image: multiapi
          imagePullPolicy: Never
          ports:
            - containerPort: 8080
In the deployment the following things are specified:
- Deployment by the name of dep2 is created.
- Container by the name of mc2 is created. This container contains the image multiapi.
- Container Port 8080 is exposed i.e. containerPort: 8080. Check Dockerfile of MultiApp project.
Next, in the command prompt window, go to the directory of these deployment files and apply them with kubectl apply. The command will be:
kubectl apply -f mydep1.yaml
kubectl apply -f mydep2.yamlNow coming to the service which will expose the “myapi” project running on a Pod. The service config file called service2.yaml is given below.
apiVersion: v1
kind: Service
metadata:
  name: service-2
spec:
  type: NodePort
  selector:
    app: mc-app2
  ports:
    - port: 7070
      targetPort: 8080
The metadata.name field specifies the name of the service as “service-2”
metadata:
  name: service-2
Note the port 7070 of the service is exposed and the service targets port 8080 of the container. Did you recall we changed the url in Index.cshtml.cs to this url – http://service-2:7070/api/Joke? This was done to call this service.
ports:
    - port: 7070
      targetPort: 8080
Now notice the selector field of the service.
selector:
    app: mc-app2
It says to apply this service to the deployment having a matchLabels as – app: mc-app2.
If you see the matchLabels field of the deployment 2, you will find the value as app: mc-app2.
matchLabels:
    app: mc-app2
In this way the service targets a particular deployment.
Now apply this service by running the following command
kubectl apply -f service2.yamlAccessing Web API through the Service with “CURL”
Now I will show how to call Web API from the service-2. For this I will go inside the container “mc1” which is containing the “MultiApp” project image.
So first run docker ps to get the container id running this project. The container id in my case is “b97af0bfd9cf”.
Next run docker exec -it -u root b97af0bfd9cf bash to get root shell.
Next, install curl, the commands is given below.
apt-get update
apt-get install curl
After this make curl request to the service-2. The command is:
curl http://service-2:7070/api/JokeYou will get the Jokes in the curl response. I have shown all the steps in the below image:

Exposing the app to the browser
I will now create another Kubernetes Service called service-1 and this will expose the Pod 1. Note that Pod 1 is containing “multiapp” image inside “mc1” docker container. See the below image which explains this:
The service-1 configuration file is given below. The file name is service1.yaml.
apiVersion: v1
kind: Service
metadata:
  name: service-1
spec:
  type: NodePort
  selector:
    app: mc-app1
  ports:
    - port: 6060
      targetPort: 8080
See the selector field of this service:
selector:
    app: mc-app1
And it is same as the value of matchLabels field of the deployment 1.
matchLabels:
    app: mc-app1
Now apply this service by running the following command:
kubectl apply -f service1.yamlFinally, it’s time to open the app on the browser. So run kubectl get services to get the service-1 ports and open it with url – http://localhost:port.

For me the url is http://localhost:32034 and I can open it on the browser, see image below:

Using ASP.NET Core Environment variable
I can use environment variables to pass the “service-2” url (which is used to call the web api) from the deployment configuration yaml file. This will make our code dynamic. Let us see how to do it:
So, add an environment variable called WebApiBaseAddress and provide it the value of the web api in terms of service-2 i.e. http://service-2:7070/api/Joke.
I have shown the updated code in highlighted way.
apiVersion: apps/v1
kind: Deployment
metadata:
  name: dep1
  labels:
    app: s1
spec:
  replicas: 1
  selector:
    matchLabels:
      app: mc-app1
  template:
    metadata:
      labels:
        app: mc-app1
    spec:
      containers:
        - name: mc1
          image: multiapp
          imagePullPolicy: Never
          ports:
            - containerPort: 8080
          env:
            - name: WebApiBaseAddress
              value: http://service-2:7070/api/Joke
And now in the asp.net core app, change the code which is calling the web api as shown by the highlighted way:
public async Task OnGet()
{
    using (var client = new System.Net.Http.HttpClient())
    {
        var request = new System.Net.Http.HttpRequestMessage();

        string url = Environment.GetEnvironmentVariable("WebApiBaseAddress");
        request.RequestUri = new Uri(url);

        var response = await client.SendAsync(request);
        var joke = await response.Content.ReadAsStringAsync();

        var details = JObject.Parse(joke);
        ViewData["Joke"] = details["name"] + ";;" + details["text"] + ";;" + details["category"];
    }
}
Well, that’s it for this tutorial. Enjoy!
Download the source code:
In this ASP.NET Core Kubernetes Multi Pods tutorial I covered the networking between apps running on different pods. I also covered this scenario by creating an example with Multi-container ASP.NET Core app. If you like this tutorial kindly share on fb, twitter and other social community websites.
SHARE THIS ARTICLE
Related Tutorials:


ABOUT THE AUTHOR
I hope you enjoyed reading this tutorial. If it helped you then consider buying a cup of coffee for me. This will help me in writing more such good tutorials for the readers. Thank you.

HELLO EVERYONE
 Welcome to YogiHosting - A Programming Tutorial Website. It is used by millions of people around the world to learn and explore about ASP.NET Core, Blazor, jQuery, JavaScript, Docker, Kubernetes and other topics.
SUBSCRIBE TO NEWSLETTER
Enter your email address to subscribe to this blog and receive notifications of new posts by email.
Join 90K other subscribers