Kubernetes Liveness Readiness Startup Probes

Kubernetes ensures that the App running in Pods is always healthy. If there is some problem with the App then it restarts the Pod based on the restart policy set for the Pod. The question now is how k8s detects an un-healthy app? The answer is through Probes. In this tutorial we will be creating ASP.NET Core Kubernetes Probes this will help you to maintain your app smoothly.
Page Contents
Kubernetes Probes: Liveness, Readiness, and Startup probes
Kubernetes has 3 types of Probes:
- Startup Probe: It is the first probe and is used to find out if the app is initialized.
- Liveness Probe: It is used to find out if the app has crashed/deadlocked.
- Readiness Probe: this probe is used to find out if the app is ready to handle requests.
Before I start digging each of these probes let me add health checks in an ASP.NET Core app.
ASP.NET Core Kubernetes series consists of the following articles:
- Deploy ASP.NET Core App on Kubernetes
- Managing ASP.NET Core app hosted on Kubernetes
- How to use Kubernetes Ingress on an ASP.NET Core app
- Kubernetes: Host Multi-Container ASP.NET Core app to Single Pod
- Kubernetes: Host Multi-Container ASP.NET Core app to Multiple Pods
- Kubernetes Volume emptyDir and SSL Mount to volume
- Kubernetes Persistent volumes (PV) and Persistent Volume Claim (PVC)
- Kubernetes Liveness Readiness Startup Probes
- How to use Helm for ASP.NET Core with Kubernetes
Add Health checks in an ASP.NET Core app
In your ASP.NET Core app you can add health checks and expose the result of these health checks endpoints to outside world. For example your app has a url called https://localhost:8032/health which will provide the result of health status of your app.
Health checks can be added to an app by the use Health Checks Middleware and libraries. We have to Register health check services in the Program.cs and then create health check endpoints.
In the Program.cs class we create 3 endpoints for Startup, Liveness and Readiness probes. These endpoints are:
/health/SP
/health/LP
/health/RP
These endpoints are dealt with 3 separate C# classes which are:
- MyHealthCheckStartup.cs
- MyHealthCheckLiveness.cs
- MyHealthCheckReadiness.cs
In simple terms these class are assigned to provide with the status of the probe for the endpoints they are assigned to.
The code of the Program.cs class is given below and the health checks are highlighted:
using KubeProbe.Models;
using Microsoft.AspNetCore.Diagnostics.HealthChecks;

var builder = WebApplication.CreateBuilder(args);

builder.Services.AddHealthChecks()
    .AddCheck<MyHealthCheckStartup>(
        "Probe 1",
        tags: new[] { "sp_tag" });

builder.Services.AddHealthChecks()
    .AddCheck<MyHealthCheckLiveness>(
        "Probe 2",
        tags: new[] { "lp_tag" });

builder.Services.AddHealthChecks()
    .AddCheck<MyHealthCheckReadiness>(
        "Probe 3",
        tags: new[] { "rp_tag" });

// Add services to the container.
builder.Services.AddControllersWithViews();

var app = builder.Build();

app.MapHealthChecks("/healthz");

// Configure the HTTP request pipeline.
if (!app.Environment.IsDevelopment())
{
    app.UseExceptionHandler("/Home/Error");
    // The default HSTS value is 30 days. You may want to change this for production scenarios, see https://aka.ms/aspnetcore-hsts.
    app.UseHsts();
}

app.UseHttpsRedirection();
app.UseStaticFiles();

app.UseRouting();

app.UseAuthorization();

app.MapHealthChecks("/health/SP", new HealthCheckOptions()
{
    Predicate = (check) => check.Tags.Contains("sp_tag")
});
app.MapHealthChecks("/health/LP", new HealthCheckOptions()
{
    Predicate = (check) => check.Tags.Contains("lp_tag")
});
app.MapHealthChecks("/health/RP", new HealthCheckOptions()
{
    Predicate = (check) => check.Tags.Contains("rp_tag")
});

app.MapControllerRoute(
    name: "default",
    pattern: "{controller=Home}/{action=Index}/{id?}");

app.Run();
In the above code, we added with 3 heath checks methods and these are tagged with “sp_tag”, “lp_tag” and “rp_tag”. Notice the corresponding classes are also specified during addition. I will create these 3 classes in just a moment.
The code being discussed about is given below.
builder.Services.AddHealthChecks()
    .AddCheck<MyHealthCheckStartup>(
        "Probe 1",
        tags: new[] { "sp_tag" });

builder.Services.AddHealthChecks()
    .AddCheck<MyHealthCheckLiveness>(
        "Probe 2",
        tags: new[] { "lp_tag" });

builder.Services.AddHealthChecks()
    .AddCheck<MyHealthCheckReadiness>(
        "Probe 3",
        tags: new[] { "rp_tag" });
Next, the endpoints to these health checks are added. The help of a Func Predicate is taken to filter these health checks by the tags which were created before. Recall these tags were specified when I added these health checks.
So, this means, when an endpoint is called then only the corresponding “class” is called. Recall I have 3 classes for these 3 health checks. The discussed code is given below:
app.MapHealthChecks("/health/SP", new HealthCheckOptions()
{
    Predicate = (check) => check.Tags.Contains("sp_tag")
});
app.MapHealthChecks("/health/LP", new HealthCheckOptions()
{
    Predicate = (check) => check.Tags.Contains("lp_tag")
});
app.MapHealthChecks("/health/RP", new HealthCheckOptions()
{
    Predicate = (check) => check.Tags.Contains("rp_tag")
});
The below table lists the class that will be called when an endpoint is called.
| Endpoint | Class that will handle health check |
|---|---|
| /health/SP | MyHealthCheckStartup.cs |
| /health/LP | MyHealthCheckLiveness.cs |
| /health/RP | MyHealthCheckReadiness.cs |
Now finally add the 3 health check classes. So create a new class called MyHealthCheckStartup.cs in your app and inside this add the 3 classes.
using Microsoft.Extensions.Diagnostics.HealthChecks;

namespace KubeProbe.Models
{
    public class MyHealthCheckStartup : IHealthCheck
    {
        public Task<HealthCheckResult> CheckHealthAsync(HealthCheckContext context, CancellationToken cancellationToken = default)
        {
            var result = HealthCheckResult.Healthy();
            return Task.FromResult(result);
        }
    }

    public class MyHealthCheckLiveness : IHealthCheck
    {
        public Task<HealthCheckResult> CheckHealthAsync(HealthCheckContext context, CancellationToken cancellationToken = default)
        {
            var result = HealthCheckResult.Healthy();
            return Task.FromResult(result);
        }
    }

    public class MyHealthCheckReadiness : IHealthCheck
    {
        public Task<HealthCheckResult> CheckHealthAsync(HealthCheckContext context, CancellationToken cancellationToken = default)
        {
            var result = HealthCheckResult.Healthy();
            return Task.FromResult(result);
        }
    }
}
The health check classes should implement the interface IHealthCheck of the Microsoft.Extensions.Diagnostics.HealthChecks namespace. Also, the function CheckHealthAsync must be implemented by these classes.
Notice I am just returning a healthy result on the “CheckHealthAsync” function.
var result = HealthCheckResult.Healthy();In real world ASP.NET Core App you will be performing checks for the necessary areas of your app to find out if they are working correctly or not. For example, suppose if your app is performing some machine learning tasks then you will be checking if it is working well or not and so will be returning healthy or unhealthy status.
public class MyHealthCheckStartup: IHealthCheck
{
public Task<HealthCheckResult> CheckHealthAsync(HealthCheckContext context, CancellationToken cancellationToken = default)
{
var result = machineStatus==true ? HealthCheckResult.Healthy() : HealthCheckResult.UnHealthy();
return Task.FromResult(result);
}
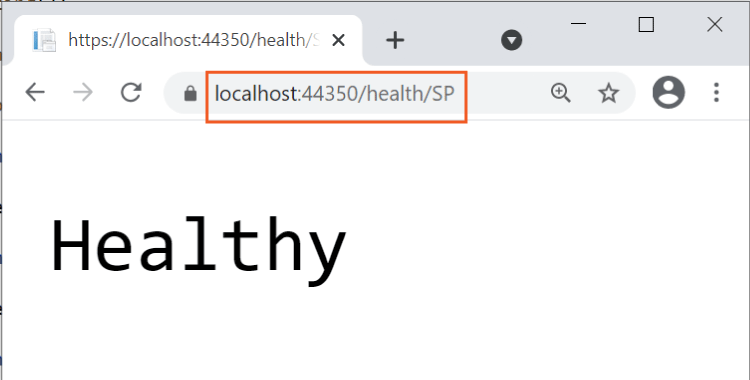
}Now run the app and visit any of the health check endpoints and you will see healthy status as shown by the below image.
We have successfully configured health checks in our app so now we can create kubernetes Probes: Liveness, Readiness, and Startup probes.
Kubernetes Startup Probes
The first probe which kubernetes runs is the Startup Probe. This probe is helpful in finding if the app is initialized or not. Normally it may just take a few milli-seconds time for the app to be initialized but some app, which are big enough, can take a few seconds (or more) to be initialized. So Startup Probe are used mainly for big apps that take a longer time for initializing.
Few things to note here:
- When the app is in the initializing stage the Startup Probe returns some http error code from 400 to 599.
- As soon as the app is initialized the Startup Probe will return a http success code from 200 to 299. This means the probe succeeded, now the startup probe will not run again for the lifetime of that container.
- You can instruct kubernetes how many tries it should perform for this probe. If startup probe fails for all these tries then kubernetes will eventually kill the container, and restart the pod.
The Startup Probe is defined in the deployment yaml file. In the below given deployment yaml file, I have added the startupProbe that will configure Kubernetes Startup Probes. See the codes that are highlighted.
apiVersion: apps/v1
kind: Deployment
metadata:
  name: test-dep
  labels:
    app: aspnet-core-app
spec:
  replicas: 1
  selector:
    matchLabels:
      component: web
  template:
    metadata:
      labels:
        component: web
    spec:
      containers:
        - name: csimpleweb
          image: simpleweb
          imagePullPolicy: Never
          ports:
            - containerPort: 8080
          startupProbe:
            httpGet:
              path: /health/SP
              port: 80
            failureThreshold: 25
            periodSeconds: 10
The Startup probe is defined in the startupProbe field, and calls the URL /health/SP on port 8080.
The failureThreshold specifies how many times the probe should be tried. I have given it a value of 25. The periodSeconds field specifies the wait period between checks.
So, it means the Startup Probe will continue for 25*10=250 seconds and when it passes k8s starts the liveness and readiness probes. If it fails for all these 250 seconds then k8s will kill the pod and restart another one.
Kubernetes Liveness Probes
Kubernetes uses Liveness probes to find out if the app is running correctly or not. Some app running for long periods of time can transition to a broken or deadlock state. So, if kubernetes Liveness Probes fail then it kills the pod and starts a new one for the app.
In the deployment yaml file I have added the configurations for Liveness Probe. See highlighted code below:
apiVersion: apps/v1
kind: Deployment
metadata:
  name: test-dep
  labels:
    app: aspnet-core-app
spec:
  replicas: 1
  selector:
    matchLabels:
      component: web
  template:
    metadata:
      labels:
        component: web
    spec:
      containers:
        - name: csimpleweb
          image: simpleweb
          imagePullPolicy: Never
          ports:
            - containerPort: 8080
          livenessProbe:
            httpGet:
              path: /health/LP
              port: 80
            initialDelaySeconds: 2
            periodSeconds: 10
            timeoutSeconds: 5
            failureThreshold: 10
The livenessProbe field defines this probe. I have provided the endpoint of this liveness check to the path field /health/LP on port 8080.
The other fields and their descriptions are:
- initialDelaySeconds – number of seconds to delay before running the probe.
- periodSeconds – the waiting time between 2 consecutive tries.
- timeoutSeconds – number of seconds to wait for the response from the app. If the app does not give the response i.e. you get timeout, then start another try.
- failureThreshold – number of tries to perform.
I have provided failureThreshold field the value of 10 so 10 tries will be performed by kubernetes and if all these fails then it will kill the pod and start a new one.
The Liveness Probe runs on the container during it’s whole lifecycle.
Kubernetes Readiness Probes
We can performs Kubernetes Readiness Probes to detect if the ASP.NET Core app is ready to handle request or not. Note that Readiness probes runs on the container during its whole lifecycle and pods reporting that they are not ready does not receive traffic through Kubernetes Services.
Check the below deployment yaml file where I have added Readiness Probe.
apiVersion: apps/v1
kind: Deployment
metadata:
  name: test-dep
  labels:
    app: aspnet-core-app
spec:
  replicas: 1
  selector:
    matchLabels:
      component: web
  template:
    metadata:
      labels:
        component: web
    spec:
      containers:
        - name: csimpleweb
          image: simpleweb
          imagePullPolicy: Never
          ports:
            - containerPort: 8080
          readinessProbe:
            httpGet:
              path: /health/RP
              port: 80
            initialDelaySeconds: 2
            periodSeconds: 10
            timeoutSeconds: 5
            failureThreshold: 10
            successThreshold: 5
Configuration settings are similar for readiness probes, although there is successThreshold. This field tells kubernetes to consider this probe successful only if the request to the endpoint is successful for the given number of times (here 5) after receiving a failure. Suppose at some point the request to the url – /health/RP timed out, so kubernetes will make 5 tries (as given in the “successThreshhold” value) and all these 5 tries should pass, only then the probe will be considered successful.
Download the source codes:
In this ASP.NET Core Kubernetes Probes Tutorial, I covered the topic of Startup, Liveness and Readiness probles in full details. I hope you enjoyed learning this great topic of k8s. Kindly share this tutorial with your friends to.
SHARE THIS ARTICLE
Related Tutorials:


ABOUT THE AUTHOR
I hope you enjoyed reading this tutorial. If it helped you then consider buying a cup of coffee for me. This will help me in writing more such good tutorials for the readers. Thank you.

HELLO EVERYONE
 Welcome to YogiHosting - A Programming Tutorial Website. It is used by millions of people around the world to learn and explore about ASP.NET Core, Blazor, jQuery, JavaScript, Docker, Kubernetes and other topics.
SUBSCRIBE TO NEWSLETTER
Enter your email address to subscribe to this blog and receive notifications of new posts by email.
Join 90K other subscribers