How to use Helm for ASP.NET Core with Kubernetes

Deploying apps on Kubernetes could be a job full of problems so we need HELM. HELM is a superhero like “He-Man”.
ASP.NET Core Kubernetes series consists of the following articles:
- Deploy ASP.NET Core App on Kubernetes
- Managing ASP.NET Core app hosted on Kubernetes
- How to use Kubernetes Ingress on an ASP.NET Core app
- Kubernetes: Host Multi-Container ASP.NET Core app to Single Pod
- Kubernetes: Host Multi-Container ASP.NET Core app to Multiple Pods
- Kubernetes Volume emptyDir and SSL Mount to volume
- Kubernetes Persistent volumes (PV) and Persistent Volume Claim (PVC)
- Kubernetes Liveness Readiness Startup Probes
- How to use Helm for ASP.NET Core with Kubernetes
Page Contents
What is HELM
HELM is a Package Manager for Kubernetes which help to easily pack, configure, and deploy apps and services onto kubernetes. HELM uses charts, a chart is a collection of files that describe a related set of Kubernetes resources. A chart is organized as a collection of files inside of a directory. For example, a chart describing myapp will be stored in a directory called “myapp”. Inside this directory there will be a number of files like .yaml, .json, .md, .text, etc.
A chart directory will have a file called Chart.yaml and this file will contain information about the chart. It will contain several fields some of them are described below:
All yaml files have apiVersion so is the Chart.yaml file also having an apiVersion field.
The “name” field specify the name of the chart.
Every chart must specify a version number.
The type field defines the type of the chart.
This field specify the dependencies which may be like sql server, redis, etc.
Installing HELM on Windows
For installing HELM you will need to first install Chocolatey. Open PowerShell in administrator privileges which you can do by right clicking the PowerShell icon and select Run as Administrator.
Now run the following command which will install Chocolatey.
Set-ExecutionPolicy Bypass -Scope Process -Force; [System.Net.ServicePointManager]::SecurityProtocol = [System.Net.ServicePointManager]::SecurityProtocol -bor 3072; iex ((New-Object System.Net.WebClient).DownloadString('https://community.chocolatey.org/install.ps1'))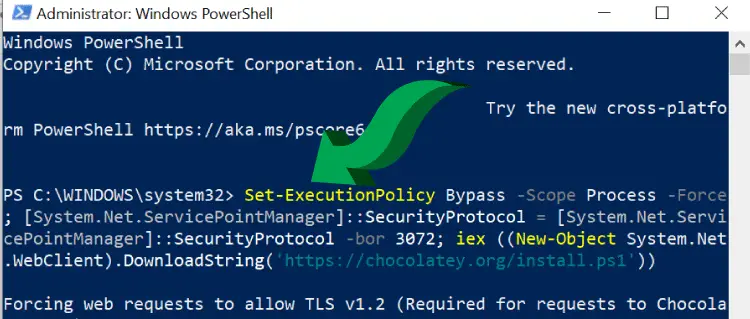
Now close and reopen the PowerShell in administrator privileges. Next run the following command which will install Helm in your pc.
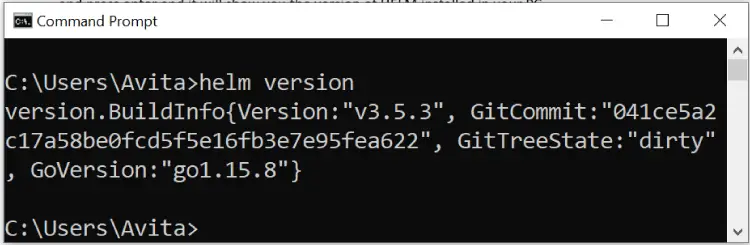
choco install kubernetes-helmYou can now close your PowerShell window and open command prompt. Type helm version and press enter, and it will show you the version of HELM installed in your PC.
Create a Chart with HELM
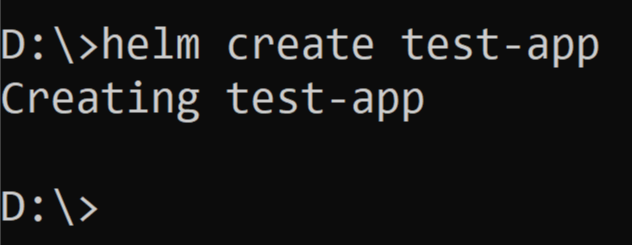
To deploy any app like an ASP.NET Core app or any other, you first have to create a chart. The command to create a chart is:
helm create test-appI ran the above command from the d:\ drive so this will create a folder called test-app inside the d:\ drive. Check the below image:
Now go to the test-app folder and you will see a number of files are created inside it. I have shown this in the below image.
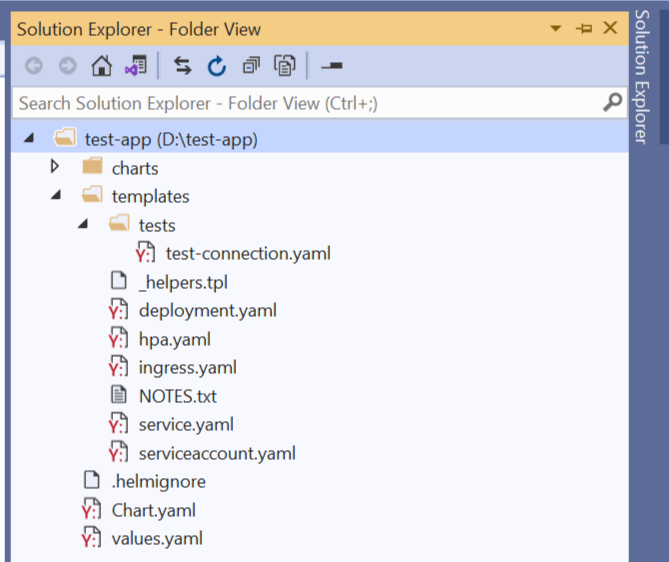
Let us discuss some important files and how they work.
As already described before Chart.yaml describes what the chart is all about. It’s code is given below:
apiVersion: v2
name: test-app
description: A Helm chart for Kubernetes

type: application

version: 0.1.0

appVersion: "1.16.0"
It has a number of fields like apiVersion, name, description, appVersion, etc. The most important one is the appVersion.
The appVersion specifies the version of the application. In my case it has a value of 1.16.0.
appVersion: "1.16.0" When you will install this chart, which we will see in just a moment, then helm will look for an image with the tag same as the appVersion field’s value. So, in my case I should have an image with a tag as 1.16.0. I will tell where to set this in the image name shortly.
The values.yaml file defines values for the app. Here you can define the name of the Image for the container. The configuration values for Service and Ingress for the app and many other things.
Open the values.yaml file in visual studio, you will see image section:
image:
  repository: nginx
  pullPolicy: IfNotPresent
  # Overrides the image tag whose default is the chart appVersion.
  tag: ""
The repository is provided with value nginx and pullPolicy is provided with value of IfNotPresent. It means helm is instructing kubernetes deployment to use nginx image for the container. If this image is not present locally on your pc then it will be downloaded from docker hub.
Change the repository to firstapp as shown below:
image:
  repository: firstapp
  pullPolicy: IfNotPresent
  # Overrides the image tag whose default is the chart appVersion.
  tag: ""
This means the deployment will need the image called firstapp:1.16.0 to be present in your Docker instance else it will download it from docker hub. The 1.16.0 is the image tag and recall it was set on the Chart.yaml file as appVersion: "1.16.0".
Next, you will find service field which specify the type of kubernetes service the chart will make in the cluster:
service:
  type: ClusterIP
  port: 80
The service is defined to be ClusterIP type and exposes it’s port 80 to other kubernetes objects. ClusterIP service can only be accessed from inside the cluster so change it to NodePort as I will want my ASP.NET Core app to be opened on the browser using this service. Also change port to 8080 since Dockerfile of my app exposes 8080 port. The change is given below:
 service:
  type: NodePort
  port: 8080
Next, you will find the Ingress field. You will find this is not enabled (enabled: false) so Ingress will not be created by the chart.
ingress:
  enabled: false
  annotations: {}
    # kubernetes.io/ingress.class: nginx
    # kubernetes.io/tls-acme: "true"
  ...
You can set the enabled field to true (if you want to) for creating the Ingress for your app. You can set other Ingress configurations if you want to.
There are 3 important files created inside the templates folder these are:
- deployment.yaml
- service.yaml
- ingress.yaml
The above 3 files configure the deployment, services and ingress for the app which will be hosted on Kubernetes cluster.
Open the deployment.yaml file whose code will look as shown below:
apiVersion: apps/v1
kind: Deployment
metadata:
  name: {{ include "test-app.fullname" . }}
  labels:
    {{- include "test-app.labels" . | nindent 4 }}
spec:
  {{- if not .Values.autoscaling.enabled }}
  replicas: {{ .Values.replicaCount }}
...
There are lots of if else block and “includes” written inside {{…}} to configure values dynamically. The values are the ones which you specified on the values.yaml file earlier.
You will find the full chart folder in the source code. The download link is given at the bottom of this tutorial.
Deploy your ASP.NET Core app to Kubernetes with “HELM”
Now I will deploy my ASP.NET Core app to Kubernetes with HELM. I have already created my chart and have specified it to use firstapp:1.16.0 image.
So, I have to build an image for the app by the name of firstapp:1.16.0.
So, in the command prompt, go to the directory of the app where the Dockerfile is present and run the docker build command which is given below. This will create the image “firstapp:1.16.0”.
docker build -t firstapp:1.16.0 -f Dockerfile .Don’t worry about the app, you can use any app for this tutorial purpose. I have also provided this app on the source code. You can download the source code to find this app.
Next run the docker images command to find this newly built image:
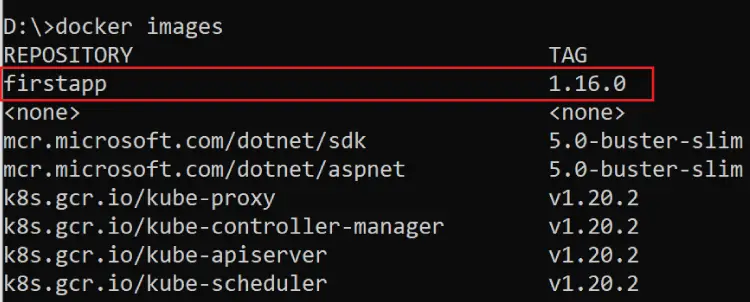
“helm install” command
We have come to the last step which is to install the chart. When the chart is installed then the deployment, service and ingress for our app will be created on our kubernetes cluster.
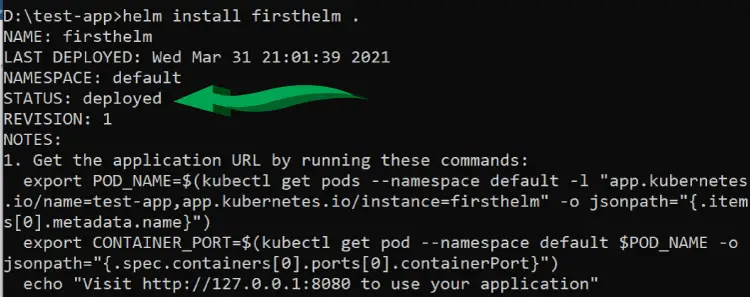
So, I go the directory where the chart files were created i.e. D:\test-app. Then I run the following command.
helm install firsthelm .This will create the chart with the name “firsthelm”. Notice the “.” at the end of the command which specify that the current directory where we are currently in (i.e. “D:\test-app” ) is the chart directory.
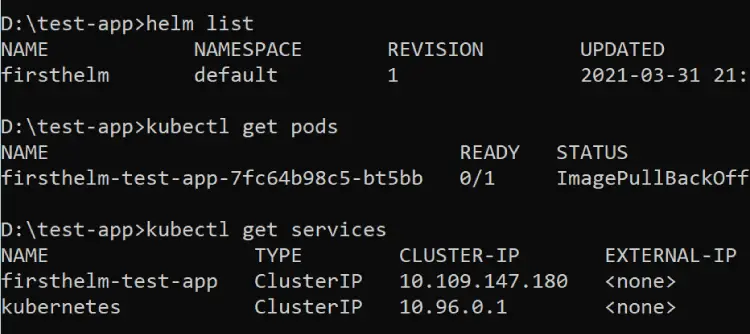
Our chart is created which you can check by running the helm list command.
Next, run the kubectl get pods and kubectl get services command and you will see that pods and services are created by the helm install command. This reduces the complexities of deployment to kubernetes. Check the below image where I have shown them:
HELM has created a service by the name of firsthelm-test-app. I can get the service port by kubectl get services. In the below image I have shown the port which in my case is 32472.

I can now open the app from the url – http://localhost:32472. Check below image.

“helm uninstall” command
To uninstall the helm chart run the uninstall command which is given below:
helm uninstall firsthelmThis removes all the deployments, pods, services and ingress which the chart has created on the kubernetes cluster.
Download the source code:
In this tutorial I covered HELM from the beginning, it’s file structure, installation on windows. Then I used helm chart to deploy an ASP.NET Core app to kubernetes. I hope you liked this tutorial so kindly share it with your friends on fb, twitter.
SHARE THIS ARTICLE
Related Tutorials:


ABOUT THE AUTHOR
I hope you enjoyed reading this tutorial. If it helped you then consider buying a cup of coffee for me. This will help me in writing more such good tutorials for the readers. Thank you.

Comments
Leave a Reply
HELLO EVERYONE
 Welcome to YogiHosting - A Programming Tutorial Website. It is used by millions of people around the world to learn and explore about ASP.NET Core, Blazor, jQuery, JavaScript, Docker, Kubernetes and other topics.
SUBSCRIBE TO NEWSLETTER
Enter your email address to subscribe to this blog and receive notifications of new posts by email.
Join 90K other subscribers
Best article on this so far. Actually got something working.