Installation of Entity Framework Core

In this tutorial you will learn How to Install Entity Framework Core on your project.
This tutorial is a part of Entity Framework Core series.
- 1. Introduction to Entity Framework Core
- 2. Installation of Entity Framework Core
- 3. Database-First approach in Entity Framework Core
- 4. DbContext Class in Entity Framework Core
- 5. Code-First Approach in Entity Framework Core
- 6. Migrations in Entity Framework Core
- 7. Insert Records in Entity Framework Core
- 8. Read Records in Entity Framework Core
- 9. Update Records in Entity Framework Core
- 10. Delete Records in Entity Framework Core
- 11. Conventions in Entity Framework Core
- 12. Configurations in Entity Framework Core
- 13. Fluent API in Entity Framework Core
- 14. Configure One-to-Many relationship using Fluent API in Entity Framework Core
- 15. Configure One-to-One relationship using Fluent API in Entity Framework Core
- 16. Configure Many-to-Many relationship using Fluent API in Entity Framework Core
- 17. Execute Raw SQL Queries using FromSqlRaw() method in Entity Framework Core
- 18. Execute SQL Stored Procedures using FromSqlRaw() & ExecuteSqlRawAsync() methods in Entity Framework Core
- 19. Xaero – Entity Framework Core Advanced Project
- 20. Value Converters and Comparers in Entity Framework Core
First create a new web app in Visual Studio by selecting ASP.NET Core Web App (Model-View-Controller) template. See the image below.

To this app we will Install Entity Framework Core and work on database operations.
Install EF Core SQL Server Provider
Entity Framework Core has Database Providers for all major databases. The installation of each of them can be done through NuGet. Here we will install SQL Server database provider since we will be working on a SQL Server Database.
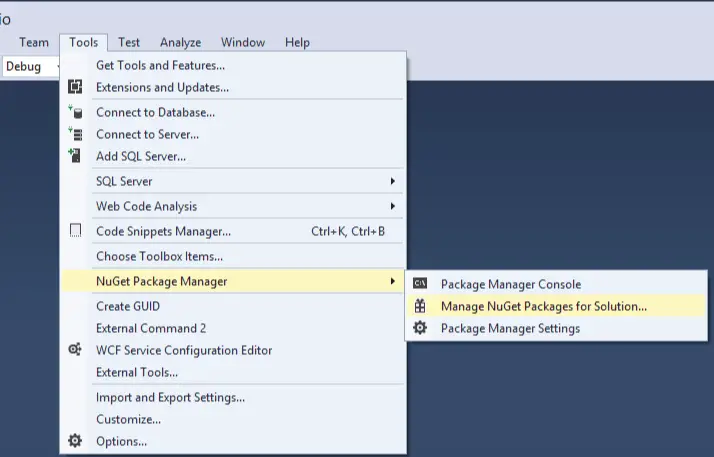
In Visual Studio go to Tools > NuGet Package Manager > Manage NuGet Packages for Solution, this will open the NuGet UI.
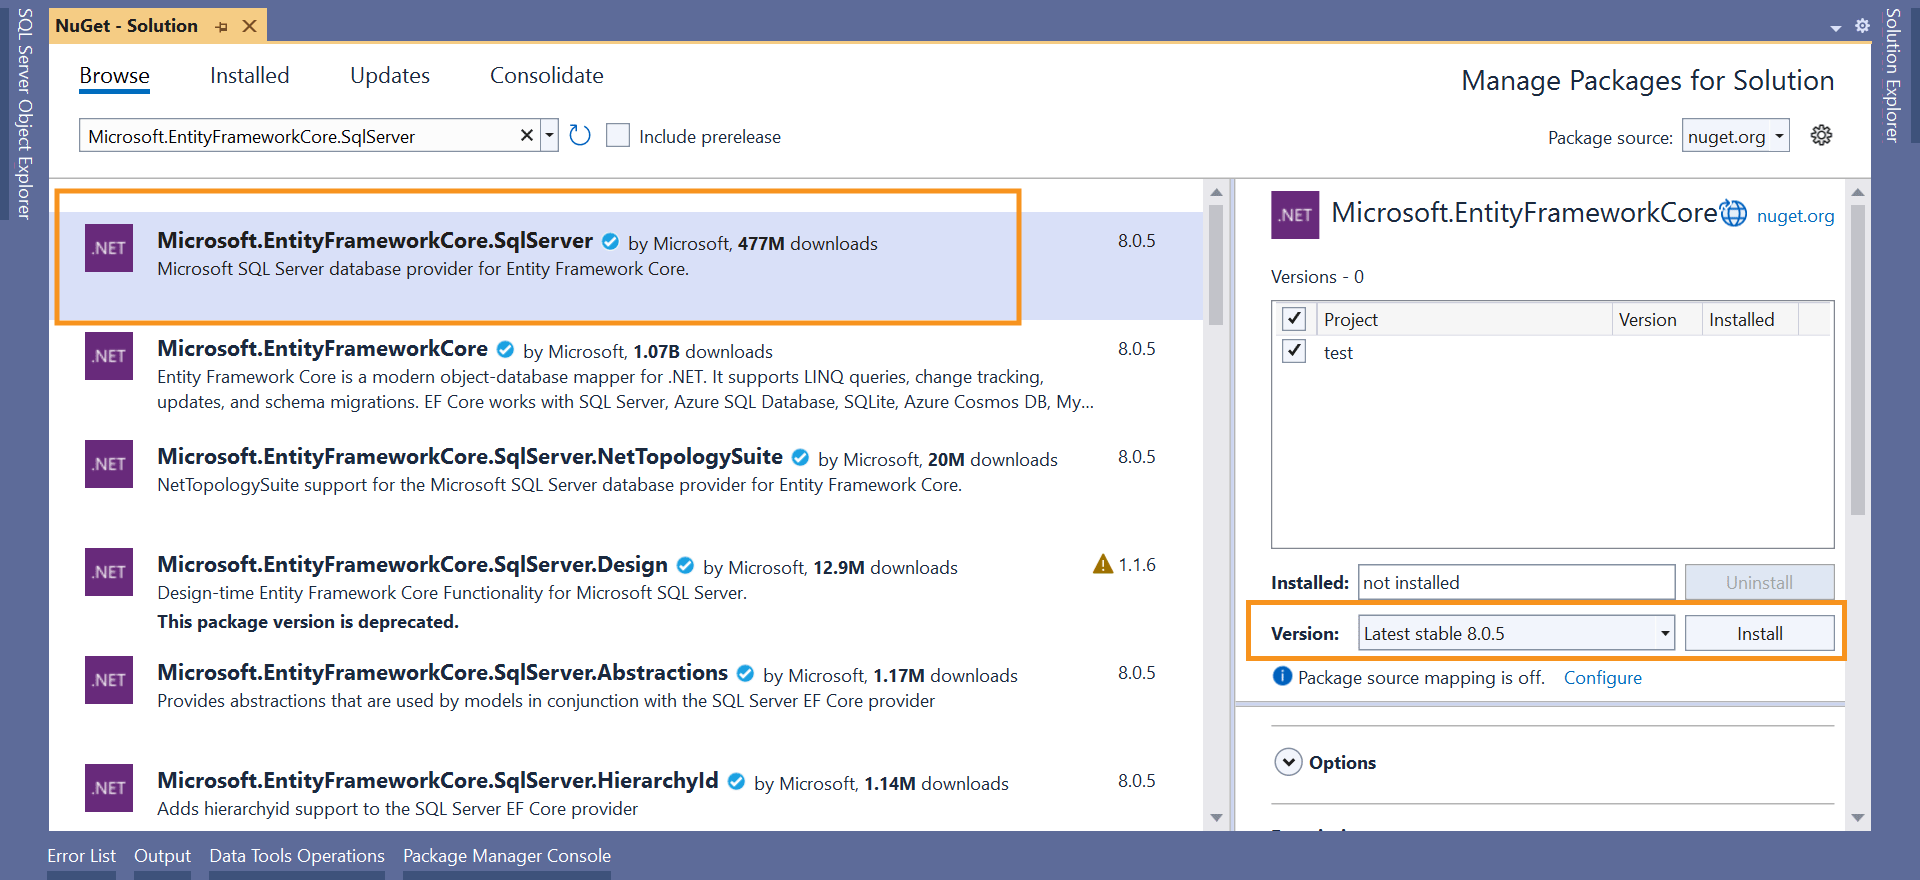
Here click the Browse link and search for Microsoft.EntityFrameworkCore.SqlServer on the text box.
The package will show up. Click on it, then on the right side check the checkbox given against the project and click the Install button.
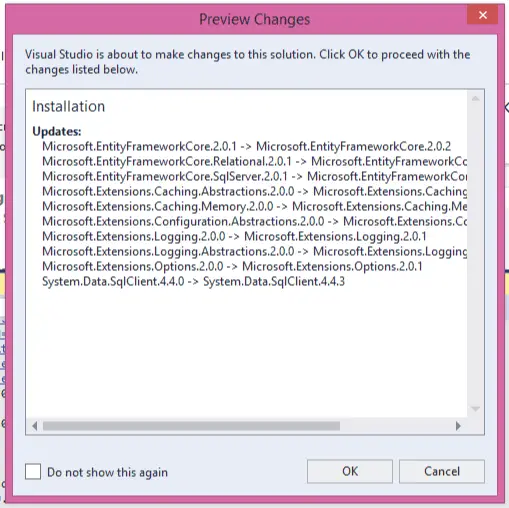
The installation of the package will start and we will see Preview Changes window. Click the OK button.
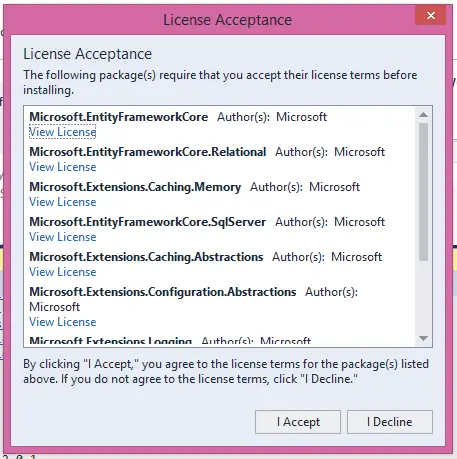
Next we will see the License Acceptance window, click the I Accept button.
Within few seconds the installation procedure will complete and the Microsoft.EntityFrameworkCore.SqlServer provider will be installed on the app.
You can verify it by seeing the Dependencies > NuGet section of your Solution Explorer.
Install Entity Framework Core Tools
There are many EF Core commands like Migration, scaffoldings that needs to be executed. For this we will need “any” of the two tools. These tools are:
- 1. .NET Core command-line interface (CLI) tools: it can be used on Windows, Linux, or macOS. Their commands begin with “dotnet ef”.
- 2. Package Manager Console (PMC) tools: it can be used only on Visual Studio on Windows. These commands start with a verb, for example “Add-Migration”, “Update-Database”, etc.
Let us understand their installation procedures.
.NET Core command-line interface (CLI) tools
First open Package Manager Console window from Tools ➤ NuGet Package Manager ➤ Package Manager Console menu. Then run the following command to install it.
dotnet tool install --global dotnet-efWorth Mentioning – If you already had dotnet ef installed in your pc then it should be updated to the latest version. Run the following update command to do this job.
dotnet tool update --global dotnet-ef
Next, install the Microsoft.EntityFrameworkCore.Design package from NuGet.

Test the packages by running the following command on Package Manager Console.
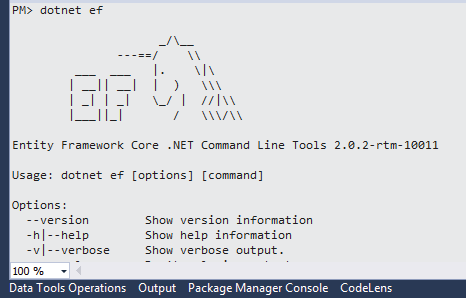
PM> dotnet ef
You will see a horse picture telling the dotnet CLI has been installed successfully.
dotnet add package Microsoft.EntityFrameworkCore.SqlServerPackage Manager Console (PMC) tools
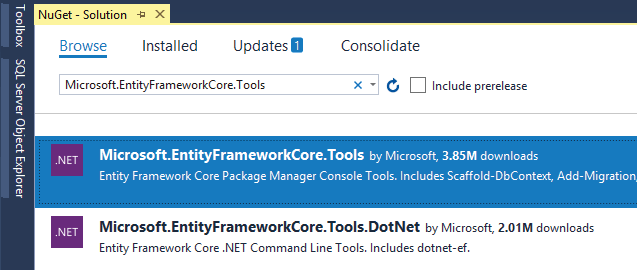
Go to NuGet UI and search for Microsoft.EntityFrameworkCore.Tools, and install it. Check the below image.
Alternately, we can also run the following install command in the Package Manager Console.
Install-Package Microsoft.EntityFrameworkCore.ToolsVerify the installation by running the following command in Package Manager Console.
Get-Help about_EntityFrameworkCoreIt will show the horse images along with different commands and their work.
We can also use the following Package Manager Console (PMC) command to install the EF Core SQL Server provider.
Install-Package Microsoft.EntityFrameworkCore.SqlServerWe learned how to perform the installation of SqlServer database provider package and EF Core tools in the app. Now it’s time to understand the workings of EF Core. Check the next tutorial whose link is given below and proceed.
SHARE THIS ARTICLE
Related Tutorials:


ABOUT THE AUTHOR
I hope you enjoyed reading this tutorial. If it helped you then consider buying a cup of coffee for me. This will help me in writing more such good tutorials for the readers. Thank you.

HELLO EVERYONE
 Welcome to YogiHosting - A Programming Tutorial Website. It is used by millions of people around the world to learn and explore about ASP.NET Core, Blazor, jQuery, JavaScript, Docker, Kubernetes and other topics.
SUBSCRIBE TO NEWSLETTER
Enter your email address to subscribe to this blog and receive notifications of new posts by email.
Join 90K other subscribers