Insert Records in Entity Framework Core

In this tutorial we will learn to Insert Records in Database with Entity Framework Core. EF Core can insert a single record or bulk records at the same time. Note that entities that have EntityState value as ‘Added’ are insterted to the database.
Page Contents
EntityState
EntityState is an enumeration that stores the state of the entity. It can have any of the 5 different values, these are ‘Added’, ‘Deleted’, ‘Detached’, ‘Modified’ & ‘Unchanged’. When we want to create a new record in the database then the EntityState of the corresponding entity should be ‘Added’. This tells EF Core that it has to insert the given record. Similarly if we want to update an entity then it must be ‘Modified’, for deleting an entity it should be ‘Deleted’.
Unchanged entity state means that there isn’t any change done for a given entity. Also note that Entity Framework Core keeps track of all the entities for changes, a value of Detached tells that the given entity is not being tracked.
This tutorial is a part of Entity Framework Core series.
- 1. Introduction to Entity Framework Core
- 2. Installation of Entity Framework Core
- 3. Database-First approach in Entity Framework Core
- 4. DbContext Class in Entity Framework Core
- 5. Code-First Approach in Entity Framework Core
- 6. Migrations in Entity Framework Core
- 7. Insert Records in Entity Framework Core
- 8. Read Records in Entity Framework Core
- 9. Update Records in Entity Framework Core
- 10. Delete Records in Entity Framework Core
- 11. Conventions in Entity Framework Core
- 12. Configurations in Entity Framework Core
- 13. Fluent API in Entity Framework Core
- 14. Configure One-to-Many relationship using Fluent API in Entity Framework Core
- 15. Configure One-to-One relationship using Fluent API in Entity Framework Core
- 16. Configure Many-to-Many relationship using Fluent API in Entity Framework Core
- 17. Execute Raw SQL Queries using FromSqlRaw() method in Entity Framework Core
- 18. Execute SQL Stored Procedures using FromSqlRaw() & ExecuteSqlRawAsync() methods in Entity Framework Core
- 19. Xaero – Entity Framework Core Advanced Project
- 20. Value Converters and Comparers in Entity Framework Core
Entity Framework Core Create Records
We will now create records with entity framework core. There are 2 entities – Department & Employee. The entities are created in Department.cs and Employee.cs files inside the “Models” folder of the app.
A Department entity can have more than one Employee so there is one-to-many relationship between them.
The codes of these entity classes are given below.
public class Department
{
    public int Id { get; set; }
    public string Name { get; set; }

    public ICollection<Employee> Employee { get; set; }
}

public class Employee
{
    public int Id { get; set; }
    public string Name { get; set; }
    public string Designation { get; set; }

    public int DepartmentId { get; set; }
    public Department Department { get; set; } = null!;
}
Navigation Property is a property defined on the principal or dependent entity. This property references the related entity.
Notice the “Employee” property on the “Department” class – public ICollection<Employee> Employee { get; set; }, which is a Navigation Property as it references the related Employee entity. To be more specific it is a Collection Navigation Property as it contains references to many related Employee entities.
Similarly the property “Department” on the employee class which is our Navigation Property – public Department Department { get; set; } = null!;. This Navigation Property references the related Department entity.
The property public int DepartmentId { get; set; } is the foreign key of the relationship.
The DbContext for the Entity Framework Core is created inside the “Models” folder of the app and is named as CompanyContext.cs. It defines the 2 entities which are Department and Employee.
public class CompanyContext : DbContext
{
    public CompanyContext(DbContextOptions<CompanyContext> options) : base(options)
    {
    }

    public DbSet<Department> Department { get; set; }
    public DbSet<Employee> Employee { get; set; }

    protected override void OnModelCreating(ModelBuilder modelBuilder)
    {

    }
}
We registered the DbContext as a service in the program class with the below code.
builder.Services.AddDbContext<CompanyContext>(options =>
  options.UseSqlServer(builder.Configuration.GetConnectionString("DefaultConnection")));
The above code provides DbContext with the connection string (located inside the “appsettings.json” file). It also registers the DbContext as a service. With this we can use the DbContext in our controllers through dependency injection technique. The connection string code is given below which will be different for your case.
{
  "ConnectionStrings": {
    "DefaultConnection": "Data Source=(localdb)\\MSSQLLocalDB;Initial Catalog=Company;Integrated Security=True;Connect Timeout=30;Encrypt=False;TrustServerCertificate=False;ApplicationIntent=ReadWrite;MultiSubnetFailover=False"
  }
}
We explained how to create database context and register it as a service so that it can be used through dependency injection in the article DbContext Class in Entity Framework Core, so do check it.
Insert/Create a Single Record on the Database
First let me show how to Insert a single record on the Department table. The below code does this work.
var dept = new Department()
{
    Name = "Designing"
};
context.Entry(dept).State = EntityState.Added;
context.SaveChanges();
We have created a new Designing object of the Department class and set its EntityState to Added. When the DbContext.SaveChanges() method is called this new record is inserted on the Department table by Entity Framework Core.
The variable “context” is the object of database context class which is provided to the controller by dependency injection technique. See the below code where we have shown this.
public class DepartmentController : Controller
{
    private CompanyContext context;
    public DepartmentController(CompanyContext cc)
    {
        context = cc;
    }

    //... action methods creating record
    public IActionResult Create()
    {
        var dept = new Department()
        {
            Name = "Designing"
        };
        context.Entry(dept).State = EntityState.Added;
        context.SaveChanges();
    }
}
Check the below image where we have shown the newly created record on the database.

There is also a shorter way to insert a record. The below code will do the same thing.
var dept = new Department()
{
    Name = "Designing"
};

context.Add(dept);
context.SaveChanges();
Note that we don’t have to explicitly set the EntityState to Added, as this is done by EF Core by it’s own.
The SaveChanges() method which we used earlier is a synchronous method. We can instead use the SaveChangesAsync() method which is an asynchronous method. Asynchronous methods make use of threading and enables server resources to be used more efficiently. So our codes handle more traffic without delays.
The below code does the record creation in the database in Asynchronous way.
var dept = new Department()
{
    Name = "Designing"
};

context.Add(dept);
await context.SaveChangesAsync();
TryUpdateModelAsync
The best manner to create records and at the same time prevent overposting by malicious users is by the use of TryUpdateModelAsync method. Here, from the model, we can extract only those field values that we need to insert to our database. The remaining fields that are not needed are left out. A malicious user adds values to these fields through tools like fiddler or through JavaScript. But as we are filtering them therefore there is no chance they are making way to our database.
The below code is adding a new employee record by TryUpdateModelAsync method. We created an empty employee object first, and then added the Name, DepartmentId and Designation field values to it through lambda expression. These values are provided through Model Binding. This means the code is extracting only these 3 values from the Model and inserting it to the database. Other fields are totally ignored.
var emptyEmployee = new Employee();

if (await TryUpdateModelAsync<Employee>(emptyEmployee, "", s => s.Name, s => s.DepartmentId, s => s.Designation))
{
    context.Employee.Add(emptyEmployee);
    await context.SaveChangesAsync();
    return RedirectToAction("Index");
}
Entity Framework Core Bulk Insert
The DbContext.AddRange() method is used to bulk insert multiple records on the database at the same time.
Here we are bulk inserting 3 department records.
var dept1 = new Department() { Name = "Development" };
var dept2 = new Department() { Name = "HR" };
var dept3 = new Department() { Name = "Marketing" };

context.AddRange(dept1, dept2, dept3);
await context.SaveChangesAsync();
We can do the same thing from the below code:
var dept1 = new Department() { Name = "Development" };
var dept2 = new Department() { Name = "HR" };
var dept3 = new Department() { Name = "Marketing" };

var deps = new List<Department>() { dept1, dept2, dept3 };

context.AddRange(deps);
await context.SaveChangesAsync();
Entity Framework Core Insert Related Records
The Department & Employee tables have many-to-one relationship between them. Here we will insert one new record to each of these 2 tables (Department & Employee).
var dept = new Department()
{
    Name = "Admin"
};

var emp = new Employee()
{
    Name = "Matt",
    Designation = "Head",
    Department = dept
};

context.Add(emp);
await context.SaveChangesAsync();
We have set the ‘Department’ property of the Employee class to the Department object. So in this way Entity Framework Core will know that the entities are related hence it will insert both of them to their respected database tables.
Check the database to find both the new records on their respected tables.

Let’s take another example:
var dept = context.Department.Include(b => b.Employee).First();
var emp = new Employee { Name = "Matt", Designation = "Head" };

dept.Employee.Add(emp);
context.SaveChanges();
In the above example, the employee entity is inserted because it is added to the Employee property of the department entity. The department entity is fetched from the database and no insert is done for it.
Entity Framework Core CRUD Operations – CREATE RECORDS
We will now make Entity Framework Core CRUD OPERATIONS feature. Let us first perform the “Create Records” feature for the Department entity. So create a new controller file called DepartmentController.cs inside the “Controllers” folder of the app. Here add “Create” action methods which will take values for a new Department, from a form which is submitted from the view. The code of the controller is given below.
using EFCoreExample.Models;
using Microsoft.AspNetCore.Mvc;

namespace EFCoreExample.Controllers
{
    public class DepartmentController : Controller
    {
        private CompanyContext context;
        public DepartmentController(CompanyContext cc)
        {
            context = cc;
        }

        public IActionResult Create()
        {
            return View();
        }

        [HttpPost]
        public async Task<IActionResult> Create(Department dept)
        {
            context.Add(dept);
            await context.SaveChangesAsync();

            return View();
        }
    }
}
The controller gets the DbContext object from dependency injection and it uses it to add a new record to the database.
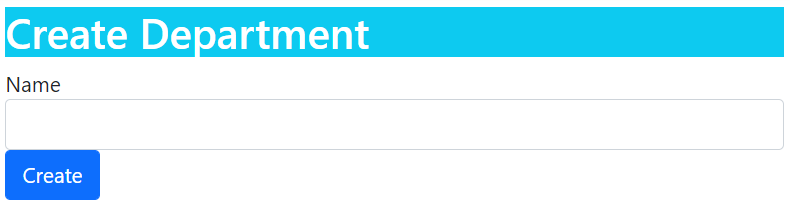
Next we need to create a small form where user can enter the department name whose records entity framework core will add to the database. So add a new razor view file called Create.cshtml inside the “Views/Department” folder. It’s code is given below.
@{
    ViewData["Title"] = "Create Department";
}

@model Department

<h1 class="bg-info text-white">Create Department</h1>

<form method="post">
    <div class="form-group">
        <label asp-for="Name"></label>
        <input asp-for="Name" class="form-control" />
    </div>
    <button type="submit" class="btn btn-primary">Create</button>
</form>
Run the app and go to the url – https://localhost:7018/Department/Create. We will see the department form (screenshot given below). Fill in the name of the department and click the button to create the record.
Next we need to Create Employee Records. So we add a new controller file called EmployeeController.cs and add “Create” action methods which will create a new employee record. The code is given below.
using EFCoreExample.Models;
using Microsoft.AspNetCore.Mvc;
using Microsoft.AspNetCore.Mvc.Rendering;
using Microsoft.EntityFrameworkCore;

namespace EFCoreExample.Controllers
{
    public class EmployeeController : Controller
    {
        private CompanyContext context;
        public EmployeeController(CompanyContext cc)
        {
            context = cc;
        }

        public IActionResult Index()
        {
            return View();
        }

        public IActionResult Create()
        {
            List<SelectListItem> dept = new List<SelectListItem>();
            dept = context.Department.Select(x => new SelectListItem { Text = x.Name, Value = x.Id.ToString() }).ToList();
            ViewBag.Department = dept;

            return View();
        }

        [HttpPost]
        public async Task<IActionResult> Create(Employee emp)
        {
            context.Add(emp);
            await context.SaveChangesAsync();
            return RedirectToAction("Index");
        }
    }
}
There is one-to-many relationship between employee and department. So we also have to insert a department for every empoyee. The departments are fetched from department entity, then they are converted to a List<SelectListItem> object and added to a Viewbag variable.
List<SelectListItem> dept = new List<SelectListItem>();
dept = context.Department.Select(x => new SelectListItem { Text = x.Name, Value = x.Id.ToString() }).ToList();
ViewBag.Department = dept;
On the view we will read the Viewbag value and show the departments in an HTML SELECT control.
We can also use the TryUpdateModelAsync method on the create action method. Remove the post version of Create action and replace with with the below given one.
[HttpPost]
[ActionName("Create")]
public async Task<IActionResult> Create_Post()
{

    var emptyEmployee = new Employee();

    if (await TryUpdateModelAsync<Employee>(emptyEmployee, "", s => s.Name, s => s.DepartmentId, s => s.Designation))
    {
        context.Employee.Add(emptyEmployee);
        await context.SaveChangesAsync();
        return RedirectToAction("Index");
    }

    return View();
}
In the above code we are creating an empty employee object and then adding 3 value – Name, DepartmentId and Designation to it with lambda expression.
s => s.Name, s => s.DepartmentId, s => s.DesignationThese employee values are provided by Model Binding when the form given on the razor view file is submitted. After that we are checking if the TryUpdateModelAsync returns true which is the case when the empty employee object is successfully provided with values through the lambda expression. So in that case we are adding the employee record to the database context and then inserting the record to the database by using Entity Framework Core SaveChangesAsync method.
context.SaveChangesAsync();Next, add a razor view file called Create.cshtml inside the “Views/Employee” folder with the following code.
@{
	ViewData["Title"] = "Create Employee";
}

@model Employee

<h1 class="bg-info text-white">Create Employee</h1>
<a asp-action="Index" class="btn btn-secondary">Back</a>

<form method="post">
	<div class="form-group">
		<label asp-for="Name"></label>
		<input asp-for="Name" class="form-control" />
	</div>
	<div class="form-group">
		<label asp-for="Department"></label>
		<select asp-for="DepartmentId" asp-items="ViewBag.Department" class="form-control"></select>
	</div>
	<div class="form-group">
		<label asp-for="Designation"></label>
		<input asp-for="Designation" class="form-control" />
	</div>
	<button type="submit" class="btn btn-primary">Create</button>
</form>
Notice how all the departments are shown in the select control with the following razor code.
<select asp-for="DepartmentId" asp-items="ViewBag.Department" class="form-control"></select>We can now run the app and go to the url – https://localhost:7018/Employee/Create.. We will see the employee form with departments shown in a select control. Check the below image. Fill and submit the form to create a new record in the database.

Download the source codes:
We learned how to use Entity Framework Core to create records in the database. Records can be inserted one at a time or in batches. We also understood how to insert related records and created a CRUD OPERATIONS feature at the end. In the next tutorial we will cover the Reading part and add the read records feature to the CRUD OPERATIONS so continue this at Read Records in Entity Framework Core.
SHARE THIS ARTICLE
Related Tutorials:


ABOUT THE AUTHOR
I hope you enjoyed reading this tutorial. If it helped you then consider buying a cup of coffee for me. This will help me in writing more such good tutorials for the readers. Thank you.

HELLO EVERYONE
 Welcome to YogiHosting - A Programming Tutorial Website. It is used by millions of people around the world to learn and explore about ASP.NET Core, Blazor, jQuery, JavaScript, Docker, Kubernetes and other topics.
SUBSCRIBE TO NEWSLETTER
Enter your email address to subscribe to this blog and receive notifications of new posts by email.
Join 90K other subscribers