Xaero – Entity Framework Core Advanced Project [Updated .NET 9.0]
![Xaero – Entity Framework Core Advanced Project [Updated .NET 9.0] Xaero – Entity Framework Core Advanced Project [Updated .NET 9.0]](https://www.yogihosting.com/wp-content/uploads/2020/10/Xaero-entity-framework-core-advanced-project.png)
“Xaero” is a an Entity Framework Core project built in ASP.NET Core. It powers a Movie Database application. Entity Framework core (EF Core) is the modern and popular Object/Relational Mapper (O/RM) framework by Microsoft. In this tutorial we will build a Very Advanced Project from scratch so make sure you read this tutorial from start till end.
We will use the following frameworks/programming languages to build this project:
- 1. ASP.NET Core 9.0 with C#
- 2. Entity Framework Core
- 3. SQL Server Express LocalDB
- 4. Bootstrap
- 5. JavaScript
You can download this project from my GitHub Repository.
Page Contents
Project information in short
This project will power a Movie Database application. It will communicate with the database through Entity Framework Core O/RM. The database will have 3 main tables for keeping information about Movies, Distributions & Production Companies, plus there will be the relationships among them. The Database Diagram is shown in the below image:
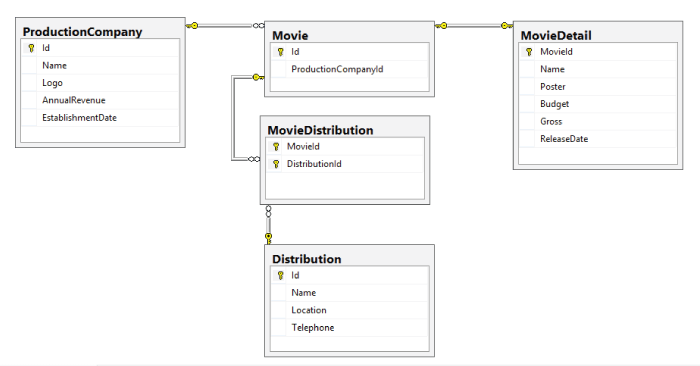
The relationships between the database tables are:
1. One-to-Many Relationship
The Movie & ProductionCompany database tables will have One-to-Many Relationship. This means One Production Company can have Many Movies or many movies can have the same production company.
2. One-to-One Relationship
The Movie & MovieDetail database tables will have One-to-One Relationship. This means One Movie will have exactly one record in “MovieDetail” table and vice versa.
3. Many-to-Many Relationship
The Movie & Distribution database tables will have Many-to-Many Relationship. This means One Movie can be associated with multiple Distributions and similarly one Distribution can be associated with multiple movies.
To create this Many-to-Many Relationship between these 2 table, we have used a separate database table called MovieDistribution. You can refer it in the database diagram image.
The CRUD Operations on the Movie Database will be performed with EF Core.
This project will help ASP.NET Core programmers with little or absolutely no Entity Framework Core knowledge. They will learn to work with EF Core and create excellent database driven applications.
Programmers will learn how relationships like One-to-Many, One-to-One & Many-to-Many are integrated to database tables and how CRUD operations are performed on them. The scenarios covered are:
- Creating records on a single or multiple database tables at the same time.
- Reading single, multiple and related records from DB tables.
- Update records entries in a single or multiple database tables at the same time.
- Deleting record entries from a single or multiple tables at the same time.
So let us start building this project from scratch.
Project
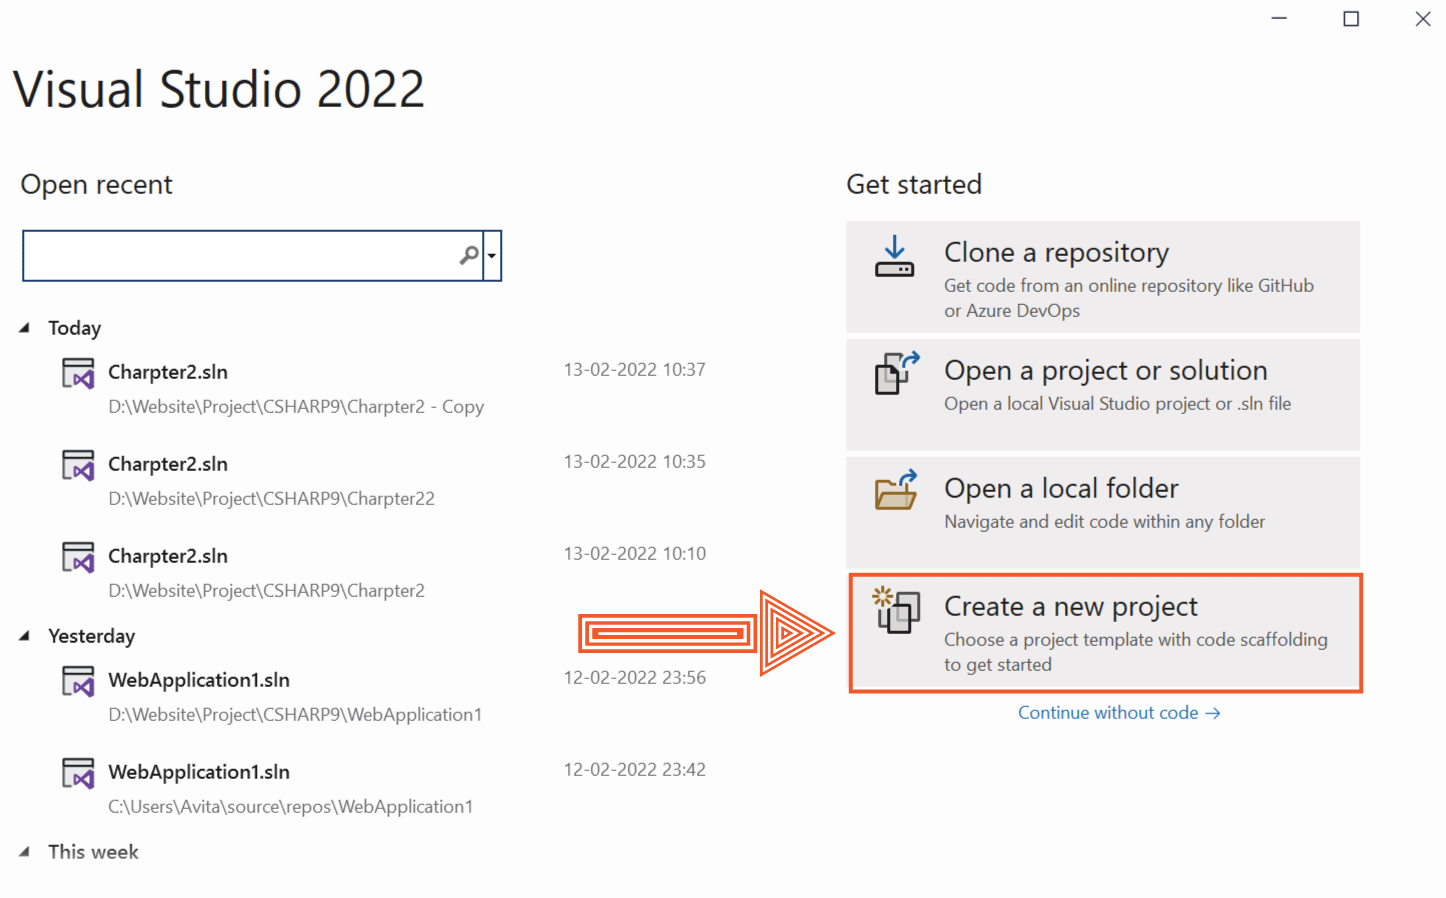
Open Visual Studio 2022, then select Create a new project.
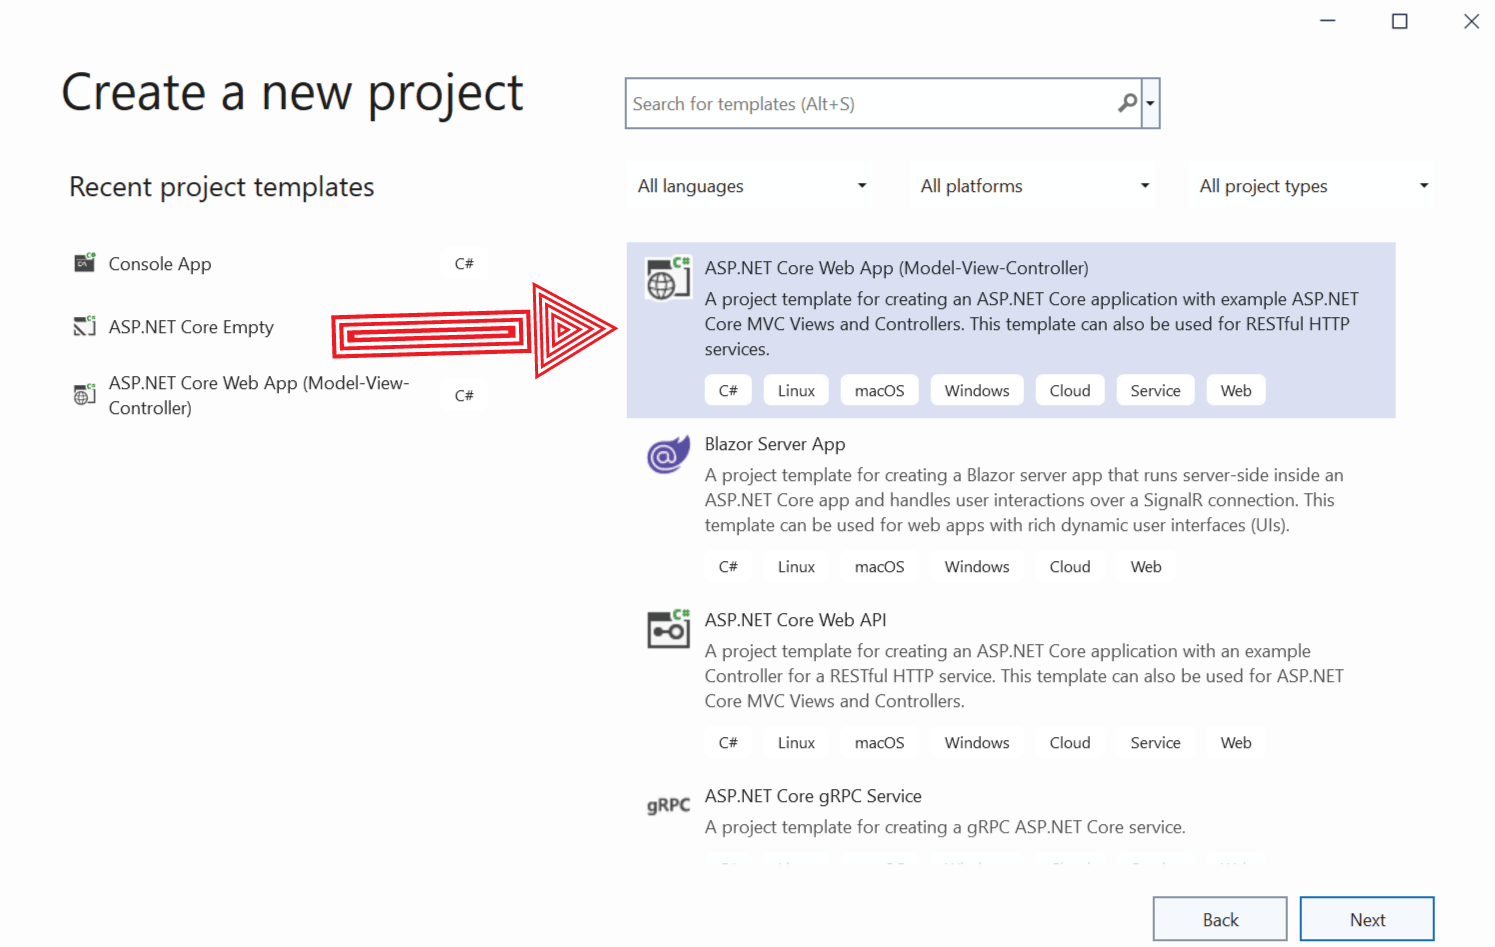
Next, select the template called ASP.NET Core Web App (Model-View-Controller), and then click the “Next” button.
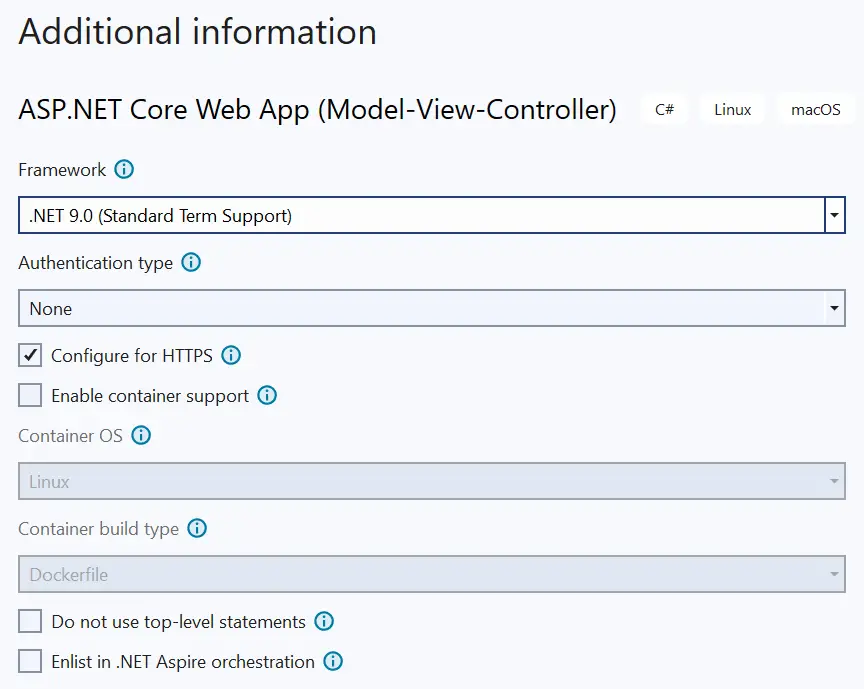
Name the project as Xaero and select the latest version of .NET. We have taken DOT NET version 9.0 for this project and kept rest of the settings as defaults.
Next we will perform the Installation of Entity Framework Core in the project. So open the Package Manager Console and run the following command to install the latest version of Microsoft.EntityFrameworkCore.SqlServer package.
PM> Install-Package Microsoft.EntityFrameworkCore.SqlServerNext, install the Microsoft.EntityFrameworkCore.Design package from NuGet.

Also update dotnet ef to the latest version. The command is given below:
dotnet tool update --global dotnet-efEntity Classes
First we will need to create 5 Entity Classes inside the Models folder of the project. These entity classes are:
The ProductionCompany.cs class is the entity for Production Company. It will manage the details of the production companies stored in the database.
The code of the ProductionCompany.cs class is given below. Note that the DataAnnotations Attributes applied to it’s properties are meant for doing validations on the View and not for setting the data types for the database tables. We will instead use Fluent API for configuring the Database Schema.
using System.ComponentModel.DataAnnotations;

namespace Xaero.Models
{
    public class ProductionCompany
    {
        public int Id { get; set; }

        [Required]
        [StringLength(50)]
        public string Name { get; set; }

        [Required]
        public string Logo { get; set; }

        [Required]
        [DisplayFormat(DataFormatString = "{0:n2}", ApplyFormatInEditMode = true)]
        public decimal AnnualRevenue { get; set; }

        [Required]
        public DateTime EstablishmentDate { get; set; }

        public ICollection<Movie> Movie_R { get; } = new List<Movie>(); // one-to-Many with Movie
    }
}
The property called Movie_R is a Collection Navigation Property of Movie type which will be used to create One-to-Many Relationship between the ProductionCompany & Movie tables of the database. We have covered this topic in another tutorial called Conventions in Entity Framework Core.
The Movie.cs class will be the entity for the Movie object. It is given below:
namespace Xaero.Models
{
    public class Movie
    {
        public int Id { get; set; }

        public int ProductionCompanyId { get; set; } // foreign key to ProductionCompany
        public ProductionCompany ProductionCompany_R { get; set; } = null!; // one-to-Many with ProductionCompany

        public MovieDetail MovieDetail_R { get; set; } // one-to-one with MovieDetail
        public List<MovieDistribution> MovieDistribution_R { get; } = []; // Many-to-Many with Distribution
    }
}
The ProductionCompanyId will be the foreign key for this table (i.e. the parent value will be the Id column of the ProductionCompany table).
It has 2 Reference Navigation Properties which are – ProductionCompany_R & MovieDetail_R. It also has a Collection Navigation Property called MovieDistribution_R.
The ProductionCompany_R is of type ProductionCompany and used for creating One-to-Many relationship with the ProductionCompany entity class.
The MovieDetail_R is of type MovieDetail and used for creating One-to-One relationship with the MovieDetail entity class.
Finally there is MovieDistribution_R is of type List<Distribution> and used for creating Many-to-Many relationship with the Distribution entity class. We will explain more on this later on.
The MovieDetails.cs class contains the full information about the Movies. It is shown below.
using System.ComponentModel.DataAnnotations;

namespace Xaero.Models
{
    public class MovieDetail
    {
        public int Id { get; set; }

        [Required]
        [StringLength(50)]
        public string Name { get; set; }

        public string Poster { get; set; }

        [Required]
        [DisplayFormat(DataFormatString = "{0:n2}", ApplyFormatInEditMode = true)]
        public decimal Budget { get; set; }

        [Required]
        [DisplayFormat(DataFormatString = "{0:n2}", ApplyFormatInEditMode = true)]
        public decimal Gross { get; set; }

        [Required]
        public DateTime ReleaseDate { get; set; }

        public int MovieId { get; set; } // foreign key to Movie

        public Movie Movie_R { get; set; } = null!; // one-to-one with Movie
    }
}
The MovieId column will be the foreign key for this table (i.e. the parent value will be the Id column of the Movie table).
The Movie_R of type Movie is creating One-to-One Relationship between this entity and the Movie.cs.
The Distribution.cs class will be the entity for the Distribution. It is given below:
using System.ComponentModel.DataAnnotations;

namespace Xaero.Models
{
    public class Distribution
    {
        public int Id { get; set; }

        [Required]
        [StringLength(50)]
        public string Name { get; set; }

        [Required]
        public string Location { get; set; }

        [Required]
        public string Telephone { get; set; }

        public List<MovieDistribution> MovieDistribution_R { get; } = []; // Many-to-Many with Movie
    }
}
The field called MovieDistribution_R is of type List<Movie> and is used to create Many-to-Many Relationship between Distribution & Movie entities.
The MovieDistribution entity will be the join entity for the “Movie” & “Distribution” entities. This entity will be needed to create Many-to-Many relationship between Movie and Distribution.
This table will contains foreign keys to both Movie and Distribution tables.
namespace Xaero.Models
{
    public class MovieDistribution
    {
        public int MovieId { get; set; } //foreign key property
        public int DistributionId { get; set; } //foreign key property

        public Movie Movie_R { get; set; } = null!; //Reference navigation property
        public Distribution Distribution_R { get; set; } = null!; //Reference navigation property
    }
}
Database Context Class
Create the Database Context Class called MovieContext.cs inside the Models folder. It’s code is given below.
using Microsoft.EntityFrameworkCore;

namespace Xaero.Models
{
    public class MovieContext : DbContext
    {
        public MovieContext(DbContextOptions<MovieContext> options) : base(options)
        {
        }

        public DbSet<ProductionCompany> ProductionCompany { get; set; }
        public DbSet<Movie> Movie { get; set; }
        public DbSet<MovieDetail> MovieDetail { get; set; }
        public DbSet<Distribution> Distribution { get; set; }
        public DbSet<MovieDistribution> MovieDistribution { get; set; }

        protected override void OnConfiguring(DbContextOptionsBuilder optionsBuilder)
        {
        }

        protected override void OnModelCreating(ModelBuilder modelBuilder)
        {
            // ProductionCompany
            modelBuilder.Entity<ProductionCompany>().HasKey(s => s.Id);

            modelBuilder.Entity<ProductionCompany>(entity =>
            {
                entity.Property(e => e.Name)
                    .IsRequired()
                    .HasMaxLength(50);

                entity.Property(e => e.Logo)
                    .IsRequired();

                entity.Property(e => e.AnnualRevenue)
                    .IsRequired()
                    .HasColumnType("Money");

                entity.Property(e => e.EstablishmentDate)
                    .IsRequired()
                    .HasColumnType("Date");
            });

            // Movie
            modelBuilder.Entity<Movie>().HasKey(s => s.Id);

            modelBuilder.Entity<Movie>()
                    .HasOne(e => e.ProductionCompany_R)
                    .WithMany(e => e.Movie_R)
                    .HasForeignKey(e => e.ProductionCompanyId)
                    .OnDelete(DeleteBehavior.Cascade);

            // MovieDetail
            modelBuilder.Entity<MovieDetail>().HasKey(s => s.Id);

            modelBuilder.Entity<MovieDetail>()
                    .HasOne(e => e.Movie_R)
                    .WithOne(e => e.MovieDetail_R)
                    .HasForeignKey<MovieDetail>(e => e.MovieId)
                    .OnDelete(DeleteBehavior.Cascade);

            modelBuilder.Entity<MovieDetail>(entity =>
            {
                entity.Property(e => e.Id)
                    .IsRequired();

                entity.Property(e => e.MovieId)
                    .IsRequired();

                entity.Property(e => e.Name)
                    .IsRequired()
                    .HasMaxLength(50);

                entity.Property(e => e.Poster)
                    .IsRequired();

                entity.Property(e => e.Budget)
                    .IsRequired()
                    .HasColumnType("Money"); ;

                entity.Property(e => e.Gross)
                    .IsRequired();

                entity.Property(e => e.ReleaseDate)
                    .IsRequired()
                    .HasColumnType("Date");
            });

            // Distribution
            modelBuilder.Entity<Distribution>().HasKey(s => s.Id);

            modelBuilder.Entity<Distribution>(entity =>
            {
                entity.Property(e => e.Name)
                    .IsRequired()
                    .HasMaxLength(50);

                entity.Property(e => e.Location)
                    .IsRequired();

                entity.Property(e => e.Telephone)
                    .IsRequired();
            });

            // MovieDistribution
            modelBuilder.Entity<MovieDistribution>().HasKey(t => new { t.MovieId, t.DistributionId });
            modelBuilder.Entity<MovieDistribution>()
                        .HasOne(t => t.Movie_R)
                        .WithMany(t => t.MovieDistribution_R)
                        .HasForeignKey(t => t.MovieId);
            modelBuilder.Entity<MovieDistribution>()
                        .HasOne(t => t.Distribution_R)
                        .WithMany(t => t.MovieDistribution_R)
                        .HasForeignKey(t => t.DistributionId);
        }
    }
}
Inside the OnModelCreating method we have used Entity Framework Core Fluent APIs to configure models for database mappings, Primary Key, Foreign Key and Relationships.
For the Movie Entity we have set it’s primary key like:
modelBuilder.Entity<Movie>().HasKey(s => s.Id);Then we have configured it’s One-to-Many Relationship with the MovieDetail entity along with setting the Foreign Key (i.e ‘ProductionCompanyId’) and Cascade Delete behaviour like:
modelBuilder.Entity<Movie>()
            .HasOne(e => e.ProductionCompany_R)
            .WithMany(e => e.Movie_R)
            .HasForeignKey(e => e.ProductionCompanyId)
            .OnDelete(DeleteBehavior.Cascade);
The Movie entity field called ProductionCompanyId will serve as the Foreign Key for the ProductionComany entity. With the OnDelete() method we have set the DeleteBehavior setting to Cascade. This means when the Parent entity i.e. here ‘ProductionCompany’ database table record is deleted then all it’s child records in the Movie table are also deleted.
Another thing to note is the configurations done for the Many-to-Many Relationship. Through HasKey method we have declared MovieId and DistributionId to be composite primary key for this table.
modelBuilder.Entity<MovieDistribution>().HasKey(t => new { t.MovieId, t.DistributionId });
modelBuilder.Entity<MovieDistribution>()
            .HasOne(t => t.Movie_R)
            .WithMany(t => t.MovieDistribution_R)
            .HasForeignKey(t => t.MovieId);
modelBuilder.Entity<MovieDistribution>()
            .HasOne(t => t.Distribution_R)
            .WithMany(t => t.MovieDistribution_R)
.HasForeignKey(t => t.DistributionId);Database Connection String in appsettings.json
Next add the below given Database Connection String in the appsettings.json file. Our database name will be “MovieDB” which you can change if you wish to.
{
  "ConnectionStrings": {
    "DefaultConnection": "Data Source=(localdb)\\MSSQLLocalDB;Initial Catalog=MovieDB;Integrated Security=True;Connect Timeout=30;Encrypt=False;TrustServerCertificate=False;ApplicationIntent=ReadWrite;MultiSubnetFailover=False"
  }
}
Register the Database Context
Now register the Database Context which is the MovieContext.cs as a service in the Program.cs class. The code which does this thing is:
builder.Services.AddDbContext<MovieContext>(options =>
  options.UseSqlServer(builder.Configuration.GetConnectionString("DefaultConnection")));
Here we are fetching the connection string from the appsettings.json file. The recommended tutorial to read is Storing DB Connection String in appsettings.json.
Performing Migrations in Entity Framework Core
Now it’s time to perform Entity Framework Core Migrations in order to create the database. Migrations need to run from the folder of the “.proj” file so with “cd” command we navigate to this folder.
cd XaeroNow in the Package Manager Console run the following 2 commands one by one
PM> dotnet ef migrations add Migration1
PM> dotnet ef database update
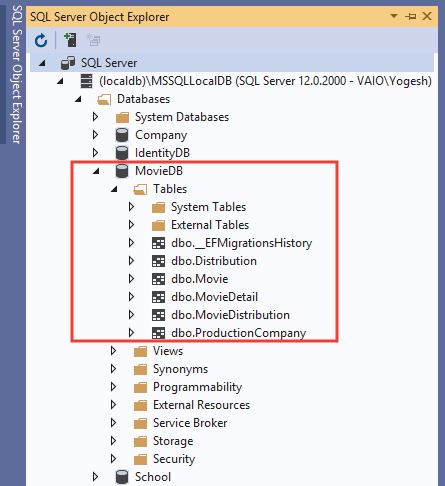
When the migration commands finish executing, they will create the database along with the tables for the entities. Verfy the database in the SQL Server Object Explorer. See the below image which shows this database along with it’s tables.
Bootstrap
We will be using Bootstrap framework for styling the Views to a proper design. Bootstrap files are provided inside the wwwroot/lib/bootstrap folder. More on this at Install Bootstrap from LibMan.
Layout, View Imports & View Start files
The _Layout.cshtml razor view file is inside the Views ➤ Shared folder. It gives the common layout to the app.
There is also _ViewStart.cshtml file inside the Views folder to specify the use of a common layout file for all views. It’s code is given below.
@{
    Layout = "_Layout";
}
You will also find _ViewImports.cshtml file inside the Views folder. Here we import the Models namespace and Built-In Tag Helpers. The code is given below.
@using Xaero
@using Xaero.Models
@addTagHelper *, Microsoft.AspNetCore.Mvc.TagHelpersWe will start with the creation of Production Company features which will include CRUD operation like Creation, Reading, Updation and Deletion of records. We will have 4 actions for performing each of these things.
“Create” Production Company feature
Here we will create Production Company records in the database using Entity Framework Core. The working of this feature is shown in the below given video:
Start by adding a new controller called ProductionController.cs inside the Controllers folder of your project.
In this controller 2 objects are provided with dependency injection. These objects are:
- 1. MovieContext which is the database context class.
- 2. IWebHostEnvironment of the Microsoft.AspNetCore.Hosting namespace. It provides information about web hosting. This object will help us to upload the logo image of the production company inside the wwwroot folder.
Also add the Create action method which does the actual creation of the production companies records. We have shown all these in the codes which are highlighted (see below).
using Microsoft.AspNetCore.Mvc;
using Xaero.Models;

namespace Xaero.Controllers
{
    public class ProductionController : Controller
    {
        private MovieContext context;
        private IWebHostEnvironment hostingEnvironment;
        public ProductionController(MovieContext mc, IWebHostEnvironment environment)
        {
            context = mc;
            hostingEnvironment = environment;
        }

        public IActionResult Create()
        {
            return View();
        }

        [HttpPost]
        public async Task<IActionResult> Create(ProductionCompany pc, IFormFile Logo)
        {
            if (Logo == null)
                ModelState.AddModelError(nameof(pc.Logo), "Please select logo file");
            else
            {
                string path = "Images/Production/" + Logo.FileName;
                using (var stream = new FileStream(Path.Combine(hostingEnvironment.WebRootPath, path), FileMode.Create))
                {
                    await Logo.CopyToAsync(stream);
                }
                pc.Logo = "~/" + path;
                ModelState.Remove(nameof(pc.Logo));
            }

            if (ModelState.IsValid)
            {
                var productionCompany = new ProductionCompany()
                {
                    Name = pc.Name,
                    Logo = pc.Logo,
                    AnnualRevenue = pc.AnnualRevenue,
                    EstablishmentDate = pc.EstablishmentDate
                };

                context.Add(productionCompany);
                await context.SaveChangesAsync();

                return RedirectToAction("Index");
            }
            else
                return View();
        }

        public IActionResult Index()
        {
            return View();
        }
    }
}
Points to be noted:
1. The Logo of the Production Company is uploaded to the Images/Production folder which is kept inside the wwwroot folder.
2. The parameter of the create action is IFormFile Logo. It will get the logo image submitted from the view through the technique of Model Binding.
3. The EF Core codes that insert the record in the database is:
var productionCompany = new ProductionCompany()
{
    Name = pc.Name,
    Logo = "~/" + path,
    AnnualRevenue = pc.AnnualRevenue,
    EstablishmentDate = pc.EstablishmentDate
};

context.Add(productionCompany);
await context.SaveChangesAsync();
4. Once the insert has been completed the redirection to the Index action is performed.
Finally add the Create razor view file called Create.cshtml inside the Views ➤ Production folder with the following code:
@model ProductionCompany

@{
    ViewData["Title"] = "Create a Production";
}

<h1 class="bg-info text-white">Create a Production</h1>
<a asp-action="Index" class="btn btn-secondary">View all Productions</a>

<div asp-validation-summary="All" class="text-danger"></div>

<form method="post" enctype="multipart/form-data">
    <div class="form-group">
        <label asp-for="Name"></label>
        <input type="text" asp-for="Name" class="form-control" />
        <span asp-validation-for="Name" class="text-danger"></span>
    </div>
    <div class="form-group">
        <label asp-for="Logo"></label>
        <input type="file" asp-for="Logo" class="form-control" />
        <span asp-validation-for="Logo" class="text-danger"></span>
    </div>
    <div class="form-group">
        <label asp-for="AnnualRevenue"></label>
        <input type="text" asp-for="AnnualRevenue" class="form-control" />
        <span asp-validation-for="AnnualRevenue" class="text-danger"></span>
    </div>
    <div class="form-group">
        <label asp-for="EstablishmentDate"></label>
        <input type="date" asp-for="EstablishmentDate" class="form-control" />
        <span asp-validation-for="EstablishmentDate" class="text-danger"></span>
    </div>
    <button type="submit" class="btn btn-primary">Create</button>
</form>
Now create the wwwroot/Images/Production folder where the Production Companies Logo files will be uploaded.
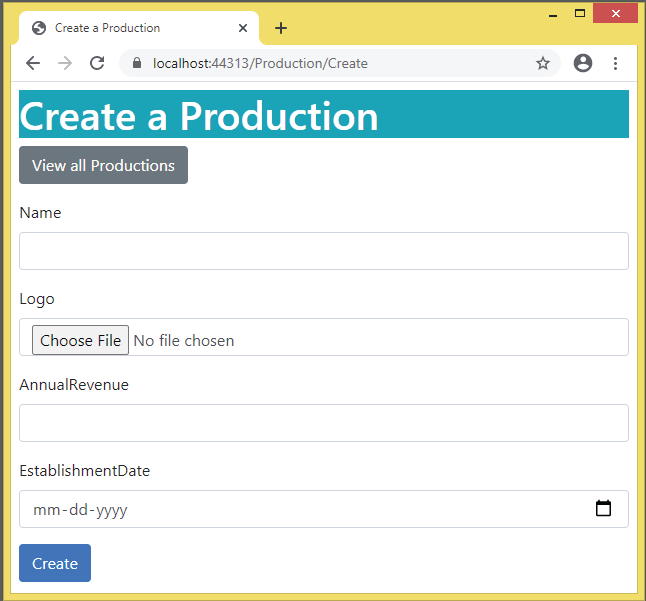
It’s time to see how the Create View looks so run the project and go to the Create View’s URL which in our case is https://localhost:44313/Production/Create. It will look like shown in the below image:
“Read” Production Company feature
Now we will create the Read Feature for Production Companies. We will use the Index Action to perform this task. Users will be able to see all the Production Companies Records on the view plus there will be features like:
- 1. Records will be shown with Paging of 3 (or anything we wish). So there will be numbered based paging.
- 2. Users can Sort the records in both Ascending and Descending manner.
The full working of this Read Production Company feature is shown by the below video:
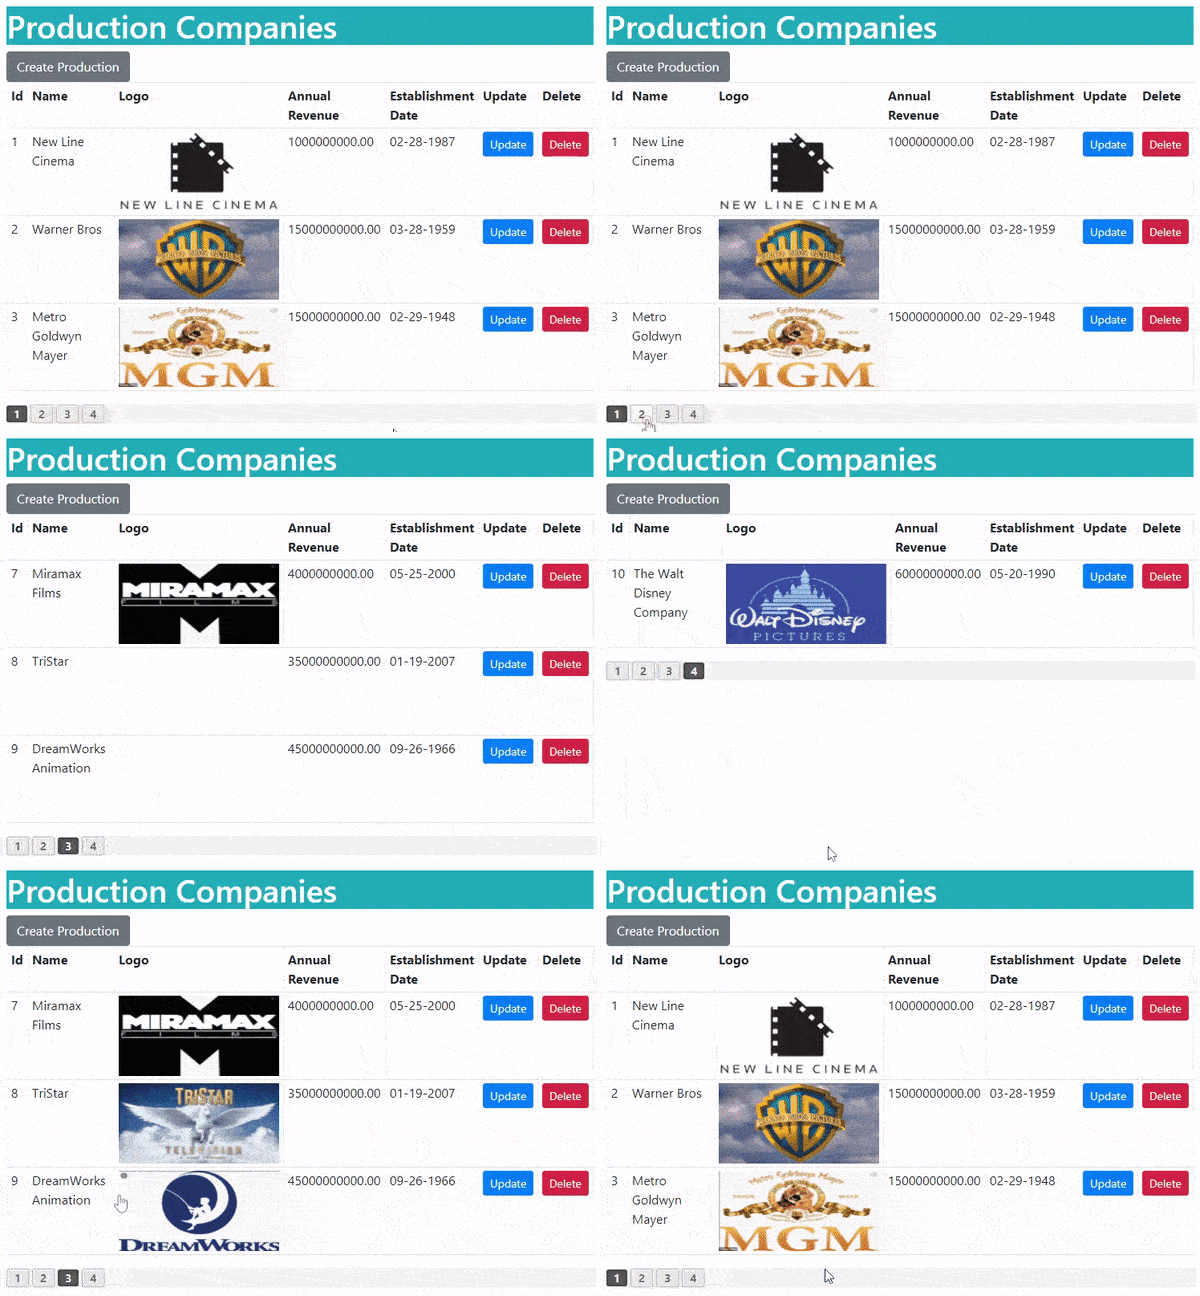
Note that the URL of the first page will be – https://localhost:44313/Production, the second page url will be – https://localhost:44313/Production/2. Similarly the 10’th page url will be https://localhost:44313/Production/10 and so on.
To create this feature we have to do 8 changes in total. Let us go through them one by one.
Add the Index action method to the ProductionController.cs file. The code is shown below:
using Microsoft.AspNetCore.Mvc;
using Xaero.Models;
using Xaero.Infrastructure;

namespace Xaero.Controllers
{
    public class ProductionController : Controller
    {
        private MovieContext context;
        private IWebHostEnvironment hostingEnvironment;
        public ProductionController(MovieContext mc, IWebHostEnvironment environment)
        {
            context = mc;
            hostingEnvironment = environment;
        }

        // other actions

        public IActionResult Index(int id)
        {
            int pageSize = 3;

            PagingInfo pagingInfo = new PagingInfo();
            pagingInfo.CurrentPage = id == 0 ? 1 : id;
            pagingInfo.TotalItems = context.ProductionCompany.Count();
            pagingInfo.ItemsPerPage = pageSize;

            var skip = pageSize * (Convert.ToInt32(id) - 1);
            ViewBag.PagingInfo = pagingInfo;
            var pc = context.ProductionCompany.Skip(skip).Take(pageSize).ToList();

            return View(pc);
        }
    }
}
Points to note:
- First we get the current page number in the parameter of the action method through a feature called Model Binding. Then we have used another class called PagingInfo.cs to contain the paging information. This paging information will be used to create the pagination on the view.
- We have set the Page Size as 3 through the code line int pageSize = 3 . You can change it to whatever number you want.
- The PagingInfo object is sent to the View using ViewBag as ViewBag.PagingInfo = pagingInfo. Then on the View we will create the paging links using a Custom Tag Helper. We will create this Tag Helper in just a moment.
- The current records of a page are fetched by Entity Framework Core from the database using the below 2 code lines:
var skip = pageSize * (Convert.ToInt32(id) - 1);
var pc = context.ProductionCompany.Skip(skip).Take(pageSize).ToList();
Notice we have used the Skip() and Take() methods of LINQ to fetch the current page records only. This will make the feature lighter and faster at the same time.
As discussed earlier, the work of this Paging class is to contain the paging information. This class’s object will be set with paging values in the action method and is then send to the view through ViewBag variable.
Create a new folder called Infrastructure on the root of the project and create a new class called PagingInfo.cs inside it. The class code it given below:
namespace Xaero.Infrastructure
{
    public class PagingInfo
    {
        public int TotalItems { get; set; }
        public int ItemsPerPage { get; set; }
        public int CurrentPage { get; set; }
        public int TotalPages
        {
            get
            {
                return (int)Math.Ceiling((decimal)TotalItems /
                    ItemsPerPage);
            }
        }
    }
}
Next, we need to create the Index.cshtml razor view inside the Views ➤ Production folder. It’s full code is shown below:
@model List<ProductionCompany>

@{
    ViewData["Title"] = "Production Companies";
}

<h1 class="bg-info text-white">Production Companies</h1>
<a asp-action="Create" class="btn btn-secondary">Create Production</a>

<table class="table table-sm table-bordered">
    <tr>
        <th>Id</th>
        <th>Name</th>
        <th>Logo</th>
        <th>Annual Revenue</th>
        <th>Establishment Date</th>
        <th>Update</th>
        <th>Delete</th>
    </tr>
    @foreach (ProductionCompany pc in Model)
    {
        <tr>
            <td>@pc.Id</td>
            <td>@pc.Name</td>
            <td><img src="@Url.Content(pc.Logo)" /></td>
            <td>@pc.AnnualRevenue.ToString("F2")</td>
            <td>@pc.EstablishmentDate.ToString("d")</td>
            <td>
                <a class="btn btn-sm btn-primary" asp-action="Update" asp-route-id="@pc.Id">
                    Update
                </a>
            </td>
            <td>
                <form asp-action="Delete" asp-route-id="@pc.Id" method="post">
                    <button type="submit" class="btn btn-sm btn-danger">
                        Delete
                    </button>
                </form>
            </td>
        </tr>
    }
</table>

<div class="pagingDiv" page-model="@ViewBag.PagingInfo" page-action="Index" page-classes-enabled="true" page-class="paging" page-class-selected="active"></div>
This view receives list of production companies in it’s model and then loops through them and show them inside an HTML table. The last line of code shows the creation of Paging Links by a Custom Tag Helper and consuming the paging information that the ViewBag variable is having.
<div class="pagingDiv" page-model="@ViewBag.PagingInfo" page-action="Index" page-classes-enabled="true" page-class="paging" page-class-selected="active"></div>Create a class called PageLinkTagHelper.cs inside the Infrastructure folder. Next add the below given code for creating a Custom Tag Helper.
using Microsoft.AspNetCore.Mvc.Rendering;
using Microsoft.AspNetCore.Mvc.Routing;
using Microsoft.AspNetCore.Mvc.ViewFeatures;
using Microsoft.AspNetCore.Mvc;
using Microsoft.AspNetCore.Razor.TagHelpers;
using System.Dynamic;

namespace Xaero.Infrastructure
{
    [HtmlTargetElement("div", Attributes = "page-model")]
    public class PageLinkTagHelper : TagHelper
    {
        private IUrlHelperFactory urlHelperFactory;

        public PageLinkTagHelper(IUrlHelperFactory helperFactory)
        {
            urlHelperFactory = helperFactory;
        }

        [ViewContext]
        [HtmlAttributeNotBound]
        public ViewContext ViewContext { get; set; }

        /*Accepts all attributes that are page-other-* like page-other-category="@Model.allTotal" page-other-some="@Model.allTotal"*/
        [HtmlAttributeName(DictionaryAttributePrefix = "page-other-")]
        public Dictionary<string, object> PageOtherValues { get; set; } = new Dictionary<string, object>();

        public PagingInfo PageModel { get; set; }

        public string PageAction { get; set; }

        public bool PageClassesEnabled { get; set; } = false;

        public string PageClass { get; set; }

        public string PageClassNormal { get; set; }

        public string PageClassSelected { get; set; }

        public override void Process(TagHelperContext context, TagHelperOutput output)
        {
            IUrlHelper urlHelper = urlHelperFactory.GetUrlHelper(ViewContext);
            TagBuilder result = new TagBuilder("div");
            string anchorInnerHtml = "";

            for (int i = 1; i <= PageModel.TotalPages; i++)
            {
                TagBuilder tag = new TagBuilder("a");
                anchorInnerHtml = AnchorInnerHtml(i, PageModel);

                if (anchorInnerHtml == "..")
                    tag.Attributes["href"] = "#";
                else if (PageOtherValues.Keys.Count != 0)
                    tag.Attributes["href"] = urlHelper.Action(PageAction, AddDictionaryToQueryString(i));
                else
                    tag.Attributes["href"] = urlHelper.Action(PageAction, new { id = i });

                if (PageClassesEnabled)
                {
                    tag.AddCssClass(PageClass);
                    tag.AddCssClass(i == PageModel.CurrentPage ? PageClassSelected : "");
                }
                tag.InnerHtml.Append(anchorInnerHtml);
                if (anchorInnerHtml != "")
                    result.InnerHtml.AppendHtml(tag);
            }
            output.Content.AppendHtml(result.InnerHtml);
        }

        public IDictionary<string, object> AddDictionaryToQueryString(int i)
        {
            object routeValues = null;
            var dict = (routeValues != null) ? new RouteValueDictionary(routeValues) : new RouteValueDictionary();
            dict.Add("id", i);
            foreach (string key in PageOtherValues.Keys)
            {
                dict.Add(key, PageOtherValues[key]);
            }

            var expandoObject = new ExpandoObject();
            var expandoDictionary = (IDictionary<string, object>)expandoObject;
            foreach (var keyValuePair in dict)
            {
                expandoDictionary.Add(keyValuePair);
            }

            return expandoDictionary;
        }

        public static string AnchorInnerHtml(int i, PagingInfo pagingInfo)
        {
            string anchorInnerHtml = "";
            if (pagingInfo.TotalPages <= 10)
                anchorInnerHtml = i.ToString();
            else
            {
                if (pagingInfo.CurrentPage <= 5)
                {
                    if ((i <= 8) || (i == pagingInfo.TotalPages))
                        anchorInnerHtml = i.ToString();
                    else if (i == pagingInfo.TotalPages - 1)
                        anchorInnerHtml = "..";
                }
                else if ((pagingInfo.CurrentPage > 5) && (pagingInfo.TotalPages - pagingInfo.CurrentPage >= 5))
                {
                    if ((i == 1) || (i == pagingInfo.TotalPages) || ((pagingInfo.CurrentPage - i >= -3) && (pagingInfo.CurrentPage - i <= 3)))
                        anchorInnerHtml = i.ToString();
                    else if ((i == pagingInfo.CurrentPage - 4) || (i == pagingInfo.CurrentPage + 4))
                        anchorInnerHtml = "..";
                }
                else if (pagingInfo.TotalPages - pagingInfo.CurrentPage < 5)
                {
                    if ((i == 1) || (pagingInfo.TotalPages - i <= 7))
                        anchorInnerHtml = i.ToString();
                    else if (pagingInfo.TotalPages - i == 8)
                        anchorInnerHtml = "..";
                }
            }
            return anchorInnerHtml;
        }
    }
}
Points to note:
- The class derives from TagHelper and so it becomes a Tag Helper. The attributes –
[HtmlTargetElement("div", Attributes = "page-model")]applied to it says that the tag helper can be applied on only an html div element and must have the attribute called page-model. - The value of ViewBag.PagingInfo send to it by the View is received in it’s PageModel property –
public PagingInfo PageModel { get; set; }. Similarly the page-action value is received by the PageAction property and so on. - The Process() method of the Tag Helper uses these values, send by the View, to create paging links. It calls the AnchorInnerHtml method which is the brain of this feature and checks the current page value and creates paging links based on this value. These links will be shown on the view inside the div element.
- We can also send more values to this Tag Helper using attributes like page-other-some, page-other-some2, etc. These values are received by the PageOtherValues property of the tag helper. Note that this property is of type Dictionary.
- The AddDictionaryToQueryString() method loops through all the values of the PageOtherValues property and then adds them to the query sting value of the URL. We can use these values to add more features like searching and so on.
Register this Custom Tag Helper inside the View Imports file. The below highlighted code line is the one which we have to add to the _ViewImports.cshtml file.
@using Xaero
@using Xaero.Models
@addTagHelper *, Microsoft.AspNetCore.Mvc.TagHelpers
@addTagHelper Xaero.Infrastructure.PageLinkTagHelper, Xaero
We will need to add some CSS for the paging links. We can do this by adding the CSS directly to the _Layout.cshtml file. Check the below highlighted code of the layout file which shows this CSS.
<!DOCTYPE html>
<html lang="en">
<head>
    <meta charset="utf-8" />
    <meta name="viewport" content="width=device-width, initial-scale=1.0" />
    <title>@ViewData["Title"] - Xaero</title>
    <script type="importmap"></script>
    <link rel="stylesheet" href="~/lib/bootstrap/dist/css/bootstrap.min.css" />
    <link rel="stylesheet" href="~/css/site.css" asp-append-version="true" />
    <link rel="stylesheet" href="~/Xaero.styles.css" asp-append-version="true" />
    <style>
        table img {
            width: 200px;
            height: 100px;
        }

        .pagingDiv {
            background: #f2f2f2;
        }

            .pagingDiv > a {
                display: inline-block;
                padding: 0px 9px;
                margin-right: 4px;
                border-radius: 3px;
                border: solid 1px #c0c0c0;
                background: #e9e9e9;
                box-shadow: inset 0px 1px 0px rgba(255,255,255, .8), 0px 1px 3px rgba(0,0,0, .1);
                font-size: .875em;
                font-weight: bold;
                text-decoration: none;
                color: #717171;
                text-shadow: 0px 1px 0px rgba(255,255,255, 1);
            }

                .pagingDiv > a:hover {
                    background: #fefefe;
                    background: -webkit-gradient(linear, 0% 0%, 0% 100%, from(#FEFEFE), to(#f0f0f0));
                    background: -moz-linear-gradient(0% 0% 270deg,#FEFEFE, #f0f0f0);
                }

                .pagingDiv > a.active {
                    border: none;
                    background: #616161;
                    box-shadow: inset 0px 0px 8px rgba(0,0,0, .5), 0px 1px 0px rgba(255,255,255, .8);
                    color: #f0f0f0;
                    text-shadow: 0px 0px 3px rgba(0,0,0, .5);
                }
    </style>
</head>
<body>
    <header>
        <nav class="navbar navbar-expand-sm navbar-toggleable-sm navbar-light bg-white border-bottom box-shadow mb-3">
            <div class="container-fluid">
                <a class="navbar-brand" asp-area="" asp-controller="Home" asp-action="Index">Xaero</a>
                <button class="navbar-toggler" type="button" data-bs-toggle="collapse" data-bs-target=".navbar-collapse" aria-controls="navbarSupportedContent"
                        aria-expanded="false" aria-label="Toggle navigation">
                    <span class="navbar-toggler-icon"></span>
                </button>
                <div class="navbar-collapse collapse d-sm-inline-flex justify-content-between">
                    <ul class="navbar-nav flex-grow-1">
                        <li class="nav-item">
                            <a class="nav-link text-dark" asp-area="" asp-controller="Home" asp-action="Index">Home</a>
                        </li>
                        <li class="nav-item">
                            <a class="nav-link text-dark" asp-area="" asp-controller="Home" asp-action="Privacy">Privacy</a>
                        </li>
                    </ul>
                </div>
            </div>
        </nav>
    </header>
    <div class="container">
        <main role="main" class="pb-3">
            @RenderBody()
        </main>
    </div>

    <footer class="border-top footer text-muted">
        <div class="container">
            © 2024 - Xaero - <a asp-area="" asp-controller="Home" asp-action="Privacy">Privacy</a>
        </div>
    </footer>
    <script src="~/lib/jquery/dist/jquery.min.js"></script>
    <script src="~/lib/bootstrap/dist/js/bootstrap.bundle.min.js"></script>
    <script src="~/js/site.js" asp-append-version="true"></script>
    @await RenderSectionAsync("Scripts", required: false)
</body>
</html>
Finally in the Program class the relevant routes need to be added. These routes will create seo friendly urls that contains page number as the last segment. Eg –
https://localhost:44313/Production
https://localhost:44313/Production/1
https://localhost:44313/Production/2
https://localhost:44313/Production/10
So go to the Program.cs file and add the below routes.
app.MapControllerRoute(
    name: "PagingPageOne",
    pattern: "{controller}",
    defaults: new { action = "Index", id = 1 })
    .WithStaticAssets();

app.MapControllerRoute(
    name: "Paging",
    pattern: "{controller}/{id:int?}",
    defaults: new { action = "Index" });
You can now run the app and test the Create and Read feature of the Production Companies.
I have written 2 useful tutorials on Routing which are:
Sorting Records in Ascending and Descending way
There should be a way for users to sort production records in ascending or descending manner. So we are going to add this feature. Unlike other tutorials where you see the sort information send to the url in query string like this :
https://localhost:44313/Production?Name=asc
https://localhost:44313/Production/1?Name=desc
https://localhost:44313/Production/2?Annual Revenue=asc
We will use another approach which will not use the query string, instead we use cookies to send the sort information to the server. So here the url will remain totally unaffected.
Start by changing the Index action method of the Production Controller file as shown below:
public IActionResult Index(int id)
{
    string cookieValueFromReq = Request.Cookies["sortCookie"];

    List<ProductionCompany> pcList;
    if (string.IsNullOrEmpty(cookieValueFromReq))
        pcList = GetRecords(id);
    else
    {
        string sortColumn = cookieValueFromReq.Split(',')[0];
        string sortValue = cookieValueFromReq.Split(',')[1];

        pcList = GetRecords(id, sortColumn, sortValue);
    }
    return View(pcList);
}
Notice we are first requesting “Cookie” named sortCookie.
string cookieValueFromReq = Request.Cookies["sortCookie"];This cookie will contain the name of the “column” and “sort value” in comma separated manner. For example the value – Id, asc means sort by Id column in ascending manner. Similarly Id, desc means sort by Id column in descending manner.
In the same way the value Name, desc means to sort by Name column in descending manner.
Next we are calling the GetRecords() function which will be fetching the sorted records from the database by Entity Framework Core.
So add this GetRecords() function to the Production Controller.
List<ProductionCompany> GetRecords(int page, string sortColumn = "", string sortValue = "")
{
    int pageSize = 3;

    PagingInfo pagingInfo = new PagingInfo();
    pagingInfo.CurrentPage = page == 0 ? 1 : page;
    pagingInfo.TotalItems = context.ProductionCompany.Count();
    pagingInfo.ItemsPerPage = pageSize;

    var skip = pageSize * (Convert.ToInt32(page) - 1);
    ViewBag.PagingInfo = pagingInfo;

    List<ProductionCompany> result;

    var query = context.ProductionCompany.AsQueryable();

    if (sortValue == "asc")
    {
        switch (sortColumn)
        {
            case "Id":
                query = query.OrderBy(s => s.Id);
                break;
            case "Name":
                query = query.OrderBy(s => s.Name);
                break;
            case "Annual Revenue":
                query = query.OrderBy(s => s.AnnualRevenue);
                break;
            case "Establishment Date":
                query = query.OrderBy(s => s.EstablishmentDate);
                break;
            default:
                query = query.OrderBy(s => s.Name);
                break;
        }
    }
    else
    {
        switch (sortColumn)
        {
            case "Id":
                query = query.OrderByDescending(s => s.Id);
                break;
            case "Name":
                query = query.OrderByDescending(s => s.Name);
                break;
            case "Annual Revenue":
                query = query.OrderByDescending(s => s.AnnualRevenue);
                break;
            case "Establishment Date":
                query = query.OrderByDescending(s => s.EstablishmentDate);
                break;
            default:
                query = query.OrderByDescending(s => s.Name);
                break;
        }
    }
    result = query.Skip(skip).Take(pageSize).ToList();

    return result;
}
Now it’s time to change the Index View. Here we only have to add the class="sort" attribute to the columns we want to be sorted. We have added it to the 4 columns which are –
- 1. Id
- 2. Name
- 3. Annual Revenue
- 4. Establishment Date
Check the highlighted code of the Index view which shows these changes:
@model List<ProductionCompany>

@{
    ViewData["Title"] = "Production Companies";
}

<h1 class="bg-info text-white">Production Companies</h1>
<a asp-action="Create" class="btn btn-secondary">Create Production</a>

<table class="table table-sm table-bordered">
    <tr>
        <th class="sort">Id</th>
        <th class="sort">Name</th>
        <th>Logo</th>
        <th class="sort">Annual Revenue</th>
        <th class="sort">Establishment Date</th>
        <th>Update</th>
        <th>Delete</th>
    </tr>
    @foreach (ProductionCompany pc in Model)
    {
        <tr>
            <td>@pc.Id</td>
            <td>@pc.Name</td>
            <td><img src="@Url.Content(pc.Logo)" /></td>
            <td>@pc.AnnualRevenue.ToString("F2")</td>
            <td>@pc.EstablishmentDate.ToString("d")</td>
            <td>
                <a class="btn btn-sm btn-primary" asp-action="Update" asp-route-id="@pc.Id">
                    Update
                </a>
            </td>
            <td>
                <form asp-action="Delete" asp-route-id="@pc.Id" method="post">
                    <button type="submit" class="btn btn-sm btn-danger">
                        Delete
                    </button>
                </form>
            </td>
        </tr>
    }
</table>

<div class="pagingDiv" page-model="@ViewBag.PagingInfo" page-action="Index" page-classes-enabled="true" page-class="paging" page-class-selected="active"></div>
Finally we will need to add the JavaScript Code which does the cookie creation and reading part that forms the core logic of this sorting feature by cookie method.
We will add this JavaScript code to the _Layout.cshtml file as it is the common layout for every view. So all views will share this script.
We have highlighted the changes to be made to this _Layout.cshtml file. This includes the JavaScript code along with a small CSS which changes the cursor to pointer when mouse is hovered over any column that supports sorting.
<!DOCTYPE html>
<html lang="en">
<head>
    <meta charset="utf-8" />
    <meta name="viewport" content="width=device-width, initial-scale=1.0" />
    <title>@ViewData["Title"] - Xaero</title>
    <script type="importmap"></script>
    <link rel="stylesheet" href="~/lib/bootstrap/dist/css/bootstrap.min.css" />
    <link rel="stylesheet" href="~/css/site.css" asp-append-version="true" />
    <link rel="stylesheet" href="~/Xaero.styles.css" asp-append-version="true" />
    <style>
        table tr th.sort:hover {
            cursor: pointer;
        }

        table td img {
            width: 200px;
            height: 100px;
        }

        .pagingDiv {
            background: #f2f2f2;
        }

            .pagingDiv > a {
                display: inline-block;
                padding: 0px 9px;
                margin-right: 4px;
                border-radius: 3px;
                border: solid 1px #c0c0c0;
                background: #e9e9e9;
                box-shadow: inset 0px 1px 0px rgba(255,255,255, .8), 0px 1px 3px rgba(0,0,0, .1);
                font-size: .875em;
                font-weight: bold;
                text-decoration: none;
                color: #717171;
                text-shadow: 0px 1px 0px rgba(255,255,255, 1);
            }

                .pagingDiv > a:hover {
                    background: #fefefe;
                    background: -webkit-gradient(linear, 0% 0%, 0% 100%, from(#FEFEFE), to(#f0f0f0));
                    background: -moz-linear-gradient(0% 0% 270deg,#FEFEFE, #f0f0f0);
                }

                .pagingDiv > a.active {
                    border: none;
                    background: #616161;
                    box-shadow: inset 0px 0px 8px rgba(0,0,0, .5), 0px 1px 0px rgba(255,255,255, .8);
                    color: #f0f0f0;
                    text-shadow: 0px 0px 3px rgba(0,0,0, .5);
                }
    </style>
</head>
<body>
    <header>
        <nav class="navbar navbar-expand-sm navbar-toggleable-sm navbar-light bg-white border-bottom box-shadow mb-3">
            <div class="container-fluid">
                <a class="navbar-brand" asp-area="" asp-controller="Home" asp-action="Index">Xaero</a>
                <button class="navbar-toggler" type="button" data-bs-toggle="collapse" data-bs-target=".navbar-collapse" aria-controls="navbarSupportedContent"
                        aria-expanded="false" aria-label="Toggle navigation">
                    <span class="navbar-toggler-icon"></span>
                </button>
                <div class="navbar-collapse collapse d-sm-inline-flex justify-content-between">
                    <ul class="navbar-nav flex-grow-1">
                        <li class="nav-item">
                            <a class="nav-link text-dark" asp-area="" asp-controller="Home" asp-action="Index">Home</a>
                        </li>
                        <li class="nav-item">
                            <a class="nav-link text-dark" asp-area="" asp-controller="Home" asp-action="Privacy">Privacy</a>
                        </li>
                    </ul>
                </div>
            </div>
        </nav>
    </header>
    <div class="container">
        <main role="main" class="pb-3">
            @RenderBody()
        </main>
    </div>

    <footer class="border-top footer text-muted">
        <div class="container">
            © 2024 - Xaero - <a asp-area="" asp-controller="Home" asp-action="Privacy">Privacy</a>
        </div>
    </footer>
    <script src="~/lib/jquery/dist/jquery.min.js"></script>
    <script src="~/lib/bootstrap/dist/js/bootstrap.bundle.min.js"></script>
    <script src="~/js/site.js" asp-append-version="true"></script>
    @await RenderSectionAsync("Scripts", required: false)

    <script>
        var dth = document.getElementsByTagName("table").item(0).getElementsByClassName("sort");
        var cVal = decodeURIComponent(getCookie("sortCookie"));
        var nColOrder = "";
        if (cVal != "null") {
            var colName = cVal.split(',')[0];
            var colOrder = cVal.split(',')[1];
            var colClicked = Array.from(document.querySelectorAll("th")).find(el => el.innerText == colName);

            if (colOrder == "asc")
                colClicked.innerHTML += "<img src=\"/Images/up.png\" />";
            else
                colClicked.innerHTML += "<img src=\"/Images/down.png\" />";
        }

        for (let i = 0; i < dth.length; i++) {
            dth[i].addEventListener("click", function (e) {

                if (cVal != null) {
                    var colName = cVal.split(',')[0];
                    var colOrder = cVal.split(',')[1];
                    var clickedColumn = this.innerText.replace(/<[^>]*>?/gm, '');

                    if (clickedColumn == colName) {
                        if (colOrder == "asc")
                            nColOrder = "desc";
                        else
                            nColOrder = "asc";

                        setCookie("sortCookie", clickedColumn + "," + nColOrder);
                    }
                    else {
                        setCookie("sortCookie", clickedColumn + ",asc");
                    }
                }
                else {
                    setCookie("sortCookie", clickedColumn + ",asc");
                }

                var cUrl = window.location.href;
                if(cUrl.includes("Production"))
                    window.location = "@Url.Action("Index", "Production")";
                else if(cUrl.includes("Movie"))
                    window.location = "@Url.Action("Index", "Movie")";
                 else if(cUrl.includes("Distribution"))
                    window.location="@Url.Action("Index", "Distribution")";
            });
        }

        function setCookie(name, value) {
            var expires = new Date();
            expires.setTime(expires.getTime() + (1 * 60 * 60 * 1000)); // adding 1 hour
            document.cookie = name + '=' + encodeURIComponent(value) + ';path=/;expires=' + expires.toUTCString();
        }

        function getCookie(name) {
            var value = document.cookie.match('(^|;) ?' + name + '=([^;]*)(;|$)');
            return value ? value[2] : null;
        }
    </script>
</body>
</html>
Points to note:
- The cookie will contain column and sort value in comma separated manner like Id, asc.
- The setCookie() method will create a new cookie every time a column is clicked for sorting.
- The getCookie() method will get the value from the cookie.
- With the JavaScript addEventListener method, we have applied the click event on each sortable columns.
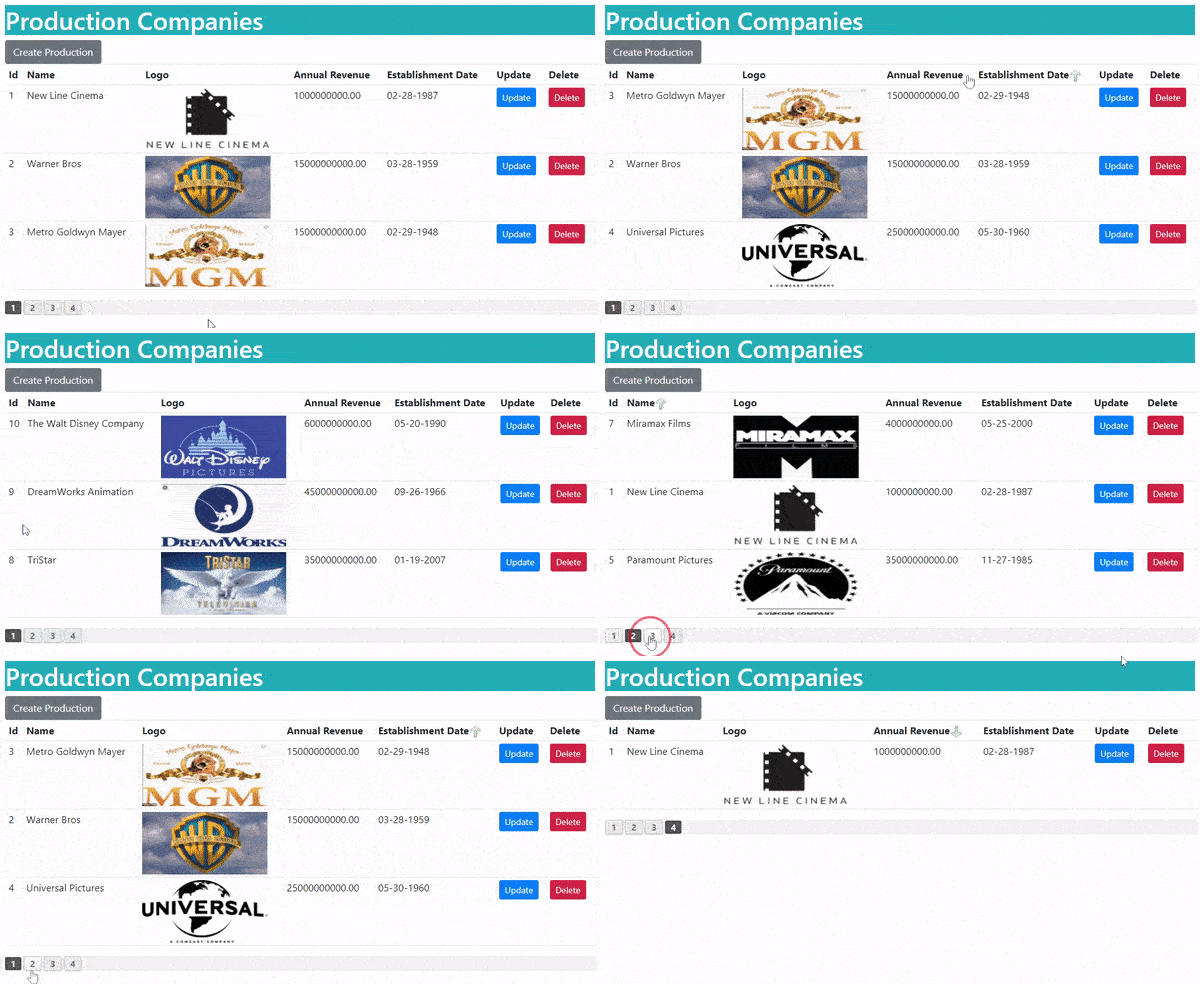
- We also show the Up & Down arrows to tell which way the sorting is done on a column. This is done by the below codes:
if (colOrder == "asc")
    colClicked.innerHTML += "<img src=\"/Images/up.png\" />";
else
    colClicked.innerHTML += "<img src=\"/Images/down.png\" />";
The “up.png” & “down.png” images are added to the wwwroot/Images folder. These images are provided on the source code of this project.
Check the below video which shown how sorting works:
“Update” Production Company feature
The Update Action of the Production Controller will do the updation of the records of the Production Companies. The Update Action method code is given below:
using Microsoft.AspNetCore.Mvc;
using Xaero.Models;
using Xaero.Infrastructure;

namespace Xaero.Controllers
{
    public class ProductionController : Controller
    {
        private MovieContext context;
        private IWebHostEnvironment hostingEnvironment;
        public ProductionController(MovieContext mc, IWebHostEnvironment environment)
        {
            context = mc;
            hostingEnvironment = environment;
        }

        // removed for brevity

        public IActionResult Update(int id)
        {
            var pc = context.ProductionCompany.Where(a => a.Id == id).FirstOrDefault();
            return View(pc);
        }

        [HttpPost]
        public async Task<IActionResult> Update(ProductionCompany pc, IFormFile mLogo)
        {
            ModelState.Remove(nameof(mLogo));
            if (ModelState.IsValid)
            {
                string path = pc.Logo;
                if (mLogo != null)
                {
                    path = "Images/Production/" + mLogo.FileName;
                    using (var stream = new FileStream(Path.Combine(hostingEnvironment.WebRootPath, path), FileMode.Create))
                    {
                        await mLogo.CopyToAsync(stream);
                    }
                }

                var productionCompany = new ProductionCompany()
                {
                    Id = pc.Id,
                    Name = pc.Name,
                    Logo = path.Substring(0, 2) == "~/" ? path : "~/" + path,
                    AnnualRevenue = pc.AnnualRevenue,
                    EstablishmentDate = pc.EstablishmentDate
                };

                context.Update(productionCompany);
                await context.SaveChangesAsync();

                return RedirectToAction("Index");
            }
            else
                return View(pc);
        }
    }
}
Points to note:
- We can update all the fields including the Logo of the production company.
- The new values sent from the View are received in the parameters of the action method which are – ProductionCompany pc, IFormFile mLogo.
- The updation of the record is done by the below 2 EF Core code lines.
context.Update(productionCompany);
await context.SaveChangesAsync();Now add the Update.cshtml razor view inside the Views ➤ Production folder containing the codes as given below:
@model ProductionCompany

@{
    ViewData["Title"] = "Update a Production";
}

<h1 class="bg-info text-white">Update a Production</h1>
<a asp-action="Index" class="btn btn-secondary">View all Productions</a>

<div asp-validation-summary="All" class="text-danger"></div>

<form method="post" enctype="multipart/form-data">
    <div class="form-group">
        <label asp-for="Id"></label>
        <input type="text" asp-for="Id" disabled class="form-control" />
    </div>
    <div class="form-group">
        <label asp-for="Name"></label>
        <input type="text" asp-for="Name" class="form-control" />
        <span asp-validation-for="Name" class="text-danger"></span>
    </div>
    <div class="form-group">
        <label asp-for="Logo"></label>
        <img src="@Url.Content(Model.Logo)" />
        <input type="text" asp-for="Logo" hidden />
        <input type="file" id="mLogo" name="mLogo" class="form-control" />
    </div>
    <div class="form-group">
        <label asp-for="AnnualRevenue"></label>
        <input type="text" asp-for="AnnualRevenue" class="form-control" />
        <span asp-validation-for="AnnualRevenue" class="text-danger"></span>
    </div>
    <div class="form-group">
        <label asp-for="EstablishmentDate"></label>
        <input type="date" asp-for="EstablishmentDate" class="form-control" />
        <span asp-validation-for="EstablishmentDate" class="text-danger"></span>
    </div>
    <button type="submit" class="btn btn-primary">Update</button>
</form>
Notice the current logo is bind to the img tag as –
<img src="@Url.Content(Model.Logo)" />And the logo path to the input tag as.
<input type="text" asp-for="Logo" hidden />The new logo will be bind to the input tag called –
<input type="file" id="mLogo" name="mLogo" class="form-control" />And when the form is posted then the new logo file will reach the IFormFile type argument of the update action method. The action in turn will upload this new file as the new logo for the company.
Check the below video which shows this update feature.
“Delete” Production Company feature
Notice that we have given a Delete button on the Index action method. On clicking the delete button the corresponding record gets deleted. So add the Delete action method to the Production controller. It’s code is below.
[HttpPost]
public async Task<IActionResult> Delete(int id)
{
    var pc = context.ProductionCompany.Where(a => a.Id == id).FirstOrDefault();
    context.Remove(pc);
    await context.SaveChangesAsync();

    return RedirectToAction("Index");
}
The delete action gets the id of the record to be deleted in it’s parameter and then uses Entity Framework Core to delete it from the database. The below 2 codes lines does the actual deletion of the record:
context.Remove(pc);
await context.SaveChangesAsync();
Check below video to see it’s working:
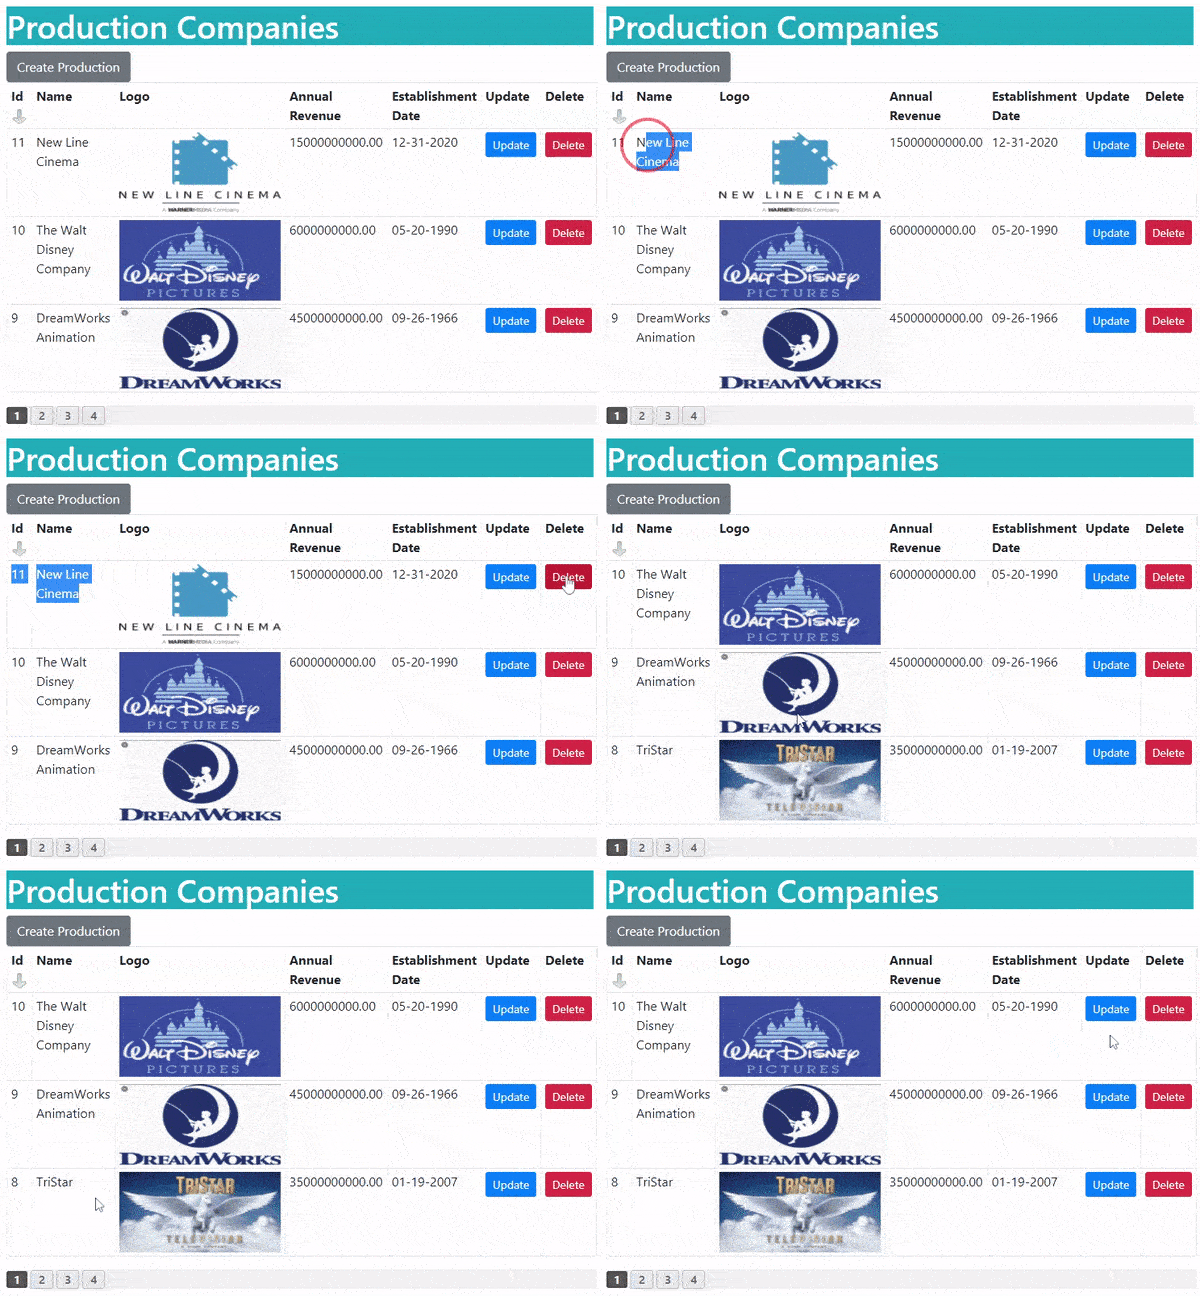
The Movie features includes the CRUD operation like Creation, Reading, Updation and Deletion of Movie records. We will have 4 actions for performing each of these things. Note that their will be One-to-Many relationship between Production and Movie entities, this means 1 production company can have many movies associated with it.
Another relationship is a One-to-One relationship which the Movie entity has with the MovieDetail entity.
“Create” Movie feature
First create a new controller called MovieController.cs inside the Controllers folder. Next provide it’s constructor with the MovieContext and IWebHostEnvironment objects. See highlighted code below.
using Microsoft.AspNetCore.Mvc;
using Xaero.Models;

namespace Xaero.Controllers
{
    public class MovieController : Controller
    {
        private MovieContext context;
        private IWebHostEnvironment hostingEnvironment;
        public MovieController(MovieContext mc, IWebHostEnvironment environment)
        {
            context = mc;
            hostingEnvironment = environment;
        }

        public IActionResult Index()
        {
            return View();
        }
    }
}
Now add a new action method called Create to the MovieController whose code is shown below in highlighted manner.
using Microsoft.AspNetCore.Mvc;
using Microsoft.AspNetCore.Mvc.Rendering;
using Xaero.Models;

namespace Xaero.Controllers
{
    public class MovieController : Controller
    {
        private MovieContext context;
        private IWebHostEnvironment hostingEnvironment;
        public MovieController(MovieContext mc, IWebHostEnvironment environment)
        {
            context = mc;
            hostingEnvironment = environment;
        }

        public IActionResult Index()
        {
            return View();
        }

        public IActionResult Create()
        {
            GetProduction();
            return View();
        }

        [HttpPost]
        public async Task<IActionResult> Create(Movie movie, IFormFile Poster)
        {
            GetProduction();

            if (Poster == null)
                ModelState.AddModelError(nameof(movie.MovieDetail_R.Poster), "Please select Movie Poster");
            else
            {
                string path = "Images/Movie/" + Poster.FileName;
                using (var stream = new FileStream(Path.Combine(hostingEnvironment.WebRootPath, path), FileMode.Create))
                {
                    await Poster.CopyToAsync(stream);
                }
                movie.MovieDetail_R.Poster = "~/" + path;
                ModelState.Remove(nameof(movie.MovieDetail_R.Poster));
            }

            if (ModelState.IsValid)
            {
                var movieDetail = new MovieDetail()
                {
                    Name = movie.MovieDetail_R.Name,
                    Poster = movie.MovieDetail_R.Poster,
                    Budget = movie.MovieDetail_R.Budget,
                    Gross = movie.MovieDetail_R.Gross,
                    ReleaseDate = movie.MovieDetail_R.ReleaseDate
                };

                var m = new Movie()
                {
                    ProductionCompanyId = movie.ProductionCompanyId,
                    MovieDetail_R = movieDetail
                };

                context.Add(m);
                await context.SaveChangesAsync();

                return RedirectToAction("Index");
            }
            else
                return View();
        }

        void GetProduction()
        {
            List<SelectListItem> production = new List<SelectListItem>();
            production = context.ProductionCompany.Select(x => new SelectListItem { Text = x.Name, Value = x.Id.ToString() }).ToList();
            ViewBag.Production = production;
        }
    }
}
Points to note:
1. This action method calls a function – GetProduction() which fetches all the Production Company records from the database and adds them to a List<SelectListItem> object. Finally this object is added to a ViewBag variable. The ViewBag variable’s value, which is of type List<SelectListItem>, will be shown inside a select html control on the view.
2. The second parameter of the action – IFormFile Poster will get the movie poster uploaded from the view and is stored inside the wwwroot/Images/Movie folder (so create Movie folder on the project). The saving part is done by the below code:
string path = "Images/Movie/" + Poster.FileName;
using (var stream = new FileStream(Path.Combine(hostingEnvironment.WebRootPath, path), FileMode.Create))
{
    await Poster.CopyToAsync(stream);
}
3. The Movie movie parameter receive the movie details filled by the user on the view.
We created 2 objects which are – MovieDetail & Movie.
var movieDetail = new MovieDetail()
{…}

var m = new Movie()
{…}
We provide the values to the properties of the MovieDetail object, and then provide the value to the corresponding Reference Navigation Property of the Movie object. That is, we set the MovieDetail_R property value to be the value of the MovieDetail object. Check the below code:
var m = new Movie()
{
    ProductionCompanyId = movie.ProductionCompanyId,
    MovieDetail_R = movieDetail
};
Other than this, we also set ProductionCompanyId property value of the Movie object which is received on the parameter of the action method – ProductionCompanyId = movie.ProductionCompanyId.
Finally the movie record is created by the below given code lines:
context.Add(m);
await context.SaveChangesAsync();
This is the way of “Inserting Related Records on the Database with EF Core”. You can check this tutorial for complete information.
You also need to add the Create View called “Create.cshtml” inside the Views ➤ Movie folder and having the following codes:
@model Movie

@{
    ViewData["Title"] = "Create a Movie";
}

<h1 class="bg-info text-white">Create a Movie</h1>
<a asp-action="Index" class="btn btn-secondary">View all Movies</a>

<div asp-validation-summary="All" class="text-danger"></div>

<form method="post" enctype="multipart/form-data">
    <div class="form-group">
        <label asp-for="@Model.MovieDetail_R.Name"></label>
        <input type="text" asp-for="@Model.MovieDetail_R.Name" class="form-control" />
        <span asp-validation-for="@Model.MovieDetail_R.Name" class="text-danger"></span>
    </div>
    <div class="form-group">
        <label asp-for="ProductionCompanyId">Production Company</label>
        <select asp-for="ProductionCompanyId" asp-items="ViewBag.Production" class="form-control">
        </select>
    </div>
    <div class="form-group">
        <label for="Poster"></label>
        <input type="file" id="Poster" name="Poster" class="form-control" />
        <span asp-validation-for="@Model.MovieDetail_R.Poster" class="text-danger"></span>
    </div>
    <div class="form-group">
        <label asp-for="@Model.MovieDetail_R.Budget"></label>
        <input type="text" asp-for="@Model.MovieDetail_R.Budget" class="form-control" />
        <span asp-validation-for="@Model.MovieDetail_R.Budget" class="text-danger"></span>
    </div>
    <div class="form-group">
        <label asp-for="@Model.MovieDetail_R.Gross"></label>
        <input type="text" asp-for="@Model.MovieDetail_R.Gross" class="form-control" />
        <span asp-validation-for="@Model.MovieDetail_R.Gross" class="text-danger"></span>
    </div>
    <div class="form-group">
        <label asp-for="@Model.MovieDetail_R.ReleaseDate"></label>
        <input type="date" asp-for="@Model.MovieDetail_R.ReleaseDate" class="form-control" />
        <span asp-validation-for="@Model.MovieDetail_R.ReleaseDate" class="text-danger"></span>
    </div>
    <button type="submit" class="btn btn-primary">Create</button>
</form>
The only important thing to be noted here is how I am binding the fields of the MovieDetail object by going through the Reference Navigation property like @Model.MovieDetail_R.Name for the “Name” property of the MovieDetail entity. Check the below code:
<input type="text" asp-for="@Model.MovieDetail_R.Name" class="form-control" />Movie records can be added from the url https://localhost:44313/Movie/Create and it’s screenshot is shown below.
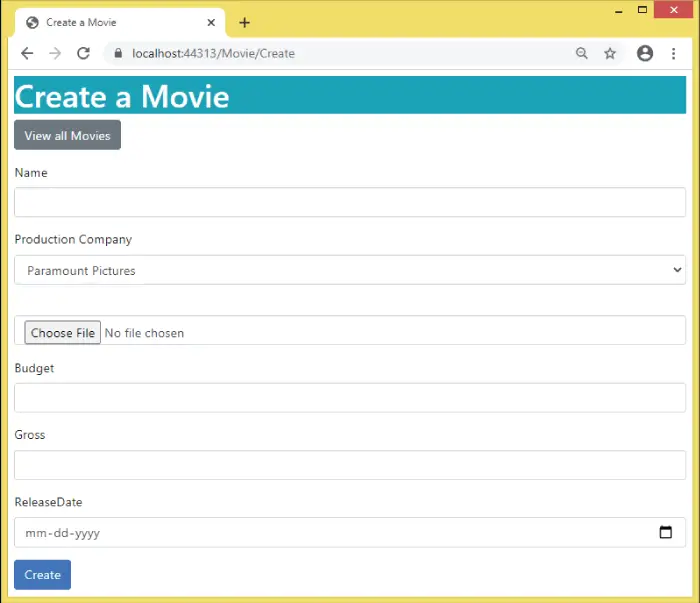
“Read” Movie feature
The read movie feature will be provided by the Index action and Index view. So update the Index action code to as shown below.
using Microsoft.AspNetCore.Mvc;
using Microsoft.AspNetCore.Mvc.Rendering;
using Xaero.Models;
using Microsoft.EntityFrameworkCore;
using Xaero.Infrastructure;

namespace Xaero.Controllers
{
    public class MovieController : Controller
    {
        private MovieContext context;
        private IWebHostEnvironment hostingEnvironment;
        public MovieController(MovieContext mc, IWebHostEnvironment environment)
        {
            context = mc;
            hostingEnvironment = environment;
        }

        public IActionResult Index(int id)
        {
            int pageSize = 3;

            PagingInfo pagingInfo = new PagingInfo();
            pagingInfo.CurrentPage = id == 0 ? 1 : id;
            pagingInfo.TotalItems = context.Movie.Count();
            pagingInfo.ItemsPerPage = pageSize;

            var skip = pageSize * (Convert.ToInt32(id) - 1);
            ViewBag.PagingInfo = pagingInfo;
            var movies = context.Movie.Skip(skip).Take(pageSize).Include(s => s.MovieDetail_R).Include(s => s.ProductionCompany_R).ToList();

            return View(movies);
        }

        // removed for brevity
    }
}
The action method receives the current page no in it’s parameter and fetches only the records that comes under that page from the database. For this it uses the Skip & Take methods of LINQ.
We can see that in this action we are fetching the Movie records from the database along with the related MovieDetail and ProductionCompany records also. We use the Include() method of Entity Framework Core for doing this thing.
var movies = context.Movie.Skip(skip).Take(pageSize).Include(s => s.MovieDetail_R).Include(s => s.ProductionCompany_R).ToList();Next add the Index.cshtml razor view file inside the Views ➤ Movie folder and having the below code:
@model List<Movie>

@{
    ViewData["Title"] = "Movie";
}

<h1 class="bg-info text-white">Movies</h1>
<a asp-action="Create" class="btn btn-secondary">Create Movie</a>

<table class="table table-sm table-bordered">
    <tr>
        <th class="sort">Id</th>
        <th class="sort">Name</th>
        <th>Production Company</th>
        <th>Poster</th>
        <th class="sort">Budget</th>
        <th class="sort">Gross</th>
        <th class="sort">Release Date</th>
        <th>Movie Distribution</th>
        <th>Update</th>
        <th>Delete</th>
    </tr>
    @foreach (Movie movie in Model)
    {
        <tr>
            <td>@movie.Id</td>
            <td>@movie.MovieDetail_R.Name</td>
            <td>@movie.ProductionCompany_R.Name</td>
            <td><img src="@Url.Content(movie.MovieDetail_R.Poster)" /></td>
            <td>@movie.MovieDetail_R.Budget.ToString("F2")</td>
            <td>@movie.MovieDetail_R.Gross.ToString("F2")</td>
            <td>@movie.MovieDetail_R.ReleaseDate.ToString("d")</td>
            <td>
                <a class="btn btn-sm btn-danger" asp-controller="MovieDistribution" asp-action="Update" asp-route-id="@movie.Id">
                    Movie Distribution
                </a>
            </td>
            <td>
                <a class="btn btn-sm btn-primary" asp-action="Update" asp-route-id="@movie.Id">
                    Update
                </a>
            </td>
            <td>
                <form asp-action="Delete" asp-route-id="@movie.Id" method="post">
                    <button type="submit" class="btn btn-sm btn-danger">
                        Delete
                    </button>
                </form>
            </td>
        </tr>
    }
</table>

<div class="pagingDiv" page-model="@ViewBag.PagingInfo" page-action="Index" page-classes-enabled="true" page-class="paging" page-class-selected="active"></div>
Notice we are using Reference Navigation Properties to get the Production Company name as – @movie.ProductionCompany_R.Name and the Movie budget as @movie.MovieDetail_R.Budget.
The “div” given at the end will create the pagination feature.
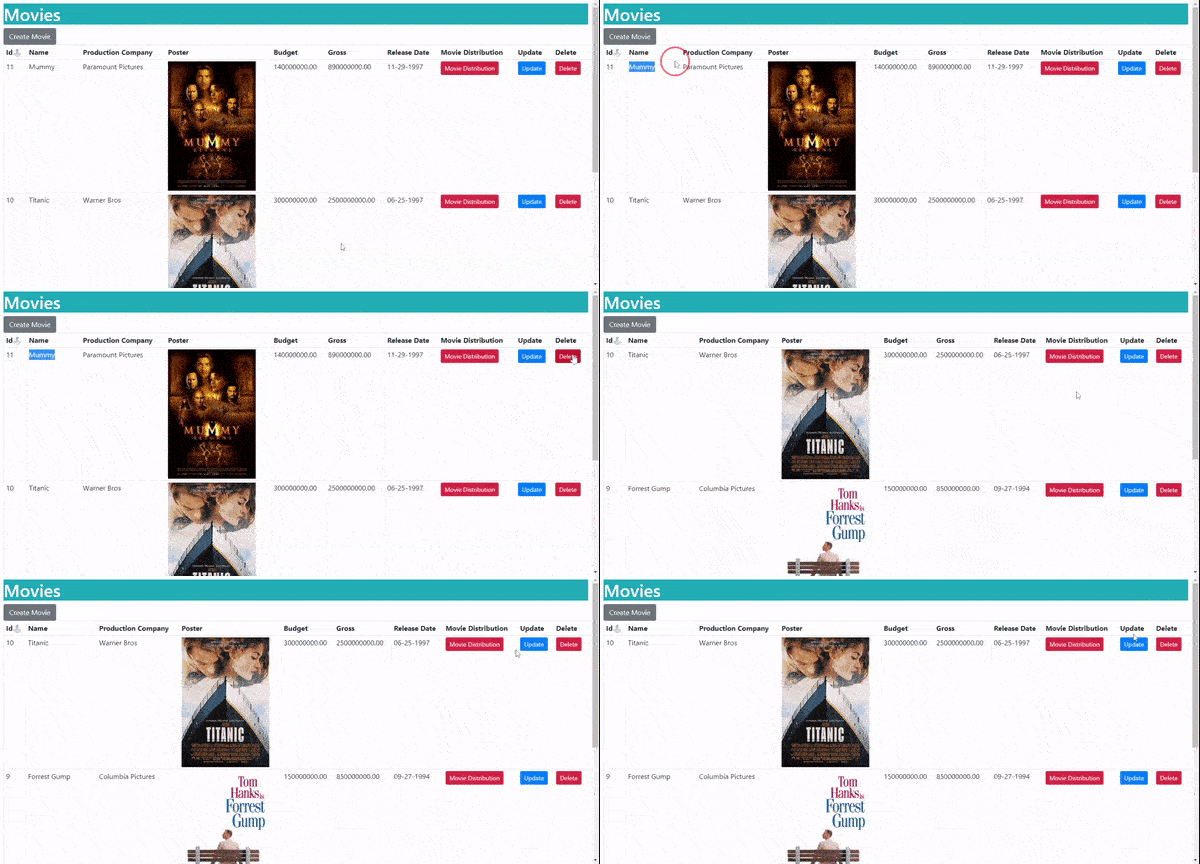
Let’s create a new movie, see the below video which shows this procedure.
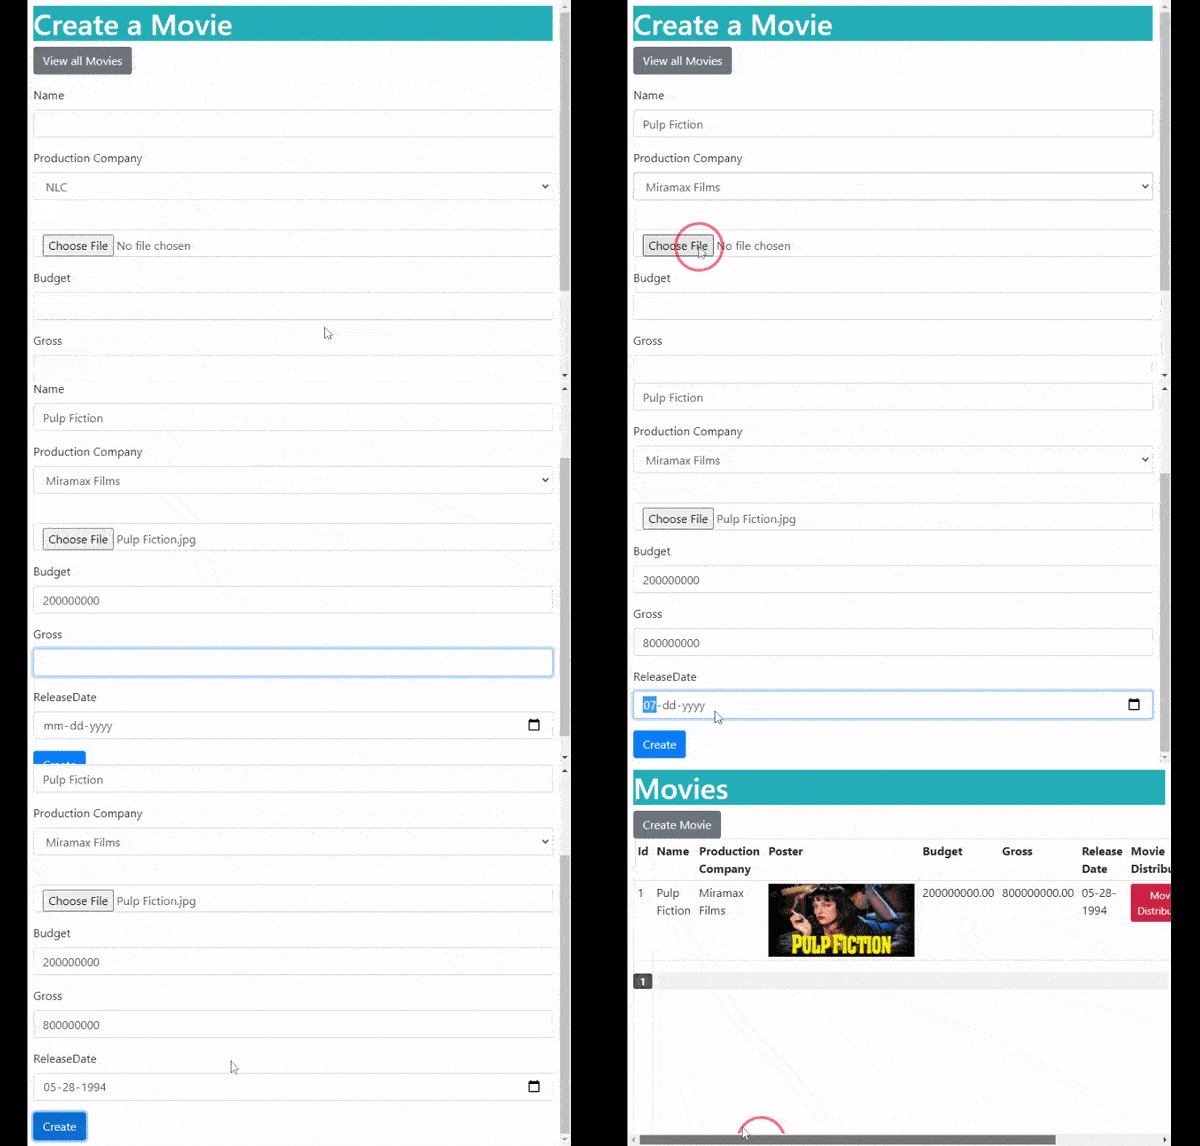
Now check the Read Movies feature, see below video.
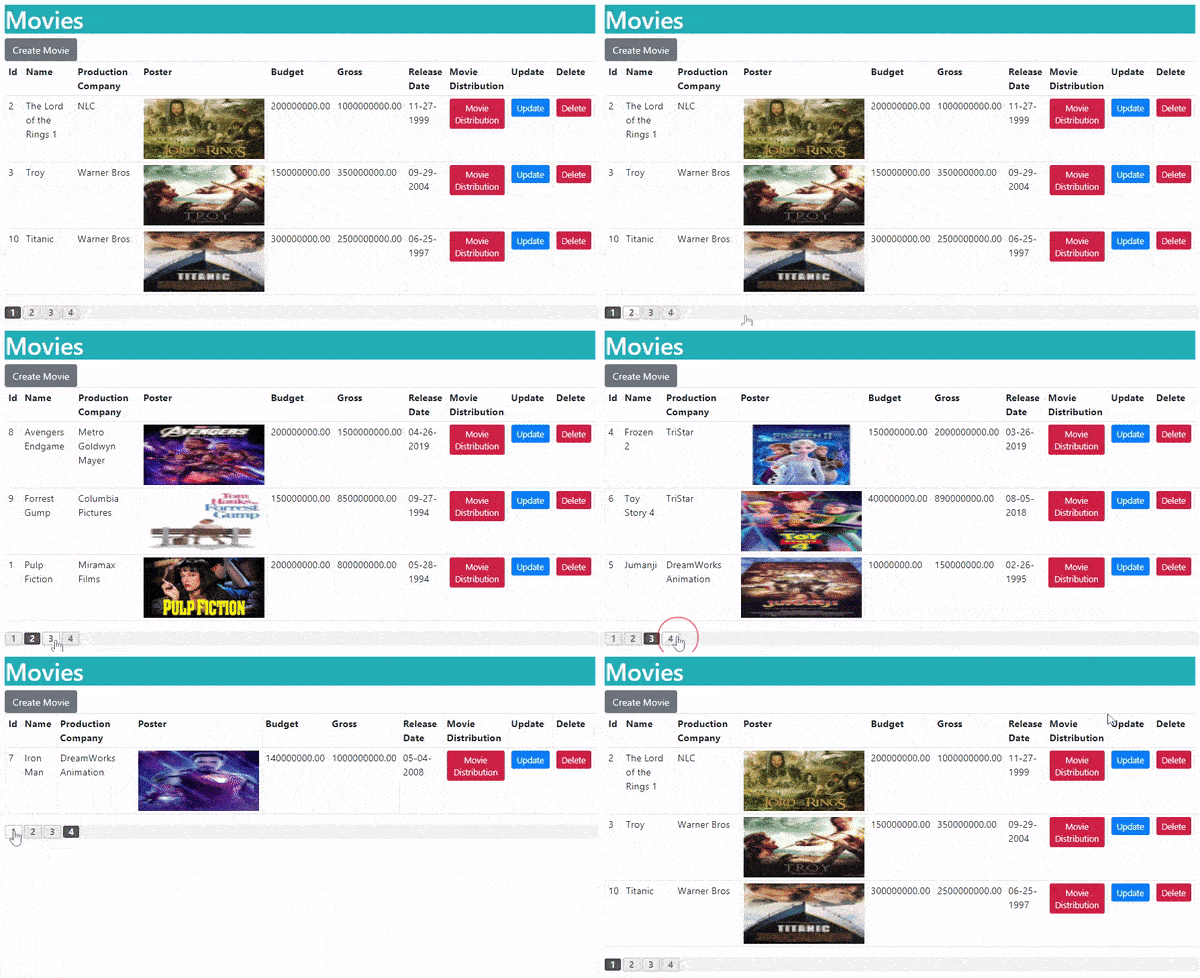
Notice that right now there is not an option for sorting. So without any delay let us create the sorting feature.
Sorting feature for Movies
Most of the Sorting infrastructure is already in place, we created it during the time of Production Company sorting. We will use the same infrastructure for Movie to. Recall, sorting infrastructure includes the following things:
- Applying CSS class
class="sort"to the sortable columns. We have added this class to “Id”, “Name”, “Budget”, “Gross” and “Release Date”. - The Cookie creation JavaScript code given in the _Layout.cshtml file.
We now only have to update the Index action method to use this infrastructure. The highlighted code which is given below illustrates the changes that need to be made.
using Microsoft.AspNetCore.Mvc;
using Microsoft.AspNetCore.Mvc.Rendering;
using Xaero.Models;
using Microsoft.EntityFrameworkCore;
using Xaero.Infrastructure;

namespace Xaero.Controllers
{
    public class MovieController : Controller
    {
        private MovieContext context;
        private IWebHostEnvironment hostingEnvironment;
        public MovieController(MovieContext mc, IWebHostEnvironment environment)
        {
            context = mc;
            hostingEnvironment = environment;
        }

        public IActionResult Index(int id)
        {
            string cookieValueFromReq = Request.Cookies["sortCookie"];

            List<Movie> mList;
            if (string.IsNullOrEmpty(cookieValueFromReq))
                mList = GetRecords(id);
            else
            {
                string sortColumn = cookieValueFromReq.Split(',')[0];
                string sortValue = cookieValueFromReq.Split(',')[1];

                mList = GetRecords(id, sortColumn, sortValue);
            }
            return View(mList);
        }

        List<Movie> GetRecords(int page, string sortColumn = "", string sortValue = "")
        {
            int pageSize = 3;

            PagingInfo pagingInfo = new PagingInfo();
            pagingInfo.CurrentPage = page == 0 ? 1 : page;
            pagingInfo.TotalItems = context.Movie.Count();
            pagingInfo.ItemsPerPage = pageSize;

            var skip = pageSize * (Convert.ToInt32(page) - 1);
            ViewBag.PagingInfo = pagingInfo;

            List<Movie> result;

            var query = context.Movie.Include(s => s.MovieDetail_R).Include(s => s.ProductionCompany_R).AsQueryable();

            if (sortValue == "asc")
            {
                switch (sortColumn)
                {
                    case "Id":
                        query = query.OrderBy(s => s.Id);
                        break;
                    case "Name":
                        query = query.OrderBy(s => s.MovieDetail_R.Name);
                        break;
                    case "Budget":
                        query = query.OrderBy(s => s.MovieDetail_R.Budget);
                        break;
                    case "Gross":
                        query = query.OrderBy(s => s.MovieDetail_R.Gross);
                        break;
                    case "Release Date":
                        query = query.OrderBy(s => s.MovieDetail_R.ReleaseDate);
                        break;
                    default:
                        query = query.OrderBy(s => s.MovieDetail_R.Name);
                        break;
                }
            }
            else
            {
                switch (sortColumn)
                {
                    case "Id":
                        query = query.OrderByDescending(s => s.Id);
                        break;
                    case "Name":
                        query = query.OrderByDescending(s => s.MovieDetail_R.Name);
                        break;
                    case "Budget":
                        query = query.OrderByDescending(s => s.MovieDetail_R.Budget);
                        break;
                    case "Gross":
                        query = query.OrderByDescending(s => s.MovieDetail_R.Gross);
                        break;
                    case "Release Date":
                        query = query.OrderByDescending(s => s.MovieDetail_R.ReleaseDate);
                        break;
                    default:
                        query = query.OrderByDescending(s => s.MovieDetail_R.Name);
                        break;
                }
            }
            result = query.Skip(skip).Take(pageSize).ToList();

            return result;
        }

        //…
    }
}
The code is easy to understand, see the GetRecords() methods which fetches the records in sorted way. It uses switch statement to fetch the records based on the sort info that the cookie stores.
Now we can test it by going to the URL – https://localhost:44313/Movie. Click the column names to sort the records. Check the below given video which shows the sorting feature in action.
“Update” Movie feature
Create the Update action method which will perform the updation of movie records. We have given it’s code in highlighted way below.
using Microsoft.AspNetCore.Mvc;
using Microsoft.AspNetCore.Mvc.Rendering;
using Xaero.Models;
using Microsoft.EntityFrameworkCore;
using Xaero.Infrastructure;

namespace Xaero.Controllers
{
    public class MovieController : Controller
    {
        private MovieContext context;
        private IWebHostEnvironment hostingEnvironment;
        public MovieController(MovieContext mc, IWebHostEnvironment environment)
        {
            context = mc;
            hostingEnvironment = environment;
        }

        // … other actions

        public IActionResult Update(int id)
        {
            var movie = context.Movie.Where(a => a.Id == id).Include(s => s.MovieDetail_R).FirstOrDefault();
            GetProduction();

            return View(movie);
        }

        [HttpPost]
        public async Task<IActionResult> Update(Movie movie, IFormFile mPoster)
        {
            GetProduction();

            if (ModelState.IsValid)
            {
                string path = movie.MovieDetail_R.Poster;
                if (mPoster != null)
                {
                    path = "Images/Production/" + mPoster.FileName;
                    using (var stream = new FileStream(Path.Combine(hostingEnvironment.WebRootPath, path), FileMode.Create))
                    {
                        await mPoster.CopyToAsync(stream);
                    }
                }

                var movieDetail = new MovieDetail()
                {
                    MovieId = movie.Id,
                    Name = movie.MovieDetail_R.Name,
                    Poster = path.Substring(0, 2) == "~/" ? path : "~/" + path,
                    Budget = movie.MovieDetail_R.Budget,
                    Gross = movie.MovieDetail_R.Gross,
                    ReleaseDate = movie.MovieDetail_R.ReleaseDate
                };

                var m = new Movie()
                {
                    Id = movie.Id,
                    ProductionCompanyId = movie.ProductionCompanyId,
                    MovieDetail_R = movieDetail
                };

                context.Update(m);
                await context.SaveChangesAsync();

                return RedirectToAction("Index");
            }
            else
                return View(movie);
        }
    }
}
Points to note:
- The update action (HTTP GET version) receives the Id of the movie in it’s parameter. I have given the update link on the Index view. Clicking this link will bring the user to the update action.
- The ProductionCompanyId field in the Movie entity along with all the fields of the MovieDetail entity are updated simultaneously through EF core. Notice we have used this code line
MovieDetail_R = movieDetailto tell EF core about the related entity.
Make sure to add the Update.cshtml razor view file inside the Views ➤ Movie folder and having the below code:
@model Movie

@{
    ViewData["Title"] = "Update a Movie";
}

<h1 class="bg-info text-white">Update a Movie</h1>
<a asp-action="Index" class="btn btn-secondary">View all Movies</a>

<div asp-validation-summary="All" class="text-danger"></div>

<form method="post" enctype="multipart/form-data">
    <div class="form-group">
        <label asp-for="Id"></label>
        <input type="text" asp-for="Id" disabled class="form-control" />
    </div>
    <div class="form-group">
        <label asp-for="@Model.MovieDetail_R.Name"></label>
        <input type="text" asp-for="@Model.MovieDetail_R.Name" class="form-control" />
        <span asp-validation-for="@Model.MovieDetail_R.Name" class="text-danger"></span>
    </div>
    <div class="form-group">
        <label asp-for="ProductionCompanyId">Production Company</label>
        <select asp-for="ProductionCompanyId" asp-items="ViewBag.Production" class="form-control">
        </select>
    </div>
    <div class="form-group">
        <label asp-for="@Model.MovieDetail_R.Poster"></label>
        <img src="@Url.Content(Model.MovieDetail_R.Poster)" width="500" />
        <input type="text" asp-for="@Model.MovieDetail_R.Poster" hidden />
        <input type="file" id="mPoster" name="mPoster" class="form-control" />
    </div>
    <div class="form-group">
        <label asp-for="@Model.MovieDetail_R.Budget"></label>
        <input type="text" asp-for="@Model.MovieDetail_R.Budget" class="form-control" />
        <span asp-validation-for="@Model.MovieDetail_R.Budget" class="text-danger"></span>
    </div>
    <div class="form-group">
        <label asp-for="@Model.MovieDetail_R.Gross"></label>
        <input type="text" asp-for="@Model.MovieDetail_R.Gross" class="form-control" />
        <span asp-validation-for="@Model.MovieDetail_R.Gross" class="text-danger"></span>
    </div>
    <div class="form-group">
        <label asp-for="@Model.MovieDetail_R.ReleaseDate"></label>
        <input type="date" asp-for="@Model.MovieDetail_R.ReleaseDate" class="form-control" />
        <span asp-validation-for="@Model.MovieDetail_R.ReleaseDate" class="text-danger"></span>
    </div>
    <button type="submit" class="btn btn-primary">Update</button>
</form>
See the video which shows the working of the update feature:
“Delete” Movie feature
The Index view has a delete button which on clicking will initiate the Delete Action. Open the Index View to find this below given code.
<form asp-action="Delete" asp-route-id="@movie.Id" method="post">
    <button type="submit" class="btn btn-sm btn-danger">
        Delete
    </button>
</form>
Next add the Delete action code to the Moviecontroller.cs. We have given it’s code:
[HttpPost]
public async Task<IActionResult> Delete(int id)
{
    var movie = context.Movie.Where(a => a.Id == id).FirstOrDefault();
    context.Remove(movie);
    await context.SaveChangesAsync();

    return RedirectToAction("Index");
}
Also remember that on the DB Context file we have declared delete behaviour to be cascade.
.OnDelete(DeleteBehavior.Cascade);This means if the Movie record is deleted then the related records from the MovieDetail table and MovieDistribution table are automatically deleted. Check this article for more info in this topic.
Now run your project and click on the delete button against any movie to delete it from the database. Check the below given video.
We created a MovieDistribution joining entity to create the Many-to-Many relationship between the “Movie” and “Distribution” entities. We recommend you to read this article to understand how this relationship is created in EF Core. So create a new controller called MovieDistributionController.cs inside the Controllers folder and here the necessary codes will be added.
This controller will have just one action method which is called Update action. In this action the Many-to-Many relationship will be set for the entities. For this the action will insert multiple records on the MovieDistribution table simultaneously to create this relationship.
We have shown this action method code below:
using Microsoft.AspNetCore.Mvc;
using Microsoft.AspNetCore.Mvc.Rendering;
using Microsoft.EntityFrameworkCore;
using Xaero.Models;

namespace Xaero.Controllers
{
    public class MovieDistributionController : Controller
    {
        private MovieContext context;
        public MovieDistributionController(MovieContext mc)
        {
            context = mc;
        }

        public IActionResult Update(int id)
        {
            GetMovieDistribution(id);

            var movie = context.Movie.Where(a => a.Id == id).Include(s => s.MovieDetail_R).FirstOrDefault();
            return View(movie);
        }

        [HttpPost]
        public async Task<IActionResult> Update(Movie movie, string[] distribution)
        {
            GetMovieDistribution(movie.Id);

            if (ModelState.IsValid)
            {
                context.RemoveRange(context.MovieDistribution.Where(t => t.MovieId == movie.Id).ToList());

                List<MovieDistribution> mdList = new List<MovieDistribution>();

                foreach (string d in distribution)
                {
                    var md = new MovieDistribution()
                    {
                        MovieId = movie.Id,
                        DistributionId = Convert.ToInt32(d)
                    };
                    mdList.Add(md);
                }

                context.AddRange(mdList);

                await context.SaveChangesAsync();

                return RedirectToAction("Index", "Movie");
            }
            else
                return View(movie);
        }

        void GetMovieDistribution(int movie)
        {
            List<SelectListItem> md = new List<SelectListItem>();
            md = context.Distribution.Select(x => new SelectListItem { Text = x.Name, Value = x.Id.ToString(), Selected = x.MovieDistribution_R.Where(y => y.MovieId == movie).Any(z => z.DistributionId == x.Id) }).ToList();

            ViewBag.MD = md;
        }
    }
}
Understanding the codes:
- 1. The link to this action is provided in the Index View of the Movie Controller. So we can create the relationship for the movie & distribution entities by visiting the url – https://localhost:44313/Movie and clicking the Movie Distribution link against any movie.
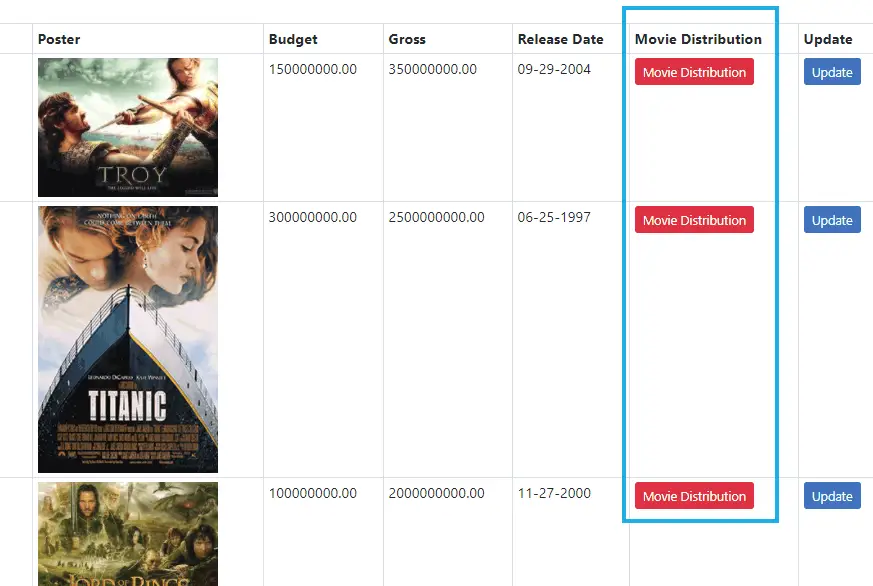
- 2. In this action first all the older records of a movie are deleted and then new records for that movie are inserted to the database. This is done to ensure that the Many-to-Many relationship remains accurate.
So the code which deletes the older records of the movie is:
context.RemoveRange(context.MovieDistribution.Where(t => t.MovieId == movie.Id).ToList());Then the new records are inserted with the AddRange() method:
context.AddRange(mdList); - 3. The variable called “mdList” is of List<MovieDistribution> type and its work is to create a list of records to be inserted by the AddRange() method. See the below code which is doing the same thing as explained earlier:
List<MovieDistribution> mdList = new List<MovieDistribution>();

foreach (string d in distribution)
{
    var md = new MovieDistribution()
    {
        MovieId = movie.Id,
        DistributionId = Convert.ToInt32(d)
    };
    mdList.Add(md);
}
The parameter of the action gets a string array containing all the distribution ids which are then added to the mdList variable by the foreach loop.
- 4. The function called GetMovieDistribution() fetches the Distribution records and adds them to a List<SelectListItem> object which is send to the view in a ViewBag variable. A html Select of “multiple” attribute is binded to these values.
Now add the Update.cshtml view inside the Views ➤ MovieDistribution folder and having the below code:
@model Movie

@{
    ViewData["Title"] = "Create Movie Distribution";
}

<link href="https://cdnjs.cloudflare.com/ajax/libs/select2/4.0.13/css/select2.min.css" rel="stylesheet" />
<script src="https://code.jquery.com/jquery-3.5.1.min.js"></script>
<script src="https://cdnjs.cloudflare.com/ajax/libs/select2/4.0.13/js/select2.min.js"></script>

<script>
    $(document).ready(function () {
        $("select").select2();
    });
</script>

<h1 class="bg-info text-white">Create a Movie Distribution</h1>
<a asp-controller="Movie" asp-action="Index" class="btn btn-secondary">View all Movies</a>

<div asp-validation-summary="All" class="text-danger"></div>

<form method="post" enctype="multipart/form-data">
    <div class="form-group">
        <label asp-for="Id"></label>
        <input type="text" asp-for="Id" disabled class="form-control" />
    </div>
    <div class="form-group">
        <label asp-for="@Model.MovieDetail_R.Name"></label>
        <input type="text" asp-for="@Model.MovieDetail_R.Name" disabled class="form-control" />
    </div>
    <div class="form-group">
        <label for="Distribution"></label>
        <select id="Distribution" name="Distribution" asp-items="ViewBag.MD" multiple class="form-control">
        </select>
    </div>
    <button type="submit" class="btn btn-primary">Create</button>
</form>
In the view code we can see that it is receiving an object of Movie type as a model. The Select control is turned into a Select2 jQuery plugin. So the users will be able to select multiple Distribution values in the select control. This feature will help to greatly improve the working of the creation of the Many-to-Many relationship in just one go.
The select control is binded to the value of the ViewBag variable which is send by the controller:
<select id="Distribution" name="Distribution" asp-items="ViewBag.MD" multiple class="form-control"></select>We will show the working video of this feature only after we have created the Distribution feature (given below). This is because the magic happens only there.
The Distribution will contain the Movie Distribution information. The Distribution entity has a Many-to-Many Relationship with the Movie entity. We have also used a Joining Entity called MovieDistribution.cs to create this relationship. Let us start by adding DistributionController.cs to the Controllers folder where the whole logic will be created.
“Create” Distribution feature
Add the Create action in the controller. The necessary codes are shown in highlighted manner.
using Microsoft.AspNetCore.Mvc;
using Xaero.Models;

namespace Xaero.Controllers
{
    public class DistributionController : Controller
    {
        private MovieContext context;
        public DistributionController(MovieContext mc)
        {
            context = mc;
        }

        public IActionResult Create()
        {
            return View();
        }

        [HttpPost]
        public async Task<IActionResult> Create(Distribution distribution)
        {
            if (ModelState.IsValid)
            {
                context.Add(distribution);
                await context.SaveChangesAsync();

                return RedirectToAction("Index");
            }
            else
                return View();
        }

        public IActionResult Index()
        {
            return View();
        }
    }
}
The code which does the record creation in the database is:
context.Add(distribution);
await context.SaveChangesAsync();
Now add the Create.cshtml view file inside the Views ➤ Distribution folder and having the below code:
@model Distribution

@{
    ViewData["Title"] = "Create a Distribution";
}

<h1 class="bg-info text-white">Create a Distribution</h1>
<a asp-action="Index" class="btn btn-secondary">View all Distribution</a>

<div asp-validation-summary="All" class="text-danger"></div>

<form method="post">
    <div class="form-group">
        <label asp-for="Name"></label>
        <input type="text" asp-for="Name" class="form-control" />
        <span asp-validation-for="Name" class="text-danger"></span>
    </div>
    <div class="form-group">
        <label asp-for="Location">Location</label>
        <input type="text" asp-for="Location" class="form-control" />
        <span asp-validation-for="Location" class="text-danger"></span>
    </div>
    <div class="form-group">
        <label asp-for="Telephone"></label>
        <input type="text" asp-for="Telephone" class="form-control" />
        <span asp-validation-for="Telephone" class="text-danger"></span>
    </div>
    <button type="submit" class="btn btn-primary">Create</button>
</form>
“Read” Distribution feature
Reading the Distribution records is done by the Index action method whose code is given below. Note that the records can also be sorted by the user.
using Microsoft.AspNetCore.Mvc;
using Xaero.Models;
using Microsoft.EntityFrameworkCore;
using Xaero.Infrastructure;

namespace Xaero.Controllers
{
    public class DistributionController : Controller
    {
        private MovieContext context;
        public DistributionController(MovieContext mc)
        {
            context = mc;
        }

        public IActionResult Create()
        {
            return View();
        }

        [HttpPost]
        public async Task<IActionResult> Create(Distribution distribution)
        {
            if (ModelState.IsValid)
            {
                context.Add(distribution);
                await context.SaveChangesAsync();

                return RedirectToAction("Index");
            }
            else
                return View();
        }

        public IActionResult Index(int id)
        {
            string cookieValueFromReq = Request.Cookies["sortCookie"];

            List<Distribution> dList;
            if (string.IsNullOrEmpty(cookieValueFromReq))
                dList = GetRecords(id);
            else
            {
                string sortColumn = cookieValueFromReq.Split(',')[0];
                string sortValue = cookieValueFromReq.Split(',')[1];

                dList = GetRecords(id, sortColumn, sortValue);
            }
            return View(dList);
        }

        List<Distribution> GetRecords(int page, string sortColumn = "", string sortValue = "")
        {
            int pageSize = 1;

            PagingInfo pagingInfo = new PagingInfo();
            pagingInfo.CurrentPage = page == 0 ? 1 : page;
            pagingInfo.TotalItems = context.Distribution.Count();
            pagingInfo.ItemsPerPage = pageSize;

            var skip = pageSize * (Convert.ToInt32(page) - 1);
            ViewBag.PagingInfo = pagingInfo;

            List<Distribution> result;

            var query = context.Distribution.Include(s => s.MovieDistribution_R).ThenInclude(r => r.Movie_R).ThenInclude(t => t.MovieDetail_R).AsQueryable();

            if (sortValue == "asc")
            {
                switch (sortColumn)
                {
                    case "Id":
                        query = query.OrderBy(s => s.Id);
                        break;
                    case "query":
                        query = query.OrderBy(s => s.Name);
                        break;
                    case "Location":
                        query = query.OrderBy(s => s.Location);
                        break;
                    default:
                        query = query.OrderBy(s => s.Name);
                        break;
                }
            }
            else
            {
                switch (sortColumn)
                {
                    case "Id":
                        query = query.OrderByDescending(s => s.Id);
                        break;
                    case "Name":
                        query = query.OrderByDescending(s => s.Name);
                        break;
                    case "Location":
                        query = query.OrderByDescending(s => s.Location);
                        break;
                    default:
                        query = query.OrderByDescending(s => s.Name);
                        break;
                }
            }
            result = query.Skip(skip).Take(pageSize).ToList();

            return result;
        }

    }
}
Points to note:
- There will be pagination feature so we have used a PagingInfo class object. It’s working is discussed previously.
- The GetRecords() function has the task to fulfil the sorting of the records.
- The switch statement is used to do the sorting of the records from the Distribution table.
- In the LINQ query, notice the uses of Include() & ThenInclude() method which fetches the related Movie & MovieDetail records.
Include(s => s.MovieDistribution_R).ThenInclude(r => r.Movie_R).ThenInclude(t => t.MovieDetail_R)We will also show these related records on the Index view. So add the Index.cshtml razor view inside the Views ➤ Distribution folder and having the below code:
@model List<Distribution>

@{
    ViewData["Title"] = "Distribution";
}

<h1 class="bg-info text-white">Distribution</h1>
<a asp-action="Create" class="btn btn-secondary">Create Distribution</a>

<table class="table table-sm table-bordered">
    <tr>
        <th class="sort">Id</th>
        <th class="sort">Name</th>
        <th>Movie</th>
        <th class="sort">Location</th>
        <th>Telephone</th>
        <th>Update</th>
        <th>Delete</th>
    </tr>
    @foreach (Distribution distribution in Model)
    {
        <tr>
            <td>@distribution.Id</td>
            <td>@distribution.Name</td>
            <td>
                <table>
                    <tr>

                        @foreach (MovieDistribution md in distribution.MovieDistribution_R)
                        {
                            <td>
                                @md.Movie_R.MovieDetail_R.Name
                            </td>
                        }
                    </tr>
                </table>
            </td>
            <td>@distribution.Location</td>
            <td>@distribution.Telephone</td>
            <td>
                <a class="btn btn-sm btn-primary" asp-action="Update" asp-route-id="@distribution.Id">
                    Update
                </a>
            </td>
            <td>
                <form asp-action="Delete" asp-route-id="@distribution.Id" method="post">
                    <button type="submit" class="btn btn-sm btn-danger">
                        Delete
                    </button>
                </form>
            </td>
        </tr>
    }
</table>

<div class="pagingDiv" page-model="@ViewBag.PagingInfo" page-action="Index" page-classes-enabled="true" page-class="paging" page-class-selected="active"></div>
Here notice the inner foreach loop whose task is to show the related MovieDetail information of the distribution records inside the HTML Table.
@foreach (MovieDistribution md in distribution.MovieDistribution_R)
{
    <td>
        @md.Movie_R.MovieDetail_R.Name
    </td>
}
First add a few Distribution records, see the below given video where we are adding a Distribution record.
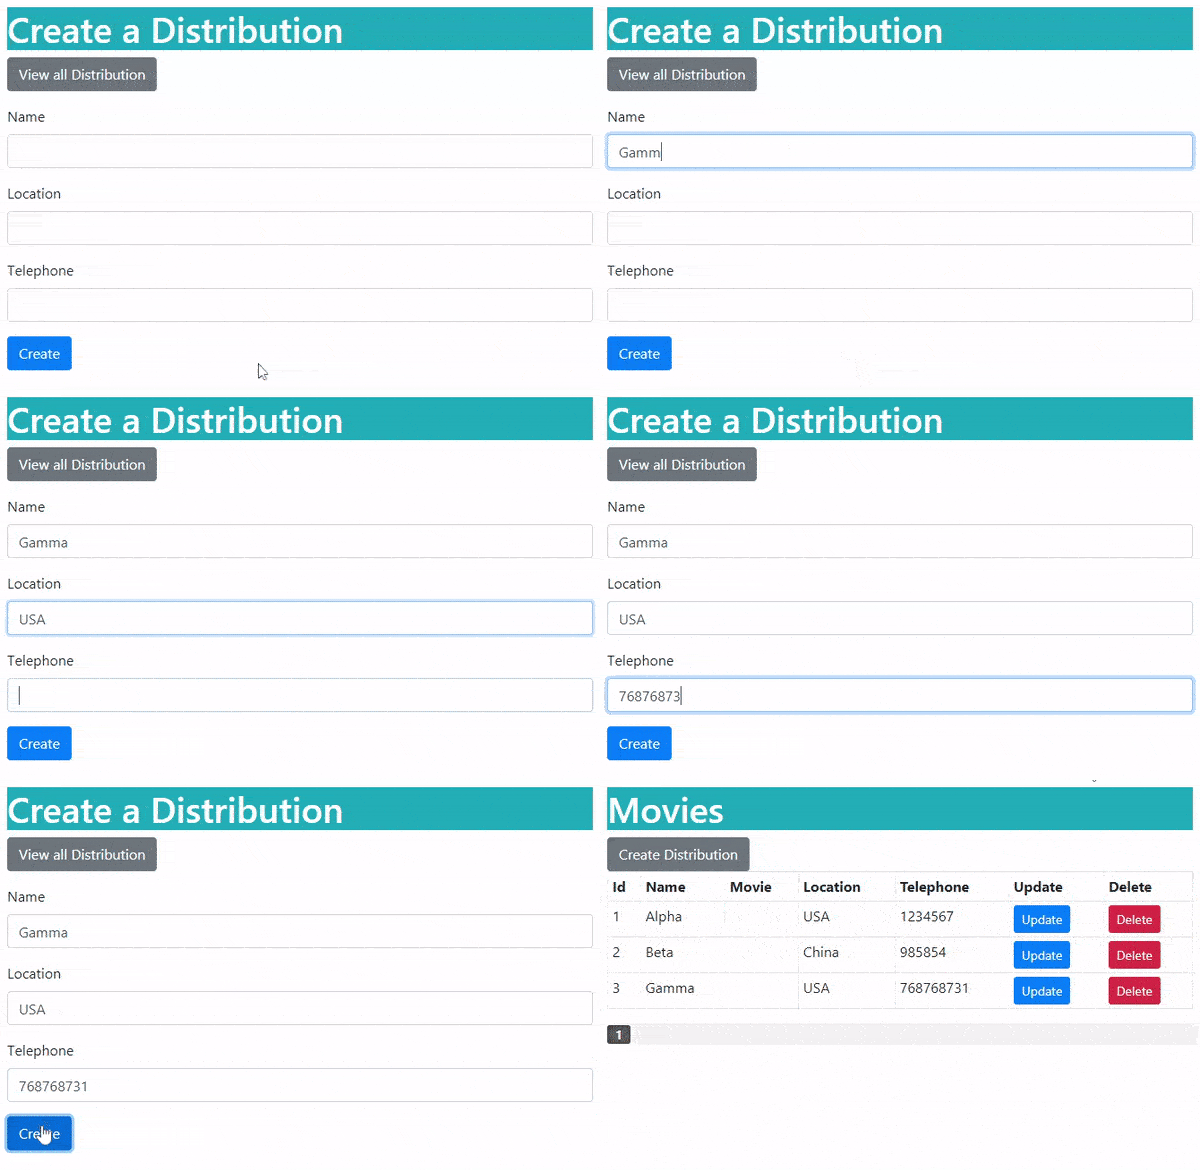
Next, video shows all the Distribution records in page by page way. The sorting of records is also shown.
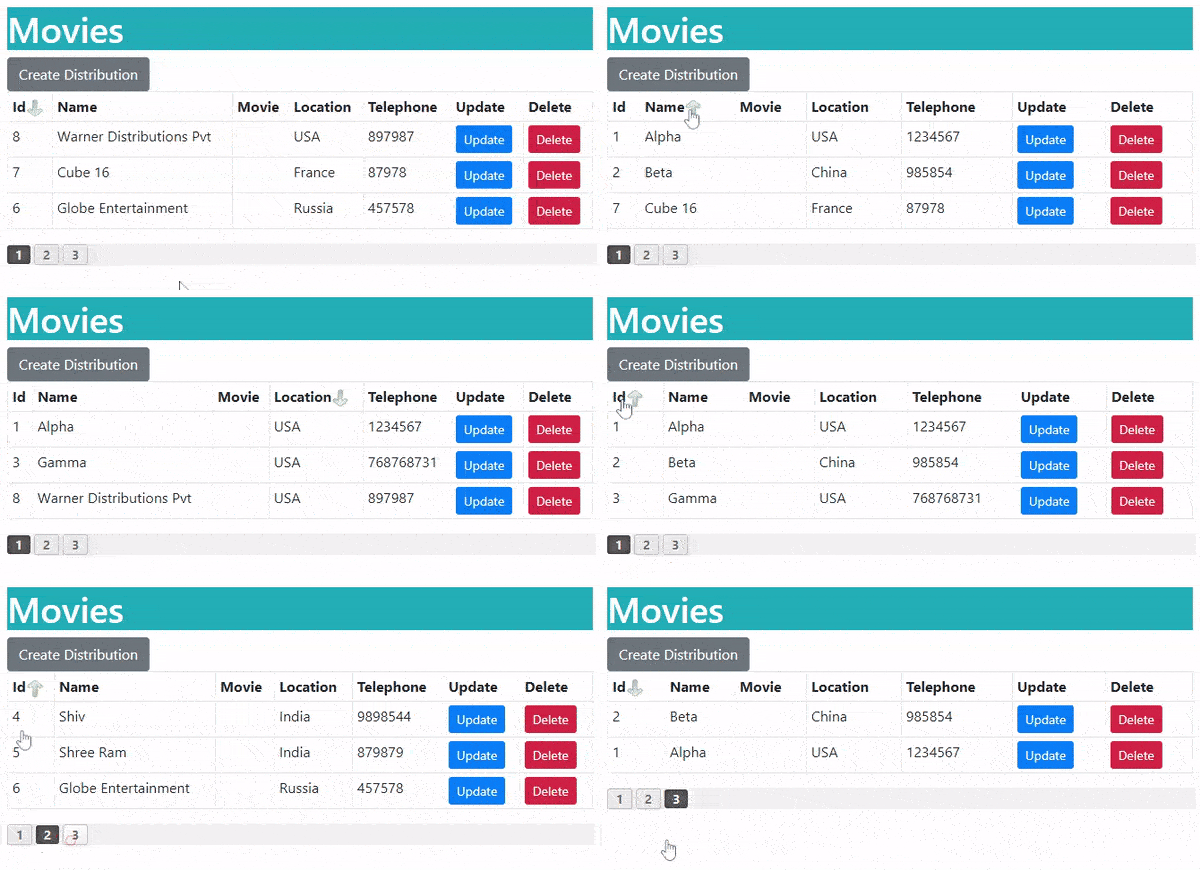
Notice the Movie column in the distribution table is empty (see above video). Next, we will show the Many-to-Many Relationship being created between the Movies & Distributions, and this will make the Movie column to start showing associated movies with a distribution.
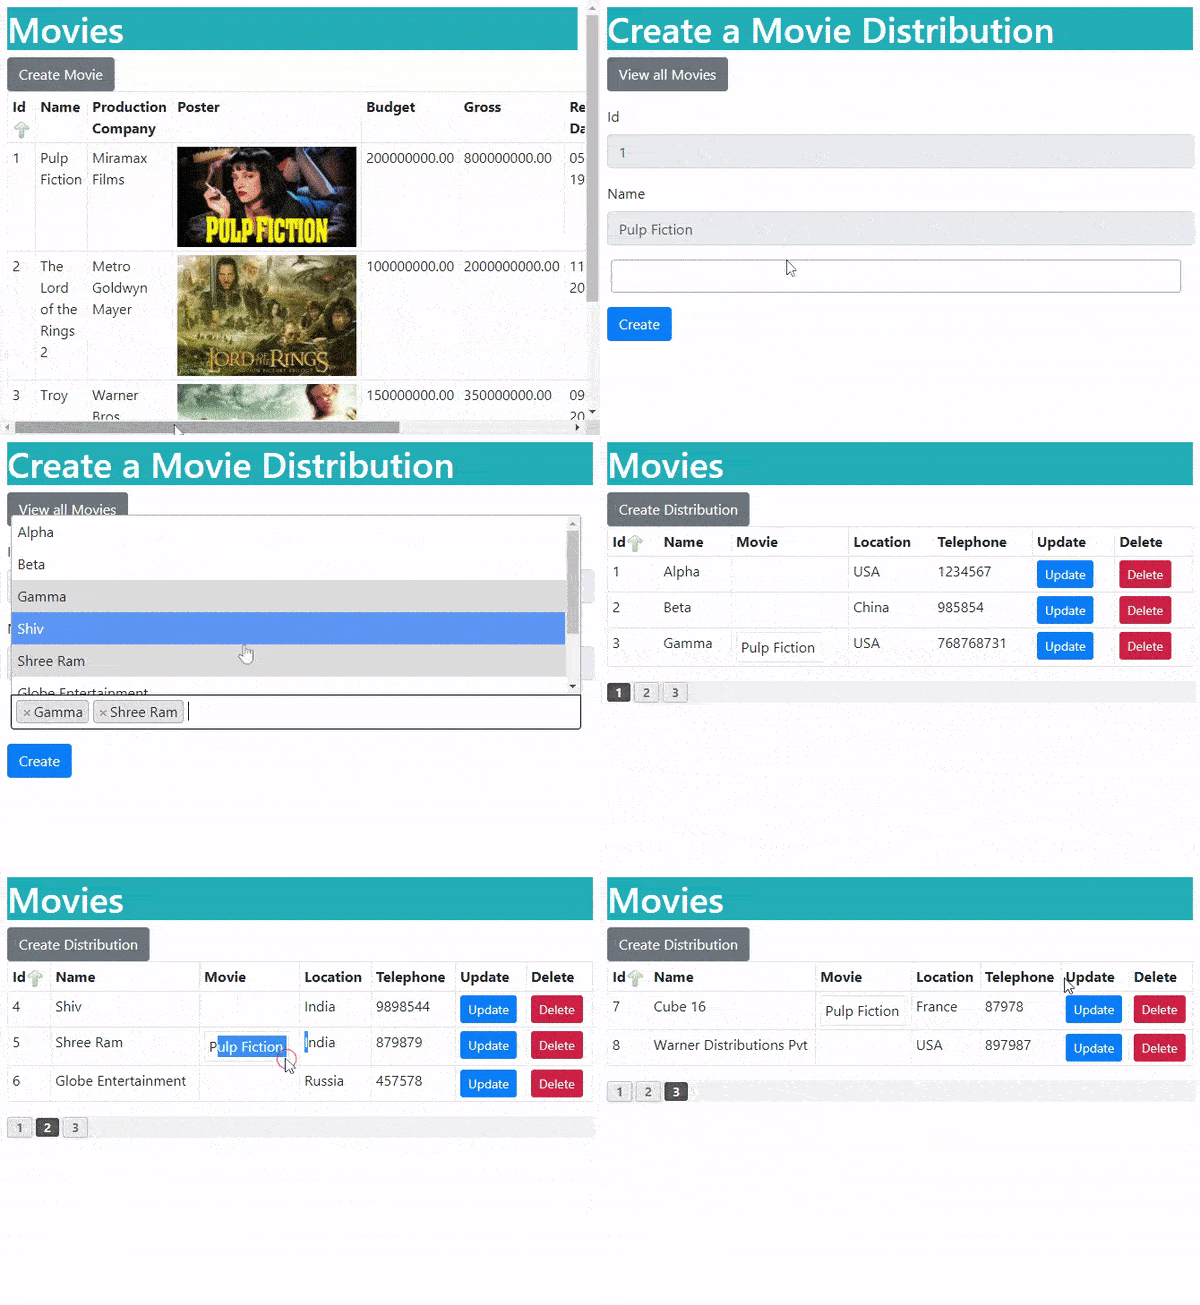
Next we did some movie associations for the Beta & Gamma distributions to show Many-to-Many Relationship. See the below image which shows these 2 thing:
- “Gamma” is a distribution for 3 movies which are “Pulp Fiction”, “The Lord of the Rings 2” and “Troy”.
- Similarly Movie “Troy” has 2 distributions which are “Beta” & “Gamma”.
This is because of Many-to-Many Relationship between the Movie & Distribution tables of the database.
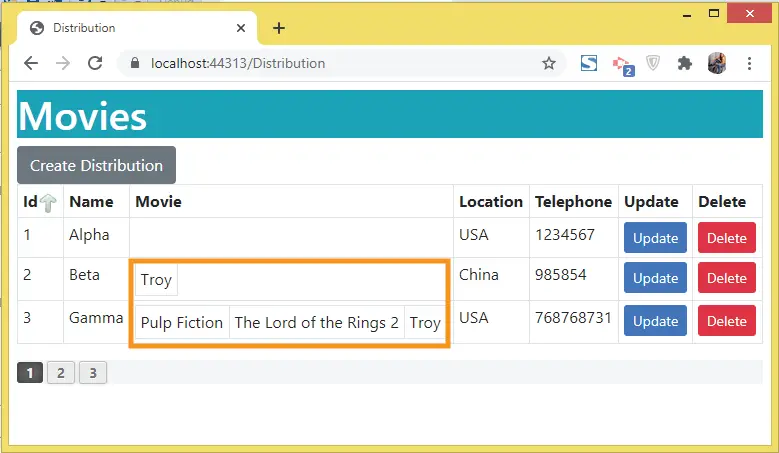
“Update” Distribution feature
The Update action will perform the updation task of the Distribution records. It’s code is fairly simple and shown below:
using Microsoft.AspNetCore.Mvc;
using Xaero.Models;
using Microsoft.EntityFrameworkCore;
using Xaero.Infrastructure;

namespace Xaero.Controllers
{
    public class DistributionController : Controller
    {
        private MovieContext context;
        public DistributionController(MovieContext mc)
        {
            context = mc;
        }

        //… other actions

        public IActionResult Update(int id)
        {
            return View(context.Distribution.Where(a => a.Id == id).FirstOrDefault());
        }

        [HttpPost]
        public async Task<IActionResult> Update(Distribution distribution)
        {
            if (ModelState.IsValid)
            {
                context.Update(distribution);
                await context.SaveChangesAsync();

                return RedirectToAction("Index");
            }
            else
                return View();
        }

    }
}
Also add the Update.cshtml file inside the Views ➤ Distribution folder and having the below code:
@model Distribution

@{
    ViewData["Title"] = "Update a Distribution";
}

<h1 class="bg-info text-white">Update a Distribution</h1>
<a asp-action="Index" class="btn btn-secondary">View all Distribution</a>

<div asp-validation-summary="All" class="text-danger"></div>

<form method="post">
    <div class="form-group">
        <label asp-for="Id"></label>
        <input type="text" asp-for="Id" disabled class="form-control" />
    </div>
    <div class="form-group">
        <label asp-for="Name"></label>
        <input type="text" asp-for="Name" class="form-control" />
        <span asp-validation-for="Name" class="text-danger"></span>
    </div>
    <div class="form-group">
        <label asp-for="Location">Location</label>
        <input type="text" asp-for="Location" class="form-control" />
        <span asp-validation-for="Location" class="text-danger"></span>
    </div>
    <div class="form-group">
        <label asp-for="Telephone"></label>
        <input type="text" asp-for="Telephone" class="form-control" />
        <span asp-validation-for="Telephone" class="text-danger"></span>
    </div>
    <button type="submit" class="btn btn-primary">Update</button>
</form>
Check the below video for it’s working.
“Delete” Distribution feature
Add the Delete action whose work is to delete the Distribution records from the database. See below code:
using Microsoft.AspNetCore.Mvc;
using Xaero.Models;
using Microsoft.EntityFrameworkCore;
using Xaero.Infrastructure;

namespace Xaero.Controllers
{
    public class DistributionController : Controller
    {
        private MovieContext context;
        public DistributionController(MovieContext mc)
        {
            context = mc;
        }

        public IActionResult Create()
        {
            return View();
        }

        //… other actions

        [HttpPost]
        public async Task<IActionResult> Delete(int id)
        {
            var distribution = context.Distribution.Where(a => a.Id == id).FirstOrDefault();
            context.Remove(distribution);
            await context.SaveChangesAsync();

            return RedirectToAction("Index");
        }
    }
}
Check the below video for it’s working.
Congratulations, we have just completed a very long Entity Framework Core Tutorial of 10,000+ words where we learned all the things to make a professional database project. I hope you liked this tutorial and all the concepts which we have explained. So please share it on your facebook, twitter and linked for necessary exposure with the coding community.


 Welcome to YogiHosting - A Programming Tutorial Website. It is used by millions of people around the world to learn and explore about ASP.NET Core, Blazor, jQuery, JavaScript, Docker, Kubernetes and other topics.