How to use Select2 jQuery plugin in ASP.NET CORE

Select2 is a jQuery based replacement for HTML Select Control. It supports searching, remote data sets, and infinite scrolling of results. It is available in GitHub and is free to use for everyone.
Select2 works by changing the appearance and working of your normal HTML select control to a Select2 control which is much powerful in features.
In this tutorial I will show you some important ways to use Select2 in your ASP.NET Core application. These are:
- 1. How to select multiple options in select control and send them to the Controller by Model Binding.
- 2. How to Bind the select control from data that is send by the Controller to the View through ViewBag.
First understand how to add a Select2 control in your ASP.NET Core View.
Adding Select2 Control in your View
In your View add the select2 CSS & JS scripts along with jQuery. Then call the .select2() method inside the document.read method as shown below.
<link href="https://cdnjs.cloudflare.com/ajax/libs/select2/4.0.13/css/select2.min.css" rel="stylesheet" />
<script src="https://code.jquery.com/jquery-3.2.1.min.js"></script>
<script src="https://cdnjs.cloudflare.com/ajax/libs/select2/4.0.13/js/select2.min.js"></script>

<script>
    $(document).ready(function () {
        $(".statesSelect").select2();
    });
</script>
Next add the select control in your View:
<select class="statesSelect" name="states" multiple="multiple">
    <option value="Select" disabled>Select</option>
    <option value="AK">Alaska</option>
    <option value="HI">Hawaii</option>
    <option value="CA">California</option>
    <option value="NV">Nevada</option>
    <option value="OR">Oregon</option>
</select>
You are now set to go. Let us now use it in 2 ways in ASP.NET Core Application.
1. Selecting Multiple Options from Select2
Here I will use the Select2 control to select multiple options. So in your View add the following code:
@{
    Layout = null;
}

@model string[];

<!DOCTYPE html>

<html>
<head>
    <meta name="viewport" content="width=device-width" />
    <title>Select2 DEMO</title>
    <link href="https://cdnjs.cloudflare.com/ajax/libs/select2/4.0.13/css/select2.min.css" rel="stylesheet" />
    <script src="https://code.jquery.com/jquery-3.2.1.min.js"></script>
    <script src="https://cdnjs.cloudflare.com/ajax/libs/select2/4.0.13/js/select2.min.js"></script>

    <script>
        $(document).ready(function () {
            $(".statesSelect").select2();
        });
    </script>
</head>
<body>
    <h1>Select2 DEMO</h1>
    @{
        if (Model != null)
        {
            <p>Your selected values:</p>
            @foreach (string state in Model)
            {
                <p>@state</p>
            }
        }
    }
    <form method="post">
        Select States:
        <select class="statesSelect" name="states" multiple>
            <option value="Select" disabled>Select</option>
            <option value="AK">Alaska</option>
            <option value="HI">Hawaii</option>
            <option value="CA">California</option>
            <option value="NV">Nevada</option>
            <option value="OR">Oregon</option>
        </select>
        <button>Submit</button>
    </form>
</body>
</html>
Explanation: The Model type is string[] and will be sent from the Controller. Note that this will contain the values of the selected states in the select2 control.
With the foreach loop I show these multiple values in the View:
@foreach (string state in Model)
{
    <p>@state</p>
}
When the button is clicked then the Index action will be called. Now create the Index actions in your controller:
using System;
using System.Collections.Generic;
using System.Linq;
using System.Threading.Tasks;
using Microsoft.AspNetCore.Mvc;
using Microsoft.AspNetCore.Mvc.Rendering;

namespace select2.Controllers
{
    public class HomeController : Controller
    {
        public IActionResult Index()
        {
            return View();
        }

        [HttpPost]
        public IActionResult Index(string[] states)
        {
            return View(states);
        }
    }
}
Notice that the HttpPost type Index action has the parameter of string array and named as ‘states’. When the button is clicked then this parameter will get the multiple selected values of the select2 control located on the View by Model Binding technique.
The Action in turn will return these values to the View where they will be displayed. Check the below Video which illustrates the working procedure:

Bind the Select2 control from Controller
You can also bind the Select2 control from dynamic values fetched from the database. Here I will send the values of select2 control from the Controller.
So add a new action method called Demo to your controller.
public IActionResult Demo()
{
    List<SelectListItem> data = new List<SelectListItem>()
    {
        new SelectListItem { Text = "Alaska", Value = "AL" },
        new SelectListItem { Text = "Hawaii", Value = "HI" },
        new SelectListItem { Text = "California", Value = "CA", Selected = true },
        new SelectListItem { Text = "Nevada", Value = "NV", Selected = true }
    };

    ViewBag.Data = data;

    return View();
}
Notice I am adding the 4 values in List<SelectListItem> type variable and sending this variables value through ViewBag variable. Also notice the last 2 values are selected.
List<SelectListItem> data = new List<SelectListItem>()
{
    new SelectListItem { Text = "Alaska", Value = "AL" },
    new SelectListItem { Text = "Hawaii", Value = "HI" },
    new SelectListItem { Text = "California", Value = "CA", Selected = true },
    new SelectListItem { Text = "Nevada", Value = "NV", Selected = true }
};
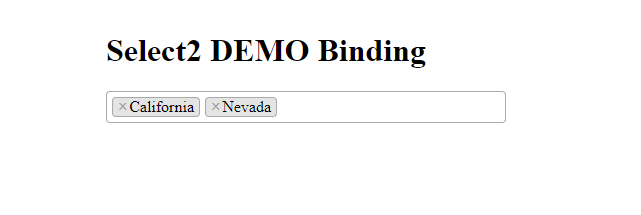
Finally add the select2 control in the Demo View and bind it with the ViewBag’s value using asp-items tag helper.
<select class="statesSelect" name="states" multiple asp-items="ViewBag.Data">
</select>
Now the select2 control will have 4 values in it for selection and 2 values will be selected by default. See the below image.
The link to download the full source code of this tutorial is given below:
DownloadSelect2 is an excellent jQuery plugin to make select controls modern and highly attractive. I strongly advise you to use it in your ASP.NET Core projects.
SHARE THIS ARTICLE
Related Tutorials:


ABOUT THE AUTHOR
I hope you enjoyed reading this tutorial. If it helped you then consider buying a cup of coffee for me. This will help me in writing more such good tutorials for the readers. Thank you.

HELLO EVERYONE
 Welcome to YogiHosting - A Programming Tutorial Website. It is used by millions of people around the world to learn and explore about ASP.NET Core, Blazor, jQuery, JavaScript, Docker, Kubernetes and other topics.
SUBSCRIBE TO NEWSLETTER
Enter your email address to subscribe to this blog and receive notifications of new posts by email.
Join 90K other subscribers