Please Consider Donating us
We are helping millions of Beginners and Professionals to learn new programming technologies.
Please consider donating us:


How to Import Excel File into Database in ASP.NET MVC

If you want to Import Excel File into your database in ASP.NET MVC then this tutorial will teach you the fastest way to accomplish this. In this tutorial you will learn:
- How to upload an Excel File to the Server with an input file control.
- How to Read the uploaded Excel File data with OleDbDataReader class.
- How to Import Excel File’s data into a Database table with SqlBulkCopy class. This is the fastest method of importing excel’s data.
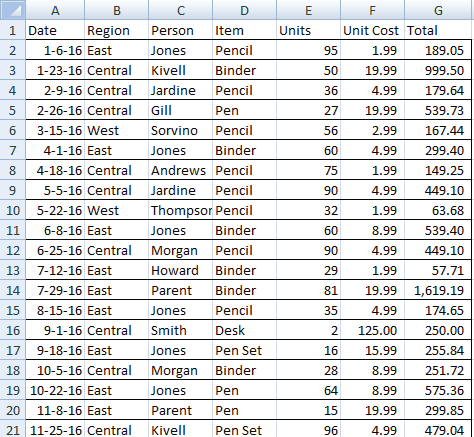
The Excel File Structure
You can Import Excel file that have any number of rows and columns. Make sure you provide the names to each and every column of the excel file.
Here I am using an excel file that contains the sale report of a shop. It has 7 columns:
- 1. Date – containing date values.
- 2. Region – contains string.
- 3. Person – contains string.
- 4. Item – contains string.
- 5. Units – contains values of type int.
- 6. Unit Cost – contains decimal values.
- 7. Total – contains decimal values.
You can download this excel file by clicking here.
Creating Database Table
Based on the structure of my excel file, I have to create a database table. To this table the data of this excel file will be copied.
I name this table as Sale and create its structure like this:
- 1. Id – Primary key and identity column of type int.
- 2. Region – varchar(25).
- 3. Person – varchar(25).
- 4. Item – varchar(25).
- 5. Units – int.
- 6. UnitCost – money.
- 7. Total – money.
- 8. AddedOn – date.
You cna download this table’s script from here.
The Create table script of my Sale table is:
CREATE TABLE [dbo].[Sale](
    [Id] [int] IDENTITY(1,1) NOT NULL,
    [Region] [varchar](25) NOT NULL,
    [Person] [varchar](25) NOT NULL,
    [Item] [varchar](25) NOT NULL,
    [Units] [int] NOT NULL,
    [UnitCost] [money] NOT NULL,
    [Total] [money] NOT NULL,
    [AddedOn] [date] NOT NULL,
 CONSTRAINT [PK_Sale] PRIMARY KEY CLUSTERED
(
    [Id] ASC
)WITH (PAD_INDEX = OFF, STATISTICS_NORECOMPUTE = OFF, IGNORE_DUP_KEY = OFF, ALLOW_ROW_LOCKS = ON, ALLOW_PAGE_LOCKS = ON) ON [PRIMARY]
) ON [PRIMARY]
The model code is:
public class ImportExcel
{
    [Required(ErrorMessage = "Please select file")]
    [FileExt(Allow = ".xls,.xlsx", ErrorMessage = "Only excel file")]
    public HttpPostedFileBase file { get; set; }
}
The FileExt() is the Custom Validation attribute used for doing the Server Side Validation of file upload control.
Thus it will allow file upload control to upload only .xls and .xlsx files.
Create a new class called FileExt and add the below code to it:
public class FileExt : ValidationAttribute
{
    public string Allow;
    protected override ValidationResult IsValid(object value, ValidationContext validationContext)
    {
        if (value != null)
        {
            string extension = ((System.Web.HttpPostedFileBase)value).FileName.Split('.')[1];
            if (Allow.Contains(extension))
                return ValidationResult.Success;
            else
                return new ValidationResult(ErrorMessage);
        }
        else
            return ValidationResult.Success;
    }
}
In the controller add Index Action of type post as shown below:
[HttpPost]
public ActionResult Index(ImportExcel importExcel)
{
    if (ModelState.IsValid)
    {
        string path = Server.MapPath("~/Content/Upload/" + importExcel.file.FileName);
        importExcel.file.SaveAs(path);

        string excelConnectionString = @"Provider='Microsoft.ACE.OLEDB.12.0';Data Source='" + path + "';Extended Properties='Excel 12.0 Xml;IMEX=1'";
        OleDbConnection excelConnection = new OleDbConnection(excelConnectionString);

        //Sheet Name
        excelConnection.Open();
        string tableName = excelConnection.GetSchema("Tables").Rows[0]["TABLE_NAME"].ToString();
        excelConnection.Close();
        //End

        OleDbCommand cmd = new OleDbCommand("Select * from [" + tableName + "]", excelConnection);

        excelConnection.Open();

        OleDbDataReader dReader;
        dReader = cmd.ExecuteReader();
        SqlBulkCopy sqlBulk = new SqlBulkCopy(ConfigurationManager.ConnectionStrings["CS"].ConnectionString);

        //Give your Destination table name
        sqlBulk.DestinationTableName = "sale";

        //Mappings
        sqlBulk.ColumnMappings.Add("Date", "AddedOn");
        sqlBulk.ColumnMappings.Add("Region", "Region");
        sqlBulk.ColumnMappings.Add("Person", "Person");
        sqlBulk.ColumnMappings.Add("Item", "Item");
        sqlBulk.ColumnMappings.Add("Units", "Units");
        sqlBulk.ColumnMappings.Add("Unit Cost", "UnitCost");
        sqlBulk.ColumnMappings.Add("Total", "Total");

        sqlBulk.WriteToServer(dReader);
        excelConnection.Close();

        ViewBag.Result = "Successfully Imported";
    }
    return View();
}
Also you need to add the following namespaces to the controller:
using System.Data.OleDb;
using System.Data.SqlClient;
using System.Configuration;
- The first step to Import Excel file is by uploading it into the Upload folder. Then a connection string is made using Microsoft.ACE.OLEDB.12.0 provider.
- Once the Excel’s file is fetched into the variable called tableName, I am then creating an OleDbCommand object and pass the ‘select’ Query and the connection string to it.
- Then I am creating an OleDbDataReader object that will read every record of the Excel file.
- Next, the Import Excel procedure starts, for this I create the a SqlBulkCopy class object and sets the SQL Database Table name to it’s DestinationTableName property. Then through the sqlBulk.ColumnMappings.Add(SourceColumn,DesinationColumn), the column mappings are done.
- Finally using the .WriteToServe() function the Excel File’s Data is copied into the database table.
Add the following code to the Index View:
<h4>@ViewBag.Result</h4>
@using (Html.BeginForm("Index", "ImportExcel", FormMethod.Post, new { enctype = "multipart/form-data" }))
{
    @Html.TextBoxFor(m => m.file, new { type = "file" })
    <button id="submitButton" type="submit">Submit</button>
    @Html.ValidationMessageFor(model => model.file)
}
Conclusion
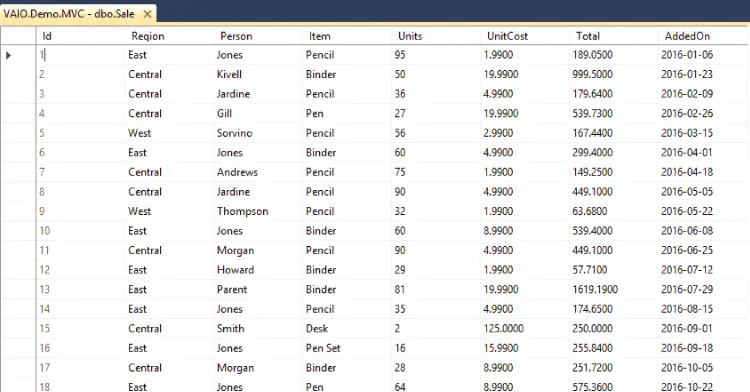
Now Run the application and Import the Excel File. After a couple of second the excel records will be copied into the database table. You can check your database table to find the newly copied records.
The below image shows the records added to my SQL database table:
You can download the source code by using the below link:
SHARE THIS ARTICLE
Related Tutorials:


ABOUT THE AUTHOR
I hope you enjoyed reading this tutorial. If it helped you then consider buying a cup of coffee for me. This will help me in writing more such good tutorials for the readers. Thank you.
HELLO EVERYONE
 Welcome to YogiHosting - A Programming Tutorial Website. It is used by millions of people around the world to learn and explore about ASP.NET Core, Blazor, jQuery, JavaScript, Docker, Kubernetes and other topics.
SUBSCRIBE TO NEWSLETTER
Enter your email address to subscribe to this blog and receive notifications of new posts by email.
Join 90K other subscribers