How to Create an “Instant Username Availability” checking feature in ASP.NET

The Instant Username Availability Check feature will enable visitors to easily find out which usernames are available and which are already taken. So when they come to create their account on your website they don’t have to:
- 1. Enter a username.
- 2. Click the submit button.
- 3. And then wait for the message regarding the username being available or not.
In this Tutorial I will make this “Instant Username Availability Check” feature in ASP.NET.
How does this feature will function
There will be a form, in this form there will be 3 text boxes for:
- 1. Username
- 2. Email
- 3. Password
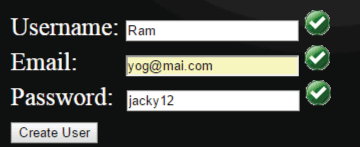
Each one of these text boxes will have an img tag which will show a Tick image or a Cross image as soon as any text box is filled with a value.
When ‘Tick’ image shows then it means the entry is correct while the ‘Cross’ image means that there is something wrong for the entry.

So if Tick image will show for the Username text box then it will mean the username is available. Obviously the Username entry will be checked from the database.
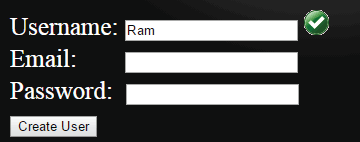
The Instant Username Availability feature will have the form like shown below:
<table>
    <tbody><tr>
        <td>Username:
            <input type="text" id="userNameTextBox">
            <img>
        </td>
    </tr>
    <tr>
        <td>Email:
            <input type="text" id="emailTextBox">
            <img>
        </td>
    </tr>
    <tr>
        <td>Password:
            <input type="text" id="passwordTextBox">
            <img>
        </td>
    </tr>
    <tr>
        <td colspan="3">
            <button id="submitButton">Create User</button>
        </td>
    </tr></tbody>
</table>
Note: The work of the submit button is to create the account for the user once all the images besides the three text boxes show Tick image.
To do the Instant Checking of the entries we will have to apply the .keyup() event for each of these 3 text boxes.
The .keyup() code for email text box is:
$("#emailTextBox").keyup(function () {
    if (EmailValidate())
        $(this).siblings("img").attr("src", "tick.png");
    else
        $(this).siblings("img").attr("src", "cross.png");
});

function EmailValidate() {
    var numericExpression = /^\w.+@[a-zA-Z_-]+?\.[a-zA-Z]{2,3}$/;
    var elem = $("#emailTextBox").val();
    if (elem.match(numericExpression))
        return true;
    else
        return false;
}
On the .keyup() event I check whether the email entry is in the correct format or not. If it is then the image next to the email text box will show Tick image and if it is not then it shows the Cross image.
I used the jQuery’s .siblings() method that finds the ‘img’ element that is the sibling of the email text box.
The EmailValidate() function checks the value of the email text box based on a valid email regular expression.
For password I want it to be at least 6 characters in length. So its code is:
$("#passwordTextBox").keyup(function () {
    if ($(this).val().length >= 6)
        $(this).siblings("img").attr("src", "tick.png");
    else
        $(this).siblings("img").attr("src", "cross.png");
});
- This is the most important part of the tutorial. Here, in the username text box’s .keyup() event I have to check the database for finding out whether the username is available or not.
- For this I am using the jQuery AJAX method which will call a C# function, and this C# function will check the database.
- So when the C# function finds out the Username is available it returns a string called Available else if the username is already taken then it returns NotAvailable.
- Based on this return string, in my jQuery AJAX’s Success Callback method I will show the ‘Tick’ or ‘Cross’ image.
$("#userNameTextBox").keyup(function () {
    var that = this;

    $.ajax({
        type: "POST",
        url: "index.aspx/checkusername",
        contentType: "application/json; charset=utf-8",
        data: '{"username":"' + $(this).val() + '"}',
        dataType: "json",
        success: function (msg) {
            if (msg.d == "Available") {
                $(that).siblings("img").attr("src", "tick.png");
            }
            else
                $(that).siblings("img").attr("src", "cross.png");
        },
        error: function (req, status, error) {
            alert(req + " " + status + " " + error);
        }
    });
});
The $.ajax() is the jQuery AJAX method which calls the C# function called checkusername. It passes the ‘username’ to its parameter.
Inside the success function, which will be called when the C# function returns a string value, in this I am showing the Tick or the Cross image.
The C# function should be public and static and must have the [WebMethod] attribute to it.
[WebMethod]
public static string checkusername(string username)
{
    // check the username value from database

    string[] usernameAvailable = {"Ram","Shiv","Krishna" };
    if (usernameAvailable.Contains(username))
        return "Available";
    else
        return "NotAvailable";
}
Inside this function you can make ADO.NET codes that will check the username parameter value from the database. Here I have just checked it from an array value.
So in my case the available usernames are just 3 – “Ram”,”Shiv”,”Krishna”.
The button click will check if all the 3 img elements are showing the “Tick” image and in that case it will allow user to create an account on the site.
The code for this is:
$("#submitButton").click(function (e) {
    if ($("table").find('img[src="tick.png"]').length == 3) {
        alert("THank you, your account is created");
        $("table").hide();
    }
    else
        alert("Check Cross image");
    return false;
});
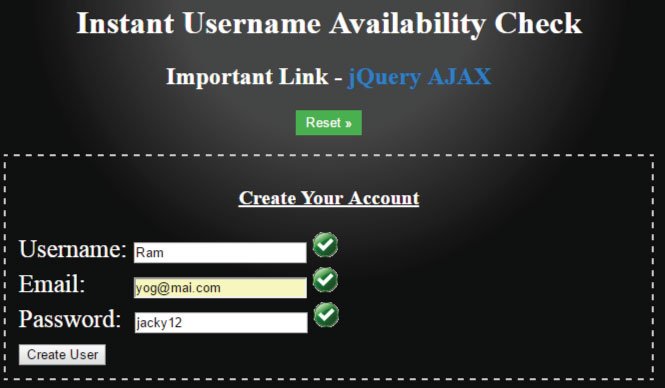
Fill Ram for username text box. You will see the “Tick” image next to it.
Fill a valid email for the email text box. You will see the Cross image initially as you type. Then when the email is in correct format, the image change to Tick one.
For password just fill any value that is of length greater than 5.

I hope you liked this Instant Username Availability check feature which is not only powerful but will also be loved by your customers. Just copy the codes which I have provided and use it freely in your website.
Full Code of .aspx page:
<form id="form1" runat="server">
    <h1>Instant Username Availability Check</h1>
    <h2>Important Link - <a href="https://www.yogihosting.com/jquery-ajax/">jQuery AJAX</a></h2>
    <h3><button id="reset">Reset »</button></h3>

    <div class="container">
        <div id="content">
            <h3><b><u>Create Your Account</u></b></h3>
            <table>
                <tbody><tr>
                    <td>Username:
                            <input type="text" id="userNameTextBox">
                        <img>
                    </td>
                </tr>
                <tr>
                    <td>Email:
                            <input type="text" id="emailTextBox">
                        <img>
                    </td>
                </tr>
                <tr>
                    <td>Password:
                            <input type="text" id="passwordTextBox">
                        <img>
                    </td>
                </tr>
                <tr>
                    <td colspan="3">
                        <button id="submitButton">Create User</button>
                    </td>
                </tr>
            </tbody></table>
        </div>
    </div>
</form>

<script src="https://ajax.googleapis.com/ajax/libs/jquery/3.1.0/jquery.min.js"></script>
<script type="text/javascript">
    $(document).ready(function () {
        $("#reset").click(function (e) {
            location.reload();
        });

        $("#submitButton").click(function (e) {
            if ($("table").find('img[src="tick.png"]').length == 3) {
                alert("THank you, your account is created");
                $("table").hide();
            }
            else
                alert("Check Cross image");
            return false;
        });

        $("#userNameTextBox").keyup(function () {
            var that = this;
            $.ajax({
                type: "POST",
                url: "index.aspx/checkusername",
                contentType: "application/json; charset=utf-8",
                data: '{"username":"' + $(this).val() + '"}',
                dataType: "json",
                success: function (msg) {
                    if (msg.d == "Available") {
                        $(that).siblings("img").attr("src", "tick.png");
                    }
                    else
                        $(that).siblings("img").attr("src", "cross.png");
                },
                error: function (req, status, error) {
                    alert(req + " " + status + " " + error);
                }
            });
        });

        $("#emailTextBox").keyup(function () {
            if (EmailValidate())
                $(this).siblings("img").attr("src", "tick.png");
            else
                $(this).siblings("img").attr("src", "cross.png");
        });

        $("#passwordTextBox").keyup(function () {
            if ($(this).val().length >= 6)
                $(this).siblings("img").attr("src", "tick.png");
            else
                $(this).siblings("img").attr("src", "cross.png");
        });

        function EmailValidate() {
            var numericExpression = /^\w.+@[a-zA-Z_-]+?\.[a-zA-Z]{2,3}$/;
            var elem = $("#emailTextBox").val();
            if (elem.match(numericExpression))
                return true;
            else
                return false;
        }
    });
</script>
Check the download link:
1. Server Side Validation in ASP.NET Core
2. Client Side Validation in ASP.NET Core


 Welcome to YogiHosting - A Programming Tutorial Website. It is used by millions of people around the world to learn and explore about ASP.NET Core, Blazor, jQuery, JavaScript, Docker, Kubernetes and other topics.