Please Consider Donating us
We are helping millions of Beginners and Professionals to learn new programming technologies.
Please consider donating us:


ASP.NET Web Forms – Implementation of BlueImp jQuery File Upload GitHub Plugin

GitHub has the the best jQuery File Upload plugin by BlueImp. It can be downloaded from GitHub using this link.
Here in this tutorial I decided to implement the BlueImp jQuery File Upload plugin in my ASP.NET Web Forms. On the completion of this implementation, you will be able to do the following things which are described below:
- 1. Multiple files upload Simultaneous.
- 2. Drag & Drop files on your page and file upload will start.
- 3. Upload progress bar that shows the real time upload progress.
- 4. Individual file uploads can be cancelled to stop the upload progress.
- 5. Resume supported on Aborted uploads.
Check this below short video which shows the working of this jQuery File Upload feature.

So what are we waiting for? Let us start the implementation part.
Add Plugin CSS and JS Files to the ASP.NET Core Application
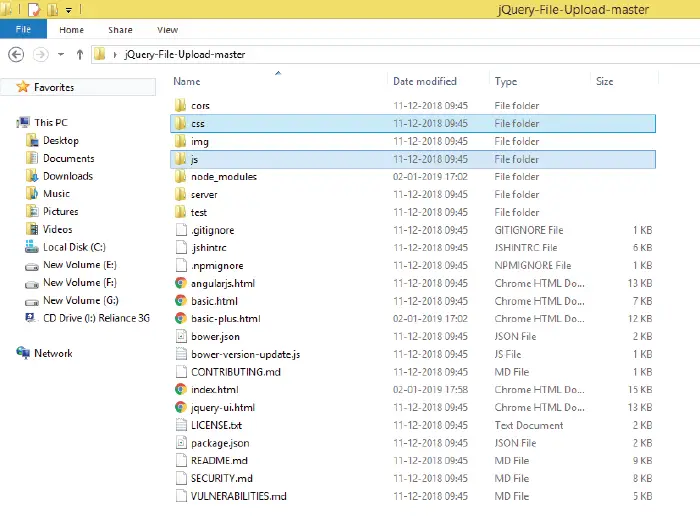
I already have downloaded this plugin from GitHub in to your local drive. Inside the plugin’s folder there are css and js folders. I copy and paste these 2 folders to my website’s Content folder.
The Content folder location is in the root directory of the website. Check the below image:
Create a new Web Form
I create a new web form called fileupload.aspx in my website. Next, I open the index.html file located in the plugin’s root folder, and copy and paste all it’s code to my fileupload.aspx web form.
The best way to do is by removing all the codes from the fileupload.aspx except the top code line which specifies the Page attributes and is given below:
<%@ Page Language="C#" AutoEventWireup="true" CodeBehind="fileupload.aspx.cs" Inherits="jFileUploadASP.fileupload" %>
Then copy and paste all the code lines from the index.html file after the Page attributes line.
Next, I change the href attribute of css files and src attribute of scripts files to their new position which is inside the Content folder.
Take for example – I changed
<script src="js/demo.js"></script>
To
<script src="/Content/js/demo.js"></script>
This makes the fileupload.aspx updated code as:
<%@ Page Language="C#" AutoEventWireup="true" CodeBehind="fileupload.aspx.cs" Inherits="jFileUploadASP.fileupload" %>

<!DOCTYPE html>
<!--
/*
 * jQuery File Upload Demo
 * https://github.com/blueimp/jQuery-File-Upload
 *
 * Copyright 2010, Sebastian Tschan
 * https://blueimp.net
 *
 * Licensed under the MIT license:
 * https://opensource.org/licenses/MIT
 */
-->
<html lang="en">
<head>
    <!-- Force latest IE rendering engine or ChromeFrame if installed -->
    <!--[if IE]>
      <meta http-equiv="X-UA-Compatible" content="IE=edge,chrome=1" />
    <![endif]-->
    <meta charset="utf-8" />
    <title>jQuery File Upload Demo</title>
    <meta name="description"
        content="File Upload widget with multiple file selection, drag&drop support, progress bars, validation and preview images, audio and video for jQuery. Supports cross-domain, chunked and resumable file uploads and client-side image resizing. Works with any server-side platform (PHP, Python, Ruby on Rails, Java, Node.js, Go etc.) that supports standard HTML form file uploads." />
    <meta name="viewport" content="width=device-width, initial-scale=1.0" />
    <!-- Bootstrap styles -->
    <link rel="stylesheet"
        href="https://maxcdn.bootstrapcdn.com/bootstrap/3.3.7/css/bootstrap.min.css"
        integrity="sha384-BVYiiSIFeK1dGmJRAkycuHAHRg32OmUcww7on3RYdg4Va+PmSTsz/K68vbdEjh4u"
        crossorigin="anonymous" />
    <!-- Generic page styles -->
    <style>
        #navigation {
            margin: 10px 0;
        }

        @media (max-width: 767px) {
            #title,
            #description {
                display: none;
            }
        }
    </style>
    <!-- blueimp Gallery styles -->
    <link rel="stylesheet"
        href="https://blueimp.github.io/Gallery/css/blueimp-gallery.min.css" />
    <!-- CSS to style the file input field as button and adjust the Bootstrap progress bars -->
    <link rel="stylesheet" href="/Content/css/jquery.fileupload.css" />
    <link rel="stylesheet" href="/Content/css/jquery.fileupload-ui.css" />
    <!-- CSS adjustments for browsers with JavaScript disabled -->
    <noscript>
        <link rel="stylesheet" href="/Content/css/jquery.fileupload-noscript.css" />
    </noscript>
    <noscript>
        <link rel="stylesheet" href="/Content/css/jquery.fileupload-ui-noscript.css" />
    </noscript>
</head>
<body>
    <div class="container">
        <ul class="nav nav-tabs" id="navigation">
            <li>
                <a href="https://github.com/blueimp/jQuery-File-Upload">Project</a>
            </li>
            <li class="active">
                <a href="#">Demo</a>
            </li>
            <li>
                <a href="https://github.com/blueimp/jQuery-File-Upload/wiki">Wiki</a>
            </li>
            <li>
                <a href="https://blueimp.net">Author</a>
            </li>
        </ul>
        <h1 id="title">jQuery File Upload Demo</h1>
        <blockquote id="description">
            <p>
                File Upload widget with multiple file selection, drag&drop
                support, progress bars, validation and preview images, audio and video
                for jQuery.<br />
                Supports cross-domain, chunked and resumable file uploads and
                client-side image resizing.<br />
                Works with any server-side platform (PHP, Python, Ruby on Rails, Java,
                Node.js, Go etc.) that supports standard HTML form file uploads.
            </p>
        </blockquote>
        <!-- The file upload form used as target for the file upload widget -->
        <form id="fileupload"
            action="https://jquery-file-upload.appspot.com/"
            method="POST"
            enctype="multipart/form-data">
            <!-- Redirect browsers with JavaScript disabled to the origin page -->
            <noscript>
                <input type="hidden"
                    name="redirect"
                    value="https://blueimp.github.io/jQuery-File-Upload/" />
            </noscript>
            <!-- The fileupload-buttonbar contains buttons to add/delete files and start/cancel the upload -->
            <div class="row fileupload-buttonbar">
                <div class="col-lg-7">
                    <!-- The fileinput-button span is used to style the file input field as button -->
                    <span class="btn btn-success fileinput-button">
                        <i class="glyphicon glyphicon-plus"></i>
                        <span>Add files...</span>
                        <input type="file" name="files[]" multiple />
                    </span>
                    <button type="submit" class="btn btn-primary start">
                        <i class="glyphicon glyphicon-upload"></i>
                        <span>Start upload</span>
                    </button>
                    <button type="reset" class="btn btn-warning cancel">
                        <i class="glyphicon glyphicon-ban-circle"></i>
                        <span>Cancel upload</span>
                    </button>
                    <button type="button" class="btn btn-danger delete">
                        <i class="glyphicon glyphicon-trash"></i>
                        <span>Delete selected</span>
                    </button>
                    <input type="checkbox" class="toggle" />
                    <!-- The global file processing state -->
                    <span class="fileupload-process"></span>
                </div>
                <!-- The global progress state -->
                <div class="col-lg-5 fileupload-progress fade">
                    <!-- The global progress bar -->
                    <div class="progress progress-striped active"
                        role="progressbar"
                        aria-valuemin="0"
                        aria-valuemax="100">
                        <div class="progress-bar progress-bar-success"
                            style="width: 0%;">
                        </div>
                    </div>
                    <!-- The extended global progress state -->
                    <div class="progress-extended"></div>
                </div>
            </div>
            <!-- The table listing the files available for upload/download -->
            <table role="presentation" class="table table-striped">
                <tbody class="files"></tbody>
            </table>
        </form>
        <div class="panel panel-default">
            <div class="panel-heading">
                <h3 class="panel-title">Demo Notes</h3>
            </div>
            <div class="panel-body">
                <ul>
                    <li>The maximum file size for uploads in this demo is
                        <strong>999 KB</strong> (default file size is unlimited).
                    </li>
                    <li>Only image files (<strong>JPG, GIF, PNG</strong>) are allowed in
                        this demo (by default there is no file type restriction).
                    </li>
                    <li>Uploaded files will be deleted automatically after
                        <strong>5 minutes or less</strong> (demo files are stored in
                        memory).
                    </li>
                    <li>You can <strong>drag & drop</strong> files from your desktop
                        on this webpage (see
                        <a href="https://github.com/blueimp/jQuery-File-Upload/wiki/Browser-support">Browser support</a>).
                    </li>
                    <li>Please refer to the
                        <a href="https://github.com/blueimp/jQuery-File-Upload">project website</a>
                        and
                        <a href="https://github.com/blueimp/jQuery-File-Upload/wiki">documentation</a>
                        for more information.
                    </li>
                    <li>Built with the
                        <a href="https://getbootstrap.com/">Bootstrap</a> CSS framework
                        and Icons from <a href="https://glyphicons.com/">Glyphicons</a>.
                    </li>
                </ul>
            </div>
        </div>
    </div>
    <!-- The blueimp Gallery widget -->
    <div id="blueimp-gallery"
        class="blueimp-gallery blueimp-gallery-controls"
        aria-label="image gallery"
        aria-modal="true"
        role="dialog"
        data-filter=":even">
        <div class="slides" aria-live="polite"></div>
        <h3 class="title"></h3>
        <a class="prev"
            aria-controls="blueimp-gallery"
            aria-label="previous slide"
            aria-keyshortcuts="ArrowLeft"></a>
        <a class="next"
            aria-controls="blueimp-gallery"
            aria-label="next slide"
            aria-keyshortcuts="ArrowRight"></a>
        <a class="close"
            aria-controls="blueimp-gallery"
            aria-label="close"
            aria-keyshortcuts="Escape"></a>
        <a class="play-pause"
            aria-controls="blueimp-gallery"
            aria-label="play slideshow"
            aria-keyshortcuts="Space"
            aria-pressed="false"
            role="button"></a>
        <ol class="indicator"></ol>
    </div>

    <!-- The template to display files available for upload -->
    <script id="template-upload" type="text/x-tmpl">
        {% for (var i=0, file; file=o.files[i]; i++) { %}
        <tr class="template-upload fade{%=o.options.loadImageFileTypes.test(file.type)?' image':''%}">
            <td>
                <span class="preview"></span>
            </td>
            <td>
                <p class="name">{%=file.name%}</p>
                <strong class="error text-danger"></strong>
            </td>
            <td>
                <p class="size">Processing...</p>
                <div class="progress progress-striped active" role="progressbar" aria-valuemin="0" aria-valuemax="100" aria-valuenow="0"><div class="progress-bar progress-bar-success" style="width:0%;"></div></div>
            </td>
            <td>
                {% if (!o.options.autoUpload && o.options.edit && o.options.loadImageFileTypes.test(file.type)) { %}
                <button class="btn btn-success edit" data-index="{%=i%}" disabled>
                    <i class="glyphicon glyphicon-edit"></i>
                    <span>Edit</span>
                </button>
                {% } %}
                {% if (!i && !o.options.autoUpload) { %}
                <button class="btn btn-primary start" disabled>
                    <i class="glyphicon glyphicon-upload"></i>
                    <span>Start</span>
                </button>
                {% } %}
                {% if (!i) { %}
                <button class="btn btn-warning cancel">
                    <i class="glyphicon glyphicon-ban-circle"></i>
                    <span>Cancel</span>
                </button>
                {% } %}
            </td>
        </tr>
        {% } %}
    </script>
    <!-- The template to display files available for download -->
    <script id="template-download" type="text/x-tmpl">
        {% for (var i=0, file; file=o.files[i]; i++) { %}
        <tr class="template-download fade{%=file.thumbnailUrl?' image':''%}">
            <td>
                <span class="preview">
                    {% if (file.thumbnailUrl) { %}
                    <a href="{%=file.url%}" title="{%=file.name%}" download="{%=file.name%}" data-gallery><img src="{%=file.thumbnailUrl%}"></a>
                    {% } %}
                </span>
            </td>
            <td>
                <p class="name">
                    {% if (file.url) { %}
                    <a href="{%=file.url%}" title="{%=file.name%}" download="{%=file.name%}" {%=file.thumbnailUrl?'data-gallery':''%}>{%=file.name%}</a>
                    {% } else { %}
                    <span>{%=file.name%}</span>
                    {% } %}
                </p>
                {% if (file.error) { %}
                <div><span class="label label-danger">Error</span> {%=file.error%}</div>
                {% } %}
            </td>
            <td>
                <span class="size">{%=o.formatFileSize(file.size)%}</span>
            </td>
            <td>
                {% if (file.deleteUrl) { %}
                <button class="btn btn-danger delete" data-type="{%=file.deleteType%}" data-url="{%=file.deleteUrl%}" {% if (file.deleteWithCredentials) { %} data-xhr-fields='{"withCredentials":true}' {% } %}>
                    <i class="glyphicon glyphicon-trash"></i>
                    <span>Delete</span>
                </button>
                <input type="checkbox" name="delete" value="1" class="toggle">
                {% } else { %}
                <button class="btn btn-warning cancel">
                    <i class="glyphicon glyphicon-ban-circle"></i>
                    <span>Cancel</span>
                </button>
                {% } %}
            </td>
        </tr>
        {% } %}
    </script>
    <script src="https://ajax.googleapis.com/ajax/libs/jquery/1.12.4/jquery.min.js"
        integrity="sha384-nvAa0+6Qg9clwYCGGPpDQLVpLNn0fRaROjHqs13t4Ggj3Ez50XnGQqc/r8MhnRDZ"
        crossorigin="anonymous"></script>
    <!-- The jQuery UI widget factory, can be omitted if jQuery UI is already included -->
    <script src="/Content/js/vendor/jquery.ui.widget.js"></script>
    <!-- The Templates plugin is included to render the upload/download listings -->
    <script src="https://blueimp.github.io/JavaScript-Templates/js/tmpl.min.js"></script>
    <!-- The Load Image plugin is included for the preview images and image resizing functionality -->
    <script src="https://blueimp.github.io/JavaScript-Load-Image/js/load-image.all.min.js"></script>
    <!-- The Canvas to Blob plugin is included for image resizing functionality -->
    <script src="https://blueimp.github.io/JavaScript-Canvas-to-Blob/js/canvas-to-blob.min.js"></script>
    <!-- blueimp Gallery script -->
    <script src="https://blueimp.github.io/Gallery/js/jquery.blueimp-gallery.min.js"></script>
    <!-- The Iframe Transport is required for browsers without support for XHR file uploads -->
    <script src="/Content/js/jquery.iframe-transport.js"></script>
    <!-- The basic File Upload plugin -->
    <script src="/Content/js/jquery.fileupload.js"></script>
    <!-- The File Upload processing plugin -->
    <script src="/Content/js/jquery.fileupload-process.js"></script>
    <!-- The File Upload image preview & resize plugin -->
    <script src="/Content/js/jquery.fileupload-image.js"></script>
    <!-- The File Upload audio preview plugin -->
    <script src="/Content/js/jquery.fileupload-audio.js"></script>
    <!-- The File Upload video preview plugin -->
    <script src="/Content/js/jquery.fileupload-video.js"></script>
    <!-- The File Upload validation plugin -->
    <script src="/Content/js/jquery.fileupload-validate.js"></script>
    <!-- The File Upload user interface plugin -->
    <script src="/Content/js/jquery.fileupload-ui.js"></script>
    <!-- The main application script -->
    <script src="/Content/js/demo.js"></script>
    <!-- The XDomainRequest Transport is included for cross-domain file deletion for IE 8 and IE 9 -->
    <!--[if (gte IE 8)&(lt IE 10)]>
        <script src="/Content/js/cors/jquery.xdr-transport.js"></script>
    <![endif]-->
</body>
</html>
Notice that the file upload control is defined as:
<input type="file" name="files[]" multiple>
Create a Generic Handler
I will have to take a help of a Generic Handler which will be called by the plugin’s scripts. The Generic Handler will then upload and save the files to the website.
So create a new Generic Handler called FileUploadHandler.ashx and add the following code to it. I placed this inside the root of my website.
using System;
using System.Collections.Generic;
using System.IO;
using System.Linq;
using System.Web;
using Newtonsoft.Json;

namespace jFileUploadASP
{
    public class FileUploadHandler : IHttpHandler
    {

        public void ProcessRequest(HttpContext context)
        {
            if (context.Request.Files.Count > 0)
            {
                HttpPostedFile file = context.Request.Files[0];
                var resultList = new List<UploadFilesResult>();
                string path = context.Server.MapPath("~/Content/uploads/");
                file.SaveAs(path + file.FileName);

                UploadFilesResult uploadFiles = new UploadFilesResult();
                uploadFiles.name = file.FileName;
                uploadFiles.size = file.ContentLength;
                uploadFiles.type = "image/jpeg";
                uploadFiles.url = "/Content/uploads/" + file.FileName;
                uploadFiles.deleteUrl = "/FileUploadHandler.ashx?file=" + file.FileName;
                uploadFiles.thumbnailUrl = "/Content/uploads/" + file.FileName;
                uploadFiles.deleteType = "GET";

                resultList.Add(uploadFiles);

                JsonFiles jFiles = new JsonFiles(resultList);
                string jFilesJson = JsonConvert.SerializeObject(jFiles);

                context.Response.ContentType = "text/plain";
                context.Response.Write(jFilesJson);
            }

            if (context.Request.QueryString["file"] != null)
            {
                File.Delete(Path.Combine(context.Server.MapPath("~/Content/uploads/"), context.Request.QueryString["file"]));
                context.Response.ContentType = "application/json";
                context.Response.Write("\"OK\"");
            }
        }

        public bool IsReusable
        {
            get
            {
                return false;
            }
        }
    }
}
Explanation : Inside the ProcessRequest method of the Generic Handler I check whether the files count is greater than 0. If files count is greater than 0 then I start the uploading of these files.
if (context.Request.Files.Count > 0)
{
//…
}
I save these files inside the Content/uploads. I also used 2 classes to store the information of all the uploaded files.
These classes are:
- 1. UploadFilesResult
- 2.JsonFiles
string jFilesJson = JsonConvert.SerializeObject(jFiles);
context.Response.ContentType = "text/plain";
context.Response.Write(jFilesJson);
Note the code line which is the setting of deleteUrl of the UploadFilesResult class object:
uploadFiles.deleteUrl = "/FileUploadHandler.ashx?file=" + file.FileName;
I assigned the value of – "/FileUploadHandler.ashx?file=" + file.FileName, so that the Generic Handler is called when the delete button is clicked in the UI.
So in the Generic Hander I added the code that does the deletion of the files:
if (context.Request.QueryString["file"] != null)
{
    File.Delete(Path.Combine(context.Server.MapPath("~/Content/uploads/"), context.Request.QueryString["file"]));
    context.Response.ContentType = "application/json";
    context.Response.Write("\"OK\"");
}
Change the URL in the main.js script
Open the main.js kept inside the Content/js folder. In this file comment out the code line that says – url: 'server/php/' and add url: 'FileUploadHandler.ashx' in it’s place.
This is needed because the plugin should know which server side file has the task to do uploading & deleting of files.
$('#fileupload').fileupload({
    // Uncomment the following to send cross-domain cookies:
    //xhrFields: {withCredentials: true},
    //url: 'server/php/'
    url: 'FileUploadHandler.ashx'
});
Create the 2 Classes
You also have to create 2 classes in the website. These files are:
1. JsonFiles
public class JsonFiles
{
    public UploadFilesResult[] files;
    public string TempFolder { get; set; }
    public JsonFiles(List<UploadFilesResult> filesList)
    {
        files = new UploadFilesResult[filesList.Count];
        for (int i = 0; i < filesList.Count; i++)
        {
            files[i] = filesList.ElementAt(i);
        }
    }
}
2. UploadFilesResult
public class UploadFilesResult
{
    public string name { get; set; }
    public long size { get; set; }
    public string type { get; set; }
    public string url { get; set; }
    public string deleteUrl { get; set; }
    public string thumbnailUrl { get; set; }
    public string deleteType { get; set; }
}
These classes store the information of the uploaded files.
You can download the source code using the below link:
I hope you loved reading this tutorial on jQuery File Upload. Download the source codes and use it in your website. Also check some of my other tutorial on ASP.NET Web Forms and jQuery.
SHARE THIS ARTICLE
Related Tutorials:


ABOUT THE AUTHOR
I hope you enjoyed reading this tutorial. If it helped you then consider buying a cup of coffee for me. This will help me in writing more such good tutorials for the readers. Thank you.
HELLO EVERYONE
 Welcome to YogiHosting - A Programming Tutorial Website. It is used by millions of people around the world to learn and explore about ASP.NET Core, Blazor, jQuery, JavaScript, Docker, Kubernetes and other topics.
SUBSCRIBE TO NEWSLETTER
Enter your email address to subscribe to this blog and receive notifications of new posts by email.
Join 90K other subscribers