


OpenAPI Support in ASP.NET Core Web API Apps: A Complete Guide
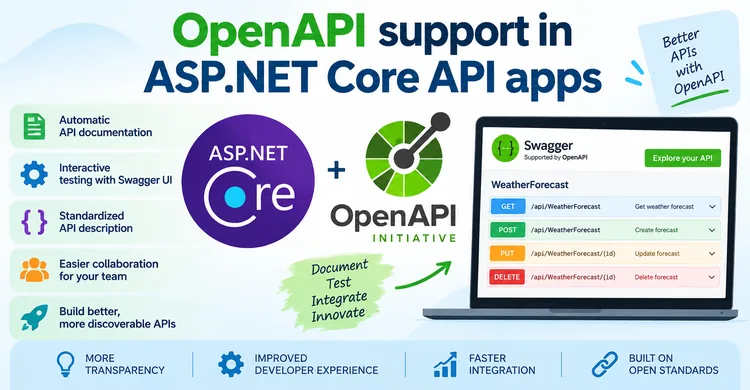
OpenAPI is a standard specification for describing HTTP APIs in a machine-readable format. In an ASP.NET Core Web API application, OpenAPI can describe your API endpoints, HTTP methods, parameters, request and response models, authentication requirements, and other API metadata.
This description can then be used by tools such as Swagger UI to generate interactive API documentation, allowing developers to explore and test API endpoints directly from a web browser.
Page Contents
ASP.NET Core supports generating OpenAPI documents for both controller-based APIs and Minimal APIs.
OpenAPI makes ASP.NET Core APIs easier to understand, test, integrate, and maintain.
Some important benefits include:
- 📚 Automatic API documentation — Describe endpoints and their request/response structures.
- 🧪 Interactive API testing — Tools such as Swagger UI allow developers to execute API requests from the browser.
- 🔧 Client-code generation — OpenAPI documents can be used to generate client libraries for different programming languages.
- 🤝 Better collaboration — Front-end and back-end developers can work from the same API contract.
- 🔍 API discoverability — Developers can quickly understand what endpoints are available and how to use them.
- 🔐 Security documentation — Authentication and authorization schemes can be represented in the OpenAPI document.
- 🌐 Tool interoperability — Because OpenAPI is a widely adopted standard, many API development tools can consume the specification.
Using OpenAPI in ASP.NET Core Web API
ASP.NET Core Web API provides built-in support for generating OpenAPI documents through the Microsoft.AspNetCore.OpenApi package and APIs such as AddOpenApi() and MapOpenApi().
The ASP.NET Core Web API project template includes the following code to enable OpenAPI support:
var builder = WebApplication.CreateBuilder();

builder.Services.AddOpenApi();

var app = builder.Build();

if (app.Environment.IsDevelopment())
{
    app.MapOpenApi();
}

app.MapGet("/", () => "Hello world!");

app.Run();
Notice the 2 lines:
builder.Services.AddOpenApi();
app.MapOpenApi();- AddOpenApi registers the services required to generate OpenAPI documents in the application’s dependency injection (DI) container.
- MapOpenApi maps an endpoint that serves the generated OpenAPI document in JSON format. By default, this endpoint is typically enabled only in the Development environment, helping prevent the accidental exposure of potentially sensitive API information in production.
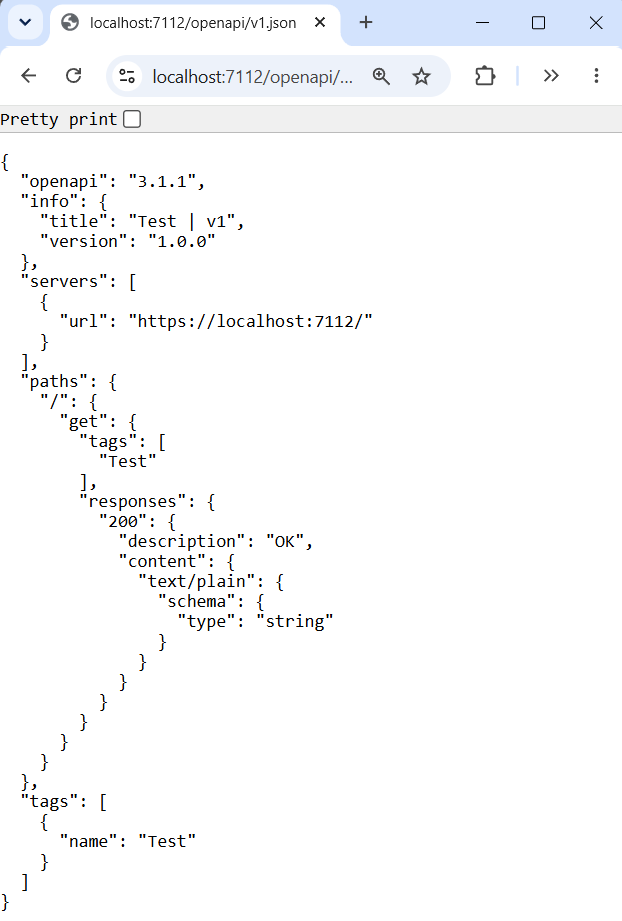
Start the application and navigate to https://localhost:{port}/openapi/v1.json to view the generated OpenAPI document. Replace {port} with the port number on which the application is running. You will see the OpenAPI generated document that describes the HTTP API exposed by the application. It follows the OpenAPI 3.1.1 specification and provides information that tools such as Swagger UI, API clients, and code generators can use to understand and interact with the API.
The OpenAPI generated document by default is in JSON format and is given below.
{
  "openapi": "3.1.1",
  "info": {
    "title": "Test | v1",
    "version": "1.0.0"
  },
  "servers": [
    {
      "url": "https://localhost:7112/"
    }
  ],
  "paths": {
    "/": {
      "get": {
        "tags": [
          "Test"
        ],
        "responses": {
          "200": {
            "description": "OK",
            "content": {
              "text/plain": {
                "schema": {
                  "type": "string"
                }
              }
            }
          }
        }
      }
    }
  },
  "tags": [
    {
      "name": "Test"
    }
  ]
}
Check the below image of the OpenAPI document:
To generate the OpenAPI document in YAML format, specify the endpoint in the MapOpenApi call with a .yaml or .yml suffix. In the following example, {documentName} represents the name of the OpenAPI document:
app.MapOpenApi("/openapi/{documentName}.yaml");Here on opening the url – https://localhost:7112/openapi/v1.yaml, we get the OpenAPI document in yaml format. Note that we provided ‘documentName’ with value of v1. This value can be anything of your choice.
openapi: '3.1.1'
info:
  title: Test | v1
  version: 1.0.0
servers:
  - url: https://localhost:7112/
paths:
  /:
    get:
      tags:
        - Test
      responses:
        '200':
          description: OK
          content:
            text/plain:
              schema:
                type: string
tags:
  - name: Test
OpenAPI document name
The default OpenAPI document name is v1:
builder.Services.AddOpenApi(); // Document name is v1The document name can be modified by passing the name as a parameter to the AddOpenApi() method:
builder.Services.AddOpenApi("internal"); // Document name is internalGenerate multiple OpenAPI documents
To generate multiple OpenAPI documents, call the AddOpenApi() extension method once for each document, using a unique document name as the first parameter in each call.
The following code configures the application to generate two separate OpenAPI documents, named v1 and v2:
builder.Services.AddOpenApi("v1");
builder.Services.AddOpenApi("v2");
Here, AddOpenApi(“v1”) registers the OpenAPI document named v1, while AddOpenApi(“v2”) registers another document named v2. Each document can be configured independently, allowing an application to expose different API versions or different subsets of endpoints.
In this case the OpenAPI document is accessed from these 2 urls.
- https://localhost:7112/openapi/v1.json
- https://localhost:7112/openapi/v2.json
We can also configure which API endpoints are included in a particular OpenAPI document. For this we can use ShouldInclude method.
ShouldInclude is a filtering function. ASP.NET Core calls it for each API endpoint and uses the returned true or false value to decide whether that endpoint should appear in the OpenAPI document.
Suppose an application generates two OpenAPI documents, v1 and v2:
builder.Services.AddOpenApi("v1", options =>
{
    options.ShouldInclude = (description) =>
        description.GroupName == null ||
        description.GroupName == "v1";
});

builder.Services.AddOpenApi("v2", options =>
{
    options.ShouldInclude = (description) =>
        description.GroupName == null ||
        description.GroupName == "v2";
});
Now, assume the endpoints are assigned to groups as follows:
app.MapGet("/products", () => "All products")
   .WithGroupName("v1");

app.MapGet("/products/new", () => "New products")
   .WithGroupName("v2");

app.MapGet("/health", () => "Healthy");
The /products endpoint has the group name v1, so it is included only in the v1 OpenAPI document. Similarly, /products/new has the group name v2, so it is included only in the v2 document. The /health endpoint has no group name, so it is included in both documents.
Therefore, the generated documents contain:
v1 OpenAPI document:
GET /products
GET /health
v2 OpenAPI document:
GET /products/new
GET /health
This approach is useful when an application exposes multiple OpenAPI documents and you want to control which endpoints appear in each document.
Generate OpenAPI documents at build time
ASP.NET Core can generate OpenAPI documents at build time, allowing the OpenAPI specification to be created as part of the application build process rather than only when the application is running. This is useful for validating API definitions during development and CI/CD pipelines, as well as for making the generated OpenAPI document available to other tools.
To enable build-time OpenAPI generation, add the Microsoft.Extensions.ApiDescription.Server package to the project:
dotnet add package Microsoft.Extensions.ApiDescription.ServerWhen the project is built, the OpenAPI document is generated automatically. The generated document can then be used by tools that consume OpenAPI specifications, such as documentation generators, client-code generators, and API testing tools.
Build-time generation is particularly useful in CI/CD environments, because the OpenAPI document can be generated and validated without requiring the application to remain running. It also makes the API contract available as a build artifact that can be versioned, published, or consumed by downstream development processes.
By default, the generated OpenAPI document is placed in the application’s output directory. To change the location where the document is generated, specify the desired path using the OpenApiDocumentsDirectory property:
<PropertyGroup>
  <OpenApiDocumentsDirectory>.</OpenApiDocumentsDirectory>
</PropertyGroup>
The OpenApiDocumentsDirectory value is resolved relative to the project file. Setting the property to . places the generated OpenAPI document in the same directory as the project file, as shown in the previous example.
By default, the generated OpenAPI document uses the same name as the application’s project file. To specify a different file name, use the –file-name argument in the OpenApiGenerateDocumentsOptions property:
<PropertyGroup>
  <OpenApiGenerateDocumentsOptions>--file-name my-open-api</OpenApiGenerateDocumentsOptions>
</PropertyGroup>Some applications are configured to generate multiple OpenAPI documents, such as separate documents for different API versions or for public and internal APIs. By default, the build-time OpenAPI document generator generates a file for every configured document. To generate a file for only a specific document, specify its name using the –document-name argument in the OpenApiGenerateDocumentsOptions property:
<PropertyGroup>
  <OpenApiGenerateDocumentsOptions>--document-name v2</OpenApiGenerateDocumentsOptions>
</PropertyGroup>
Customize Runtime Behavior During Build-Time OpenAPI Generation
Build-time OpenAPI document generation works by launching the application’s entry point with a mock server implementation. The mock server is necessary to generate accurate OpenAPI documents because not all API information can be determined through static analysis alone.
Because the application’s entry point is executed during this process, its startup logic also runs. This includes code that registers services in the DI container or reads values from application configuration. In some situations, you may need to prevent specific startup code from executing when the application is launched by the build-time OpenAPI generation process.
For example, you may want to:
- Avoid reading certain configuration values.
- Prevent database-related services from being registered.
To exclude these code paths during build-time OpenAPI generation, condition them based on the name of the entry assembly:
This code checks which assembly started the application and calls AddServiceDefaults() only if that assembly is not named GetDocument.Insider.
To exclude these code paths during build-time OpenAPI generation, condition them based on the name of the entry assembly:
This code checks which assembly started the application and calls AddServiceDefaults() only if that assembly is not named GetDocument.Insider.
if (Assembly.GetEntryAssembly()?.GetName().Name != "GetDocument.Insider")
{
    builder.AddServiceDefaults();
}
AddServiceDefaults() method registers common services and configuration needed by the application, such as:
- Health checks
- Service discovery
- HTTP resilience
- OpenTelemetry
- Other common application defaults
Therefore:
- If the entry assembly is MyWebApi → condition is true → AddServiceDefaults() is called.
- If the entry assembly is GetDocument.Insider → condition is false → AddServiceDefaults() is not called.
Why is this useful? – In the context of build-time OpenAPI document generation, GetDocument.Insider can be the process used to start the application temporarily to discover its API endpoints and generate the OpenAPI document.
The application therefore avoids running:
builder.AddServiceDefaults();when it is being started by the OpenAPI generation process.
In simple terms, the code means:
Include OpenAPI Metadata in an ASP.NET Core App
OpenAPI metadata provides additional information about your API endpoints that can be included in the generated OpenAPI document. This metadata helps describe what an endpoint does, what parameters it accepts, what it returns, and how it should appear in API documentation.
In ASP.NET Core, OpenAPI metadata can be added to endpoints using methods such as WithName, WithSummary, WithDescription, WithTags, and Produces.
app.MapGet("/products/{id}", (int id) =>
{
    return Results.Ok(new { Id = id, Name = "Laptop" });
})
.WithName("GetProduct")
.WithSummary("Gets a product by ID")
.WithDescription("Retrieves detailed information about a product using its unique identifier.")
.WithTags("Products")
.Produces(StatusCodes.Status200OK);
These methods add metadata to the GET /products/{id} endpoint. When the OpenAPI document is generated, this information can be used to produce a more descriptive API specification.
For example, the generated OpenAPI document can contain information similar to:
{
  "summary": "Gets a product by ID",
  "description": "Retrieves detailed information about a product using its unique identifier."
}Adding metadata makes the generated OpenAPI document more useful for developers and tools. It can:
- Provide meaningful endpoint names.
- Describe the purpose of an API operation.
- Document parameters and request bodies.
- Describe possible HTTP responses.
- Organize endpoints using tags.
- Improve generated API documentation.
- Provide information to OpenAPI-based client and testing tools.
In short, OpenAPI metadata bridges the gap between the implementation of an ASP.NET Core endpoint and its generated API documentation. The more relevant metadata you provide, the more informative and useful the resulting OpenAPI document becomes.
In Controller-based Web APIs, the endpoint summary and description can be set using the [EndpointSummary] and [EndpointDescription] attributes. See the below example:
[EndpointSummary("Give some summary")]
[EndpointDescription("Give some description")]
[HttpGet("hello")]
public IResult Hello()
{
    return Results.Ok("Hello .NET");
}
In controller-based apps, ASP.NET Core automatically uses the controller name as a tag for each endpoint. You can override this default behavior by applying the [Tags] attribute. Example:
[Tags(["work", "projects"])]
[HttpGet("hello")]
public IResult Hello()
{
    return Results.Ok("Hello .NET");
}
operationId
The operationId provides a stable name for an operation that can be used by OpenAPI tools and client generators.
For example:
{
  "paths": {
    "/products/{id}": {
      "get": {
        "operationId": "GetProductById"
      }
    }
  }
}
Here, getProductById uniquely identifies the GET /products/{id} operation.
In ASP.NET Core, you can specify an operation ID using metadata such as:
[HttpGet("{id}")]
[EndpointName("GetProductById")]
public IResult GetProduct(int id)
{
    // ...
}
The endpoint name is used as the OpenAPI operationId.
.WithName(“GetProductById”) is the Minimal API equivalent of [EndpointName(“GetProductById”)]
:app.MapGet("/products/{id}", (int id) =>
{
// ...
return Results.Ok();
})
.WithName("GetProductById");parameters
OpenAPI supports documenting parameters passed to an API through the path, query string, headers, and cookies. ASP.NET Core automatically infers the parameter types from the route handler’s method signature. To add a description to a parameter, you can apply the [Description] attribute.
Example: For Minimal APIs:
app.MapGet("/hello", ([Description("This is a description.")] string name) => "Hello .NET !");Example: For Controller Based APIs:
[HttpGet("hello")]
public IResult Hello([Description("This is a description.")] string name)
{
    return Results.Ok("Hello .NET !");
}
Describe the request body
In OpenAPI, describing the request body means documenting the data that an API client sends to an endpoint. The request body is commonly used with HTTP methods such as POST, PUT, and PATCH to send JSON or other data to the server.
For example, a Minimal API endpoint might accept a Product object:
app.MapPost("/products", (Product product) =>
{
    return Results.Ok(product);
});
Here, product represents the request body. A client could send:
{
  "name": "Laptop",
  "price": 1200
}
OpenAPI can describe this request body by documenting things such as:
- Content type — for example, application/json
- Schema — the structure and data types of the request
- Properties — such as name and price
- Required properties
- Description of what the request body represents
The resulting OpenAPI document might contain:
{
  "requestBody": {
    "content": {
      "application/json": {
        "schema": {
          "$ref": "#/components/schemas/Product"
        }
      }
    }
  }
}
In ASP.NET Core, much of this information can be inferred automatically from the request type. You can also add metadata to provide a more meaningful description or customize how the request body appears in the generated OpenAPI document.
In simple terms, describing the request body tells API consumers what data they need to send to an endpoint and what structure that data should have.
Describe response types
In OpenAPI, describing response types means documenting the data an API endpoint can return to the client. This allows API consumers to understand what type of data to expect, the response status code, and the structure of the response body.
For example, a Minimal API endpoint might return a Product:
app.MapGet("/products/{id}", (int id) =>
{
    var product = new Product
    {
        Id = id,
        Name = "Laptop",
        Price = 1200
    };

    return Results.Ok(product);
});
ASP.NET Core can often infer the response information from the endpoint definition. However, explicitly describing response types is useful when an endpoint can return different response types or status codes.
For example:
app.MapGet("/products/{id}", (int id) =>
{
    var product = GetProduct(id);

    if (product is null)
        return Results.NotFound();

    return Results.Ok(product);
})
.Produces<Product>(StatusCodes.Status200OK)
.Produces(StatusCodes.Status404NotFound);
This tells OpenAPI that the endpoint can return:
- 200 OK — with a Product response body.
- 404 Not Found — when the requested product doesn’t exist.
The generated OpenAPI document can then describe these responses:
{
  "responses": {
    "200": {
      "description": "OK",
      "content": {
        "application/json": {
          "schema": {
            "$ref": "#/components/schemas/Product"
          }
        }
      }
    },
    "404": {
      "description": "Not Found"
    }
  }
}Response metadata is particularly useful for Swagger UI, API documentation, and client-code generation. It tells consumers exactly what an endpoint can return instead of requiring them to infer the response structure from the implementation.
In simple terms, describing response types tells API consumers what responses an endpoint can produce, including their status codes, content types, and response-body schemas.
responses for ProblemDetails
In ASP.NET Core, ProblemDetails is a standardized format for returning information about an HTTP error. It is commonly used for responses such as 400 Bad Request, 404 Not Found, or 500 Internal Server Error.
When documenting an API with OpenAPI, you can explicitly indicate that an endpoint may return a ProblemDetails response when an error occurs.
For example, with a Minimal API:
app.MapGet("/products/{id}", (int id) =>
{
    return Results.NotFound();
})
.Produces<Product>(StatusCodes.Status200OK)
.ProducesProblem(StatusCodes.Status404NotFound);
Here:
.ProducesProblem(StatusCodes.Status404NotFound)Tells ASP.NET Core’s OpenAPI metadata system that the endpoint can return a 404 response using the ProblemDetails format.
The generated OpenAPI document can describe the response approximately like this:
{
  "responses": {
    "404": {
      "description": "Not Found",
      "content": {
        "application/problem+json": {
          "schema": {
            "$ref": "#/components/schemas/ProblemDetails"
          }
        }
      }
    }
  }
}
The application/problem+json media type indicates that the response follows the standard Problem Details for HTTP APIs format.
A typical response might look like:
{
  "type": "https://example.com/errors/not-found",
  "title": "Resource not found",
  "status": 404,
  "detail": "The requested product was not found.",
  "instance": "/products/10"
}
In short, .ProducesProblem() is useful when an endpoint can return an error represented by ProblemDetails. It makes the error response explicit in the generated OpenAPI documentation, helping API consumers understand both the HTTP status code and the structure of the error response.
Multiple response types
An API endpoint can return different response types depending on the outcome of the request. For example, a GET endpoint might return a Product when the product exists, but return ProblemDetails when an error occurs.
In ASP.NET Core Minimal APIs, you can document multiple possible responses using .Produces
app.MapGet("/products/{id}", (int id) =>
{
    var product = GetProduct(id);

    if (product is null)
        return Results.NotFound();

    return Results.Ok(product);
})
.Produces<Product>(StatusCodes.Status200OK)
.ProducesProblem(StatusCodes.Status404NotFound);
This endpoint has two possible responses:
- 200 OK — returns a Product.
- 404 Not Found — returns a ProblemDetails response.
The generated OpenAPI document can describe both responses:
{
  "responses": {
    "200": {
      "description": "OK",
      "content": {
        "application/json": {
          "schema": {
            "$ref": "#/components/schemas/Product"
          }
        }
      }
    },
    "404": {
      "description": "Not Found",
      "content": {
        "application/problem+json": {
          "schema": {
            "$ref": "#/components/schemas/ProblemDetails"
          }
        }
      }
    }
  }
}
You can also document multiple successful response types. For example, an endpoint might return different models depending on the result:
app.MapGet("/products/{id}", (int id) =>
{
    // ...
    return Results.Ok();
})
.Produces<Product>(StatusCodes.Status200OK)
.Produces<ProductDetails>(StatusCodes.Status200OK)
.ProducesProblem(StatusCodes.Status404NotFound);
However, if the same status code can return different schemas, it is generally better to explicitly model that situation using an appropriate OpenAPI schema rather than simply adding multiple .Produces
In short, documenting multiple response types tells OpenAPI consumers all the possible responses an endpoint can produce, including their status codes, content types, and response-body schemas.
Exclude endpoints from OpenAPI
By default, ASP.NET Core includes endpoints in the generated OpenAPI document when they are discoverable by the OpenAPI system. However, some endpoints may not need to appear in API documentation. For example, you might want to exclude internal, diagnostic, health-check, or administrative endpoints.
In Minimal APIs, you can exclude an endpoint by using .ExcludeFromDescription():
app.MapGet("/internal/status", () =>
{
    return Results.Ok("Running");
})
.ExcludeFromDescription();
The endpoint won’t be included in the generated OpenAPI document.
In Controller-based APIs, you can use the [ApiExplorerSettings] attribute:
[HttpGet("internal/status")]
[ApiExplorerSettings(IgnoreApi = true)]
public IResult Status()
{
    return Results.Ok("Running");
}
Here, IgnoreApi = true prevents the action from being discovered by API Explorer and therefore keeps it out of the generated OpenAPI description.
Excluding an endpoint from OpenAPI is useful when an endpoint:
- Is intended only for internal use.
- Is used for application diagnostics.
- Is a health-check or infrastructure endpoint.
- Should not be presented as part of the public API.
- Is not useful to API consumers.
Use attributes to add metadata
ASP.NET Core uses metadata defined by attributes on class or record properties to populate metadata for the corresponding properties in the generated OpenAPI schema. The following table lists the attributes from the System.ComponentModel namespace that can be used to provide metadata for generated schemas.
| Attribute | Description |
|---|---|
| [Description] | Adds description of a property in the schema |
| [Required] | Makes property as required in the schema |
| [DefaultValue] | Sets default value of a property in the schema |
| [Range] | Sets minimum and maximum values for a number |
| [MinLength] | Sets minimum length |
| [MaxLength] | Sets maximum length |
| [RegularExpression] | Sets reqular expression patterns for a string in the schema |
OpenAPI XML documentation comment support in ASP.NET Core
XML documentation comments allow you to add descriptions to your C# APIs, classes, parameters, properties, and return values. ASP.NET Core can use these comments as metadata when generating an OpenAPI document, making the generated API documentation more descriptive and useful.
For example, you can document an endpoint like this:
/// <summary>
/// Gets a work item by its ID.
/// </summary>
/// <param name="id">The unique identifier of the work item.</param>
/// <returns>The requested work item.</returns>
app.MapGet("/works/{id}", (int id) =>
{
    // ...
});
The XML comments can be compiled into an XML documentation file by enabling XML documentation generation in the project file:
<PropertyGroup>
  <GenerateDocumentationFile>true</GenerateDocumentationFile>
</PropertyGroup>
ASP.NET Core’s OpenAPI support can then read these XML documentation comments and incorporate them into the generated OpenAPI description. For example, the
The generator recognizes a set of standard XML doc tags — <code><c>, <code>, <list>, <para>, <paramref>, <typeparamref>, <see>, and <seealso></code> — and converts each into something OpenAPI descriptions can actually render. For a reference tag like <see cref="SomeOtherType">, it discards the markup itself and replaces it with the plain-text name of the thing it points to, so the resulting OpenAPI field reads as ordinary prose rather than raw XML.XML documentation comments are particularly useful for documenting endpoints, parameters, request and response models, and individual properties. They allow you to keep API documentation close to the code, reducing the need to maintain separate documentation manually.
For example, a model can be documented as follows:
/// <summary>
/// Represents a work item.
/// </summary>
public class Work
{
    /// <summary>
    /// Gets or sets the unique identifier of the work item.
    /// </summary>
    public int Id { get; set; }

    /// <summary>
    /// Gets or sets the name of the work item.
    /// </summary>
    public string Name { get; set; } = "";
}
When OpenAPI documentation is generated, these comments can appear in the resulting schema, allowing tools such as Swagger UI and other OpenAPI consumers to display meaningful descriptions.
In short, XML documentation comments provide a convenient way to enrich ASP.NET Core’s generated OpenAPI metadata directly from C# source code. This is especially valuable for larger APIs because developers can document the API while writing the code, and those descriptions can automatically flow into the generated OpenAPI document.
OpenAPI document transformers
Transformers let you customize different parts of the generated OpenAPI document. There are three transformer types:
| Transformer | Customizes |
|---|---|
| Document transformer | The entire OpenAPI document |
| Operation transformer | An individual API operation |
| Schema transformer | A data model/schema |
Transformers are defined inside the AddOpenApi() method.
builder.Services.AddOpenApi(options =>
{
    // Transformers
});options.AddDocumentTransformer((document, context, cancellationToken) =>
{
document.Info.Title = "My API";
document.Info.Description = "An API for managing work items.";
return Task.CompletedTask;
});The document parameter represents the generated OpenAPI document. You can use it to modify things such as:
- API title and description
- API version
- servers
- tags
- paths
- components
- security requirements
- other document-level metadata
options.AddOperationTransformer((operation, context, cancellationToken) =>
{
    operation.Description = "Returns all available work items.";

    return Task.CompletedTask;
});
Operation transformers are useful when you need to customize things such as:
- operation summaries
- operation descriptions
- parameters
- request bodies
- responses
- operation tags
- security requirements
options.AddSchemaTransformer((schema, context, cancellationToken) =>
{
    schema.Description = "Represents a work item.";

    return Task.CompletedTask;
});
Schema transformers are useful for customizing:
- property descriptions
- schema descriptions
- required properties
- data types
- constraints
- examples
- other schema metadata
Swagger UI and Scalar for interactive API documentation
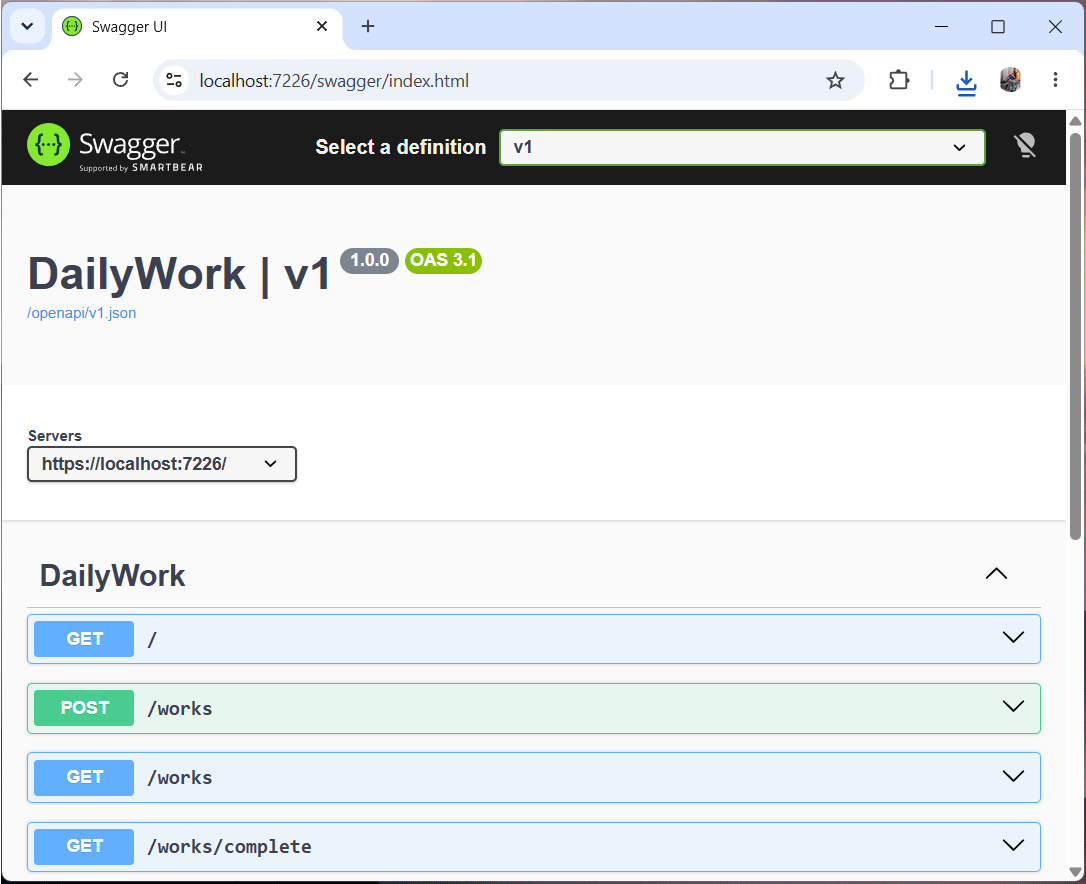
Swagger UI used to design, document, test, and interact with HTTP APIs. It is closely associated with the OpenAPI Specification, which defines a standard, machine-readable description of an API.
To use Swagger:
- Install the Swashbuckle.AspNetCore.SwaggerUi package.
- Enable the swagger-ui middleware with a reference to the OpenAPI route.
if (app.Environment.IsDevelopment())
{
    app.MapOpenApi();

    app.UseSwaggerUI(options =>
    {
        options.SwaggerEndpoint("/openapi/v1.json", "v1");
    });
}
Launch the app and navigate to https://localhost:
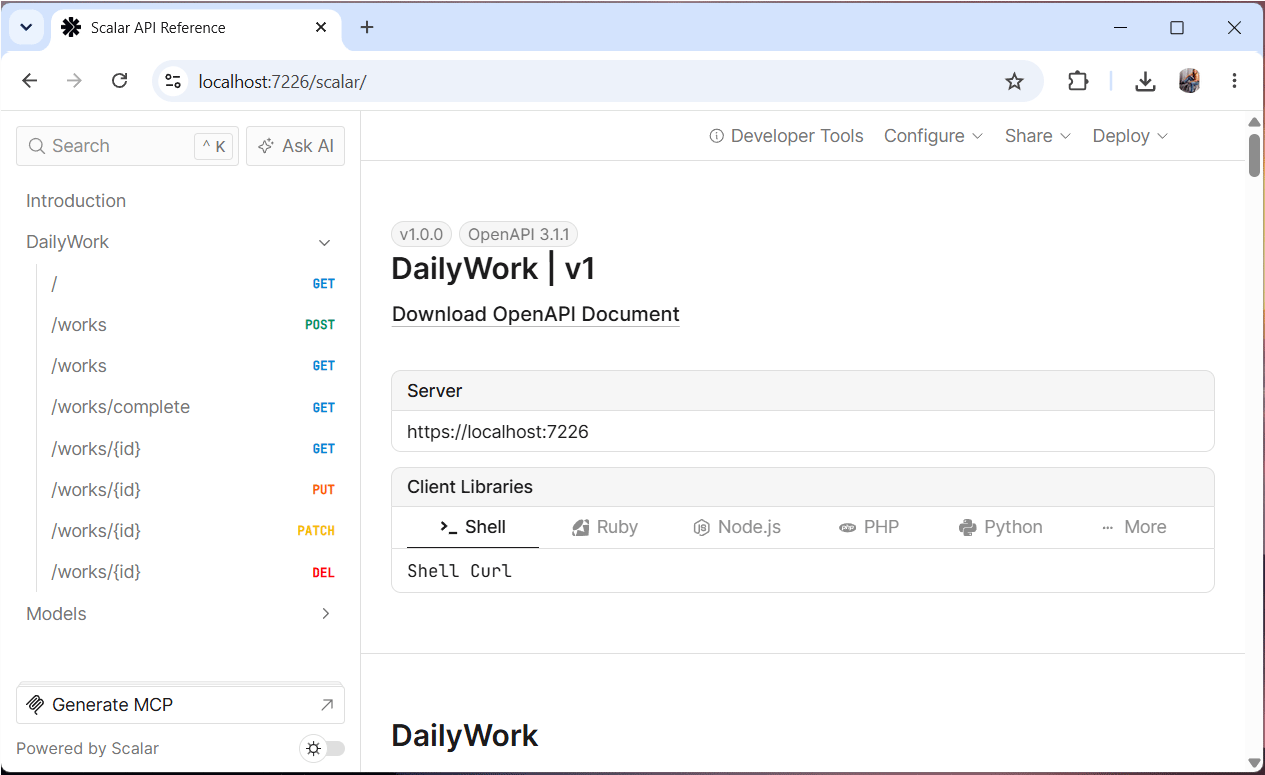
Scalar is a modern tool for viewing and interacting with OpenAPI documentation. It provides an interactive API reference UI that can read an OpenAPI document generated by your ASP.NET Core application.
To configure Scalar, install the Scalar.AspNetCore package.
if (app.Environment.IsDevelopment())
{
    app.MapOpenApi();
    app.MapScalarApiReference();
}
Launch the app and navigate to https://localhost:
OpenAPI is an important topic to learn when building professional and well-documented ASP.NET Core Web APIs. It provides a standardized way to describe an API, including its endpoints, HTTP methods, parameters, request and response formats, authentication requirements, and data models. Understanding OpenAPI helps developers create APIs that are easier to understand, test, consume, and maintain. I hope you like this tutorial on OpenAPI, kindly provide your thoughts on it.
SHARE THIS ARTICLE


Related Tutorials:


ABOUT THE AUTHOR
I hope you enjoyed reading this tutorial. If it helped you then consider buying a cup of coffee for me. This will help me in writing more such good tutorials for the readers. Thank you.

HELLO EVERYONE
 Welcome to YogiHosting - A Programming Tutorial Website. It is used by millions of people around the world to learn and explore about ASP.NET Core, Blazor, jQuery, JavaScript, Docker, Kubernetes and other topics.
SUBSCRIBE TO NEWSLETTER
Enter your email address to subscribe to this blog and receive notifications of new posts by email.
Join 90K other subscribers