Host ASP.NET Core on Apache in Linux

In this tutorial we will host ASP.NET Core apps on Apache Web Server in Linux. Apache will be used as a reverse proxy server to redirect traffic to an ASP.NET Core web app running on Kestrel server. We will set the whole process in Ubuntu OS.
This tutorial is a part of the .NET Hosting Series which contains a total of 5 tutorials, which are:
- How to Host ASP.NET Core App in a Windows Service
- Host ASP.NET Core app on IIS
- Host ASP.NET Core on Apache in Windows
- Host ASP.NET Core on Apache in Linux
- Host ASP.NET Core on Nginx in Linux
Page Contents
Install DOT NET on Linux
Let’s install .NET 8.0 SDK which is the latest version right now on our Ubuntu system. First update the system by running the below command.
sudo apt-get updateNext, run the install command for .NET 8.0 sdk.
sudo apt-get install -y dotnet-sdk-8.0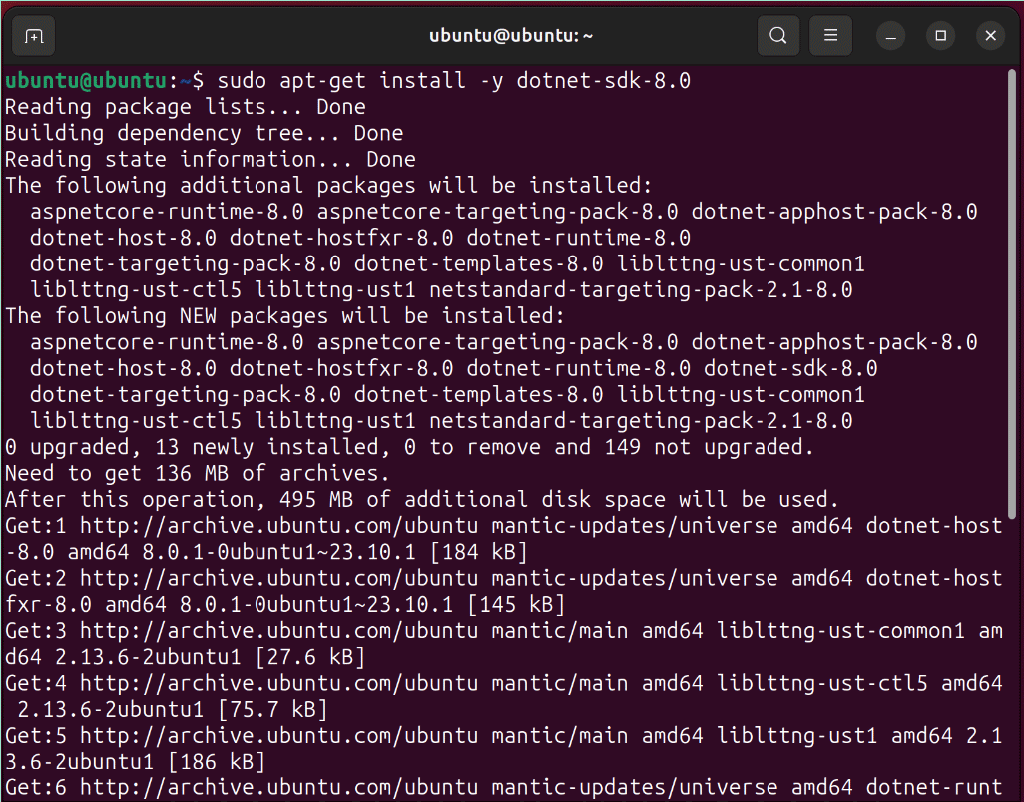
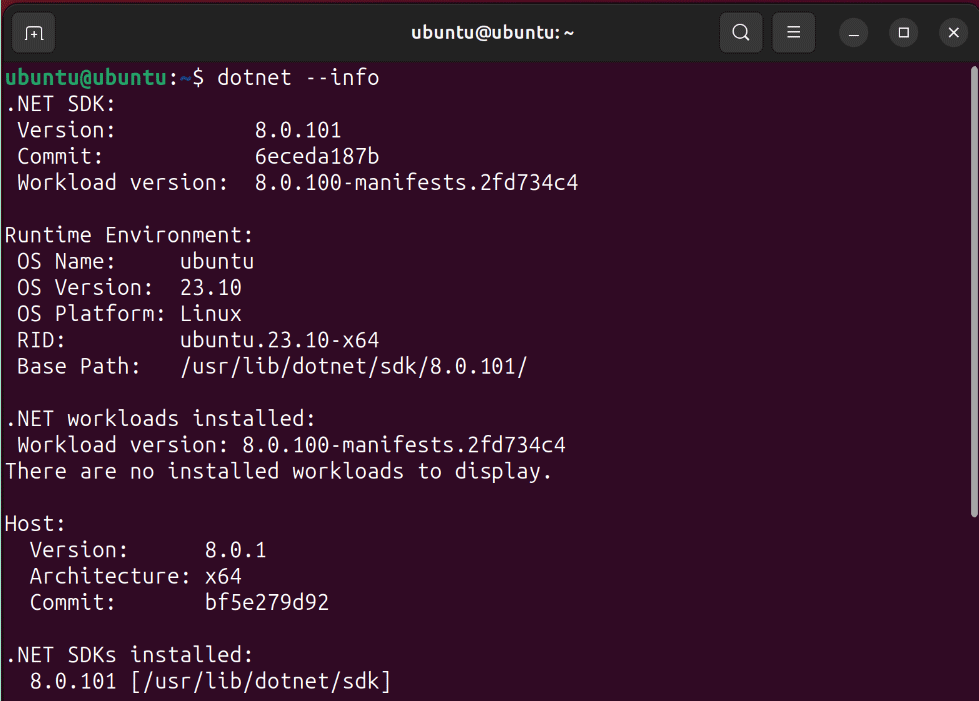
It will take 3 to 4 minutes to download .NET and installation process to complete. After that run the dotnet --info command to confirm .NET is installed successfully.
Create ASP.NET Core App
Let’s create an ASP.NET Core app through .NET command-line interface (CLI). Open terminal and run the below .NET CLI command to create MVC based app by the name of ApacheDotNet.
dotnet new mvc --name ApacheDotNet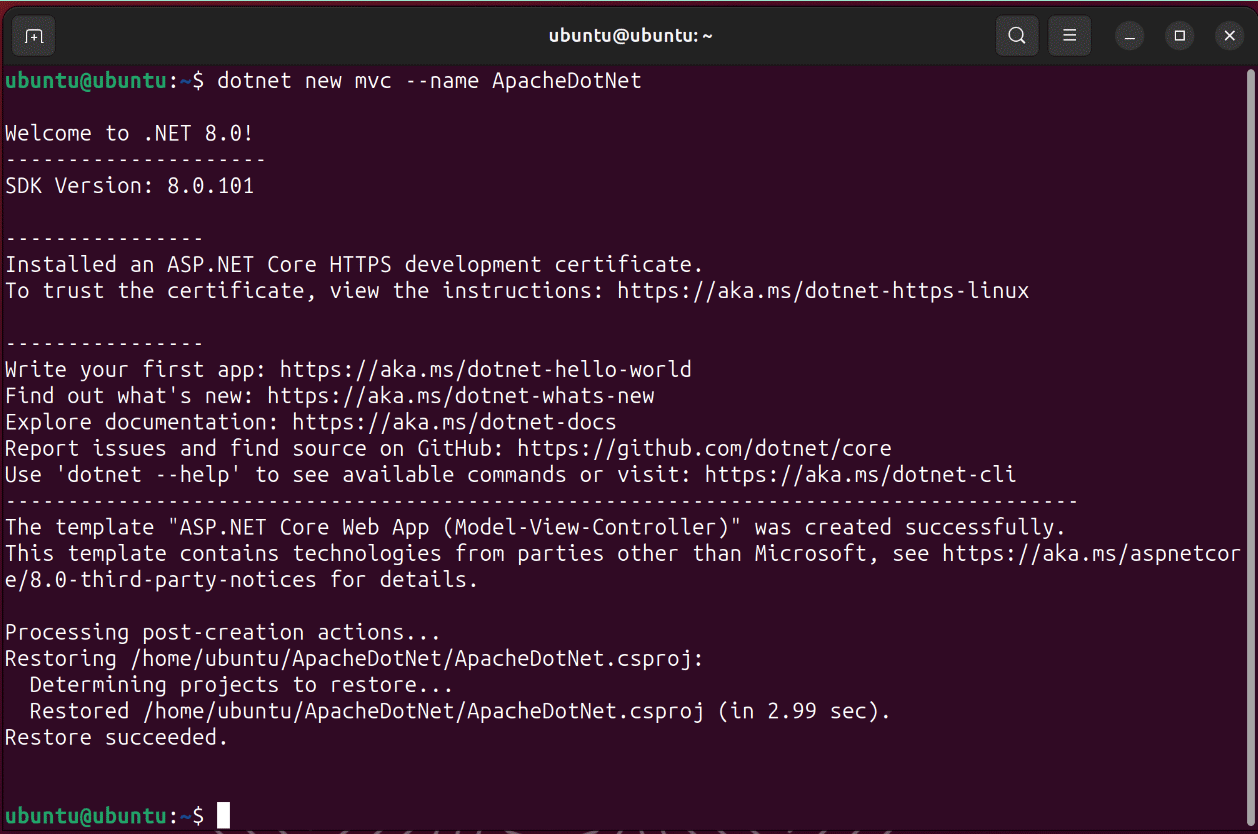
Our ASP.NET Core MVC app is created and we have to add some configurations before hosting it on Apache. First we need to ensure the app should have “hsts and redirection” middlewares present on the Program.cs file. The code lines needed are given below.
app.UseHsts();
app.UseHttpsRedirection();
So, go inside the app folder with cd ApacheDotNet then open Program class with Nano.
nano Program.cs

By default these lines are present in .NET 8.0 apps.
Since Apache will be a reverse proxy server so we need the requests to be forwarded by reverse proxy to the app hosted by Kestrel. We use the Forwarded Headers Middleware from the Microsoft.AspNetCore.HttpOverrides package to do this job. This package is automatically included in .NET 8.0 apps, but for previous versions, you have to add it from NuGet. The middleware updates the Request.Scheme, using the X-Forwarded-Proto header, so that redirect URIs and other security policies work correctly.
At the top of the Program.cs class include the namespace.
using Microsoft.AspNetCore.HttpOverrides;And after var app = builder.Build() code, enter the Forwarded Headers Middleware code which is given below.
app.UseForwardedHeaders(new ForwardedHeadersOptions
{
    ForwardedHeaders = ForwardedHeaders.XForwardedFor | ForwardedHeaders.XForwardedProto
});
My Program class now looks as shown below.
using Microsoft.AspNetCore.HttpOverrides;

var builder = WebApplication.CreateBuilder(args);

// Add services to the container.
builder.Services.AddControllersWithViews();

var app = builder.Build();

app.UseForwardedHeaders(new ForwardedHeadersOptions
{
    ForwardedHeaders = ForwardedHeaders.XForwardedFor | ForwardedHeaders.XForwardedProto
});

// Configure the HTTP request pipeline.
if (!app.Environment.IsDevelopment())
{
    app.UseExceptionHandler("/Home/Error");
    // The default HSTS value is 30 days. You may want to change this for production scenarios, see https://aka.ms/aspnetcore-hsts.
    app.UseHsts();
}

app.UseHttpsRedirection();
app.UseStaticFiles();

app.UseRouting();

app.UseAuthorization();

app.MapControllerRoute(
    name: "default",
    pattern: "{controller=Home}/{action=Index}/{id?}");

app.Run();
Press Ctrl+S to save the file. Then press Ctrl+x to exit nano.
Run dotnet build command to check for compile time error. It should succeed similar to mine.
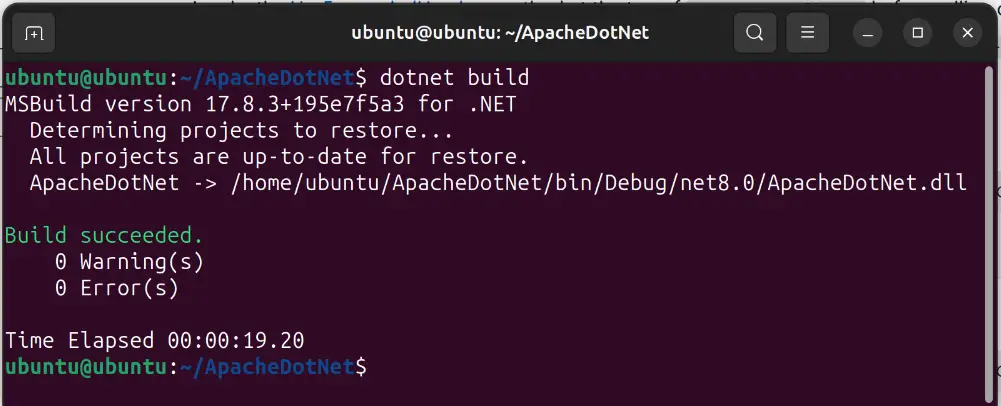
We can now publish the app by the below given CLI command.
dotnet publish --configuration ReleaseThe app is published to a folder – ApacheDotNet/bin/Release/net8.0/publish.

We can now run the app through CLI command. So first move inside the publish folder by the command.
cd bin/Release/net8.0/publishType ls command to see all the files inside this folder. There is ApacheDotNet.dll file of the app.

We can run this dll file through the given CLI command.
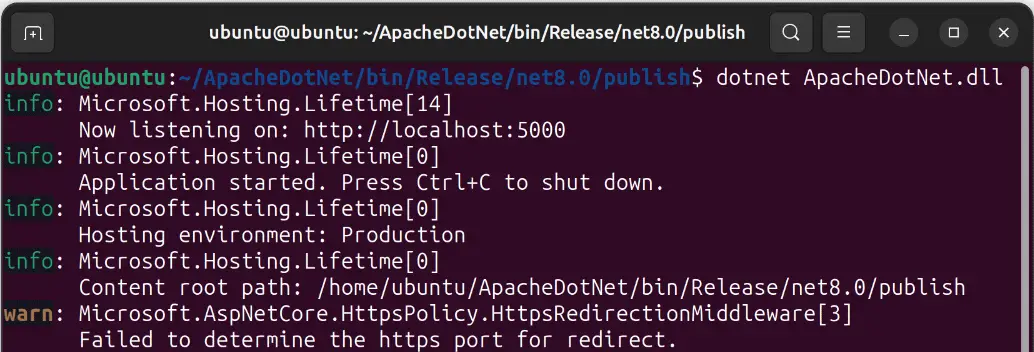
dotnet ApacheDotNet.dllThe app starts and is available on http://localhost:5000. See the below image.
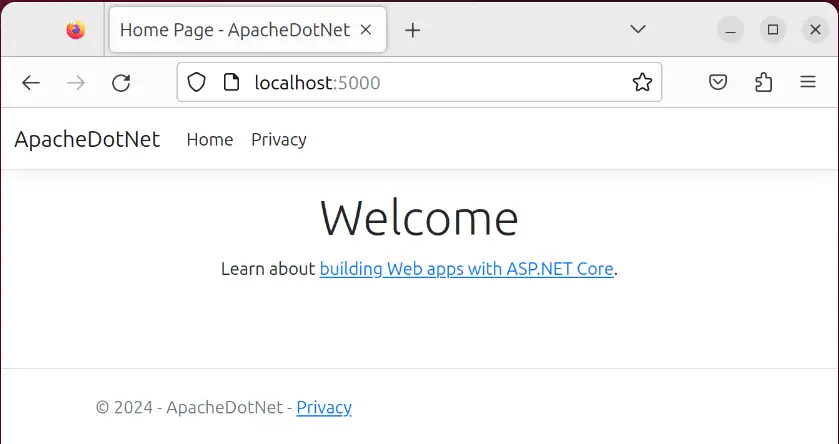
Open this url on the browser and you can view the app.
You can now press Ctrl+C on the terminal to stop kestrel and with it the app will go down. Don’t worry, we will automate this process through a Service in the next section.
In Linux we should put our web apps in /var/www/ folder. Here apps get the necessary priviledges and resources. So make a new folder for our app inside this location. The command is mkdir and is given below.
sudo mkdir /var/www/apachedotnetThe folder apachedotnet is created and we now will copy the app’s published files to it. The command to run from inside the app’s “publish” folder is given below.
sudo cp -r . /var/www/apachedotnetYou can now confirm that all files are copied successfully to this location by runninng the “ls” command as shown below.
ls /var/www/apachedotnetI have shown this thing in the below image.

Create Service file
A service file is a Linux file which contains process that needs to be controller by Linux. Here we can tell Linux to run our app on Kestrel. Let’s create a System file called kestrel-apachedotnet.service inside /etc/systemd/system/ folder. We will use nano to create this file. The command is given below.
sudo nano /etc/systemd/system/kestrel-apachedotnet.servicePaste the following code on nano.
[Unit]
Description=Apache DOT NET App

[Service]
WorkingDirectory=/var/www/apachedotnet
ExecStart=/usr/bin/dotnet /var/www/apachedotnet/ApacheDotNet.dll
Restart=always
# Restart service after 10 seconds if the dotnet service crashes:
RestartSec=10
KillSignal=SIGINT
SyslogIdentifier=apachedotnet
User=www-data
Environment=ASPNETCORE_ENVIRONMENT=Production

[Install]
WantedBy=multi-user.target
Save it and exit from nano. Let’s understand what we have done here.
We have set the /usr/bin/dotnet folder for .NET distributions and telling to execute the app’s dll file i.e./var/www/apachedotnet/ApacheDotNet.dll. This will run the app on Kestrel.
The user that manages the service is specified by the User option which is “www-data” in our case. Then we have RestartSec=10 to configure the duration of time to wait for the app to start else we terminate the app. A SIGKILL signal is issued by Linux to terminate the app.
Let’s enable the service by the below command.
sudo systemctl enable kestrel-apachedotnet.serviceAfter that start this service.
sudo systemctl start kestrel-apachedotnet.serviceNow check it’s status by the command.
sudo systemctl status kestrel-apachedotnet.serviceThe service is running successfully and the app is available at the url – http://localhost:5000. I have shown this status in the below image.
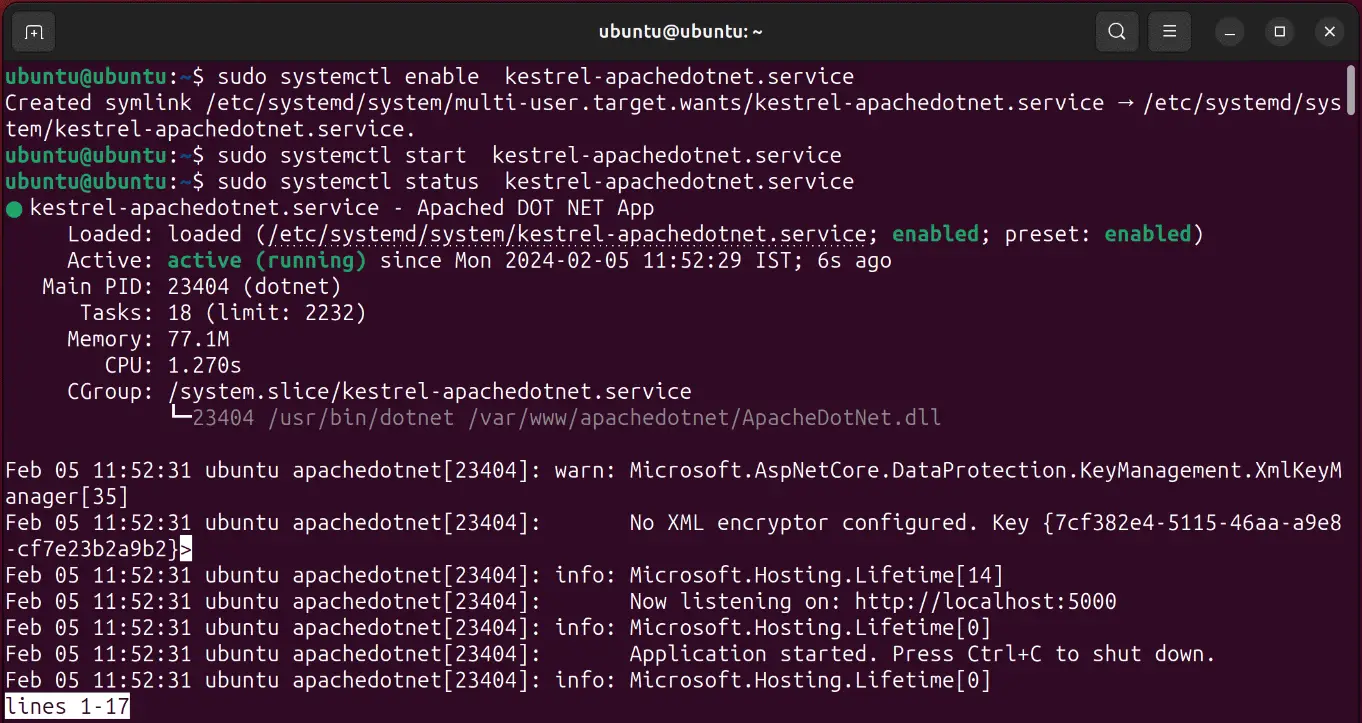
With the journalctl command you can view the logs to debug if anything is not working. The command is – sudo journalctl -fu kestrel-apachedotnet.service.

With this we don’t have to manually run the app’s dll file with dotnet cli command as the service will start the app on Kestrel whenever our Linus system starts.
We can now proceed to the installation of Apache Web Server and map this url to apache.
Install Apache in Linux
To install Apache on Ubuntu Linux run the below command on the terminal.
sudo apt install apache2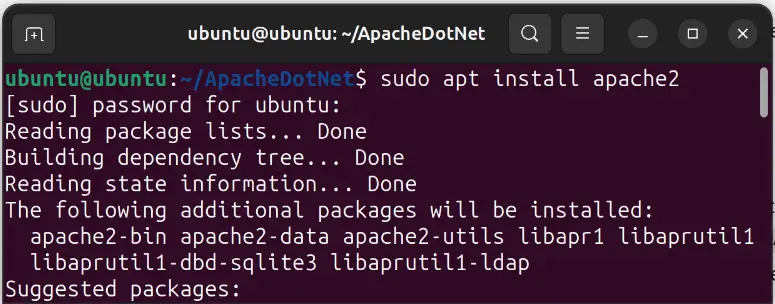
Once installed, open url – http://localhost on the browser. This will load Apache’s default page.
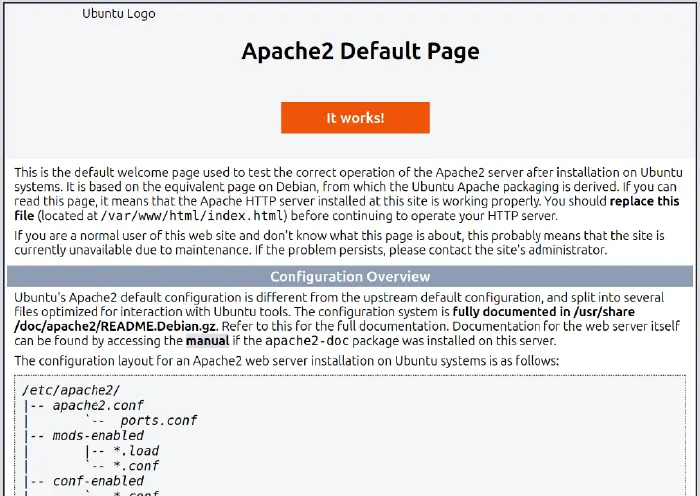
Apache is running successfully.
To check Apache status.
systemctl apache2 statusTo restart Apache.
systemctl apache2 restartThe start and stop commands.
systemctl apache2 start
systemctl apache2 stop
Now we need to enable the headers, proxy and proxy_http modules of Apache. So run the below given commands to do so.
systemctl a2enmod headers
systemctl a2enmod proxy
systemctl a2enmod proxy_http
You will get a message to restart Apache so do it now. The restart command – systemctl apache2 restart must be run.
Configure Apache for .NET app
In Ubuntu, Apache’s virtual host configuration files are stored in /etc/apache2/sites-available location. We can create a new configuration for our .NET App and configure Apache Server as a reverse proxy for it. So create a new configuration by the given command.
sudo nano /etc/apache2/sites-available/apachedotnet.confEnter the given configuration to it and save.
<VirtualHost *:*>
    RequestHeader set "X-Forwarded-Proto" expr=%{REQUEST_SCHEME}
</VirtualHost>

<VirtualHost *:80>
    ProxyPreserveHost On
    ProxyPass / http://127.0.0.1:5000/
    ProxyPassReverse / http://127.0.0.1:5000/
    ServerName  localhost
    ServerAlias *.localhost
    ErrorLog ${APACHE_LOG_DIR}/apachedotnet.log
    CustomLog ${APACHE_LOG_DIR}/apachedotnet.log common
</VirtualHost>
Explanation: There are 2 VirtualHost blocks, in the first we have written for RequestHeader. This is necessary for .NET apps when we use a reverse proxy. In the next block we have told apache to listed to port 80. The domain given by “ServerName” is localhost and is being served, the “ServerAlias” is *.localhost and it resolves to the same website. We used localhost since we are hosting the app locally, for production replace them with the domain name, eg.
ServerName www.yogihosting.com
ServerAlias *.yogihosting.com
We also need to create a symlink by the below command.
sudo ln -s /etc/apache2/sites-available/apachedotnet.conf /etc/apache2/sites-enabled/apachedotnet.confTest for syntax errors by the below command. It should give Syntax OK.
sudo apachectl configtest
Restart Apache for the configurations to become active.
systemctl apache2 restartNow open the url – http://localhost on the browser to view the app. Congrats, Apache is working correctly and acting as a reverse proxy for the .NET app. Check the below image to confirm.
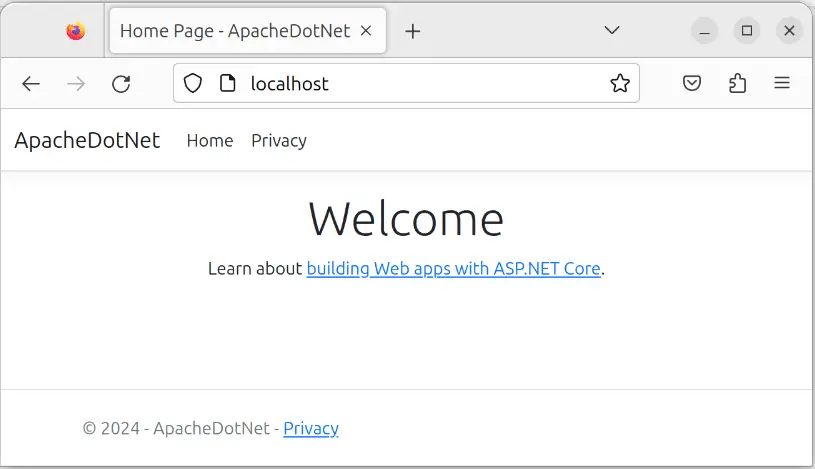
Host ASP.NET Core App with SSL on Apache
Let’s now use Self-Signed SSL with our ASP.NET Core app. Here we will do 3 things:
- Generate self-signed SSL from openSSL.
- Add SSL and perform redirection from http to https in Apache itself.
- Use a url to host our website.
Use the following openSSL commands to generate server.crt and server.key files for the SSL. Note that when command name is asked enter apachedotnet.com for it. This is because we will host this app from this domain.
openssl genrsa -des3 -out server.key 2048
openssl rsa -in server.key -out server.key.insecure
mv server.key server.key.secure
mv server.key.insecure server.key
openssl req -new -key server.key -out server.csr
openssl x509 -req -days 365 -in server.csr -signkey server.key -out server.crt
Next copy them to certs and private folders.
sudo cp server.crt /etc/ssl/certs
sudo cp server.key /etc/ssl/private
I have shown all the above command in the below image.
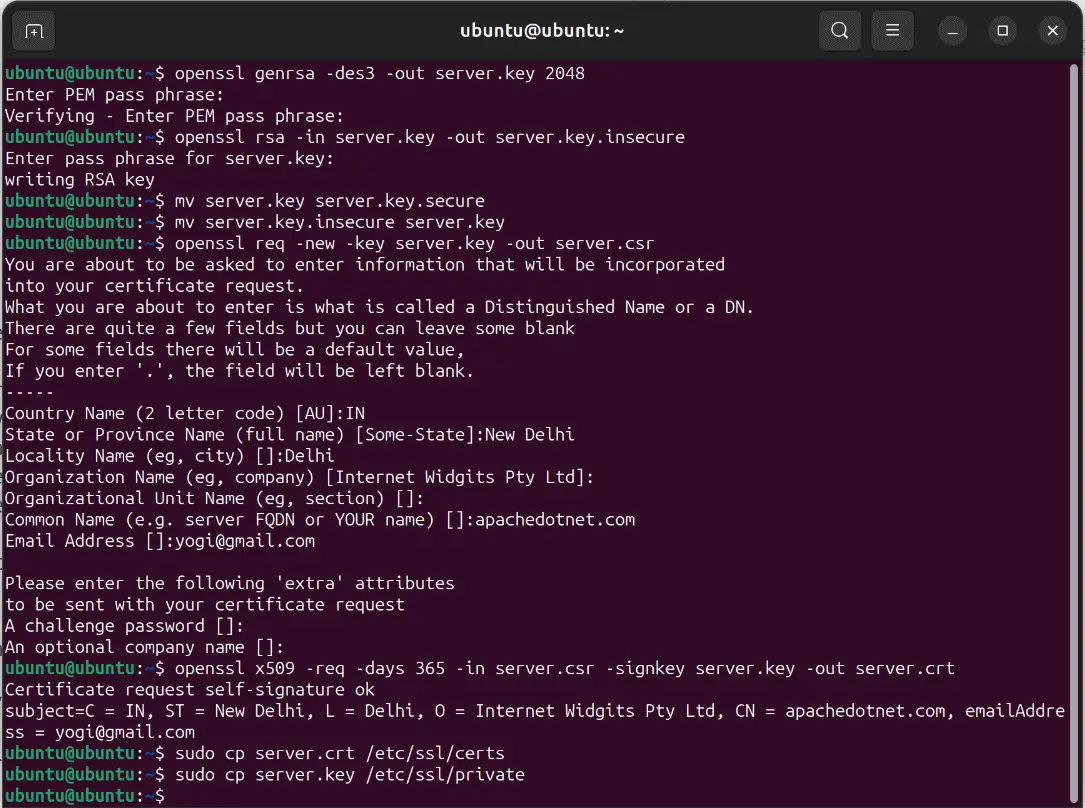
Next enable these 2 modules of Apache. These are the rewrite and ssl modules.
sudo a2enmod rewrite
sudo a2enmod ssl
Restart Apache so that new settings are updated.
sudo systemctl restart apache2Open app’s configuration file.
sudo nano /etc/apache2/sites-available/apachedotnet.confAdd the new configuration which is given below.
<VirtualHost *:*>
    RequestHeader set "X-Forwarded-Proto" expr=%{REQUEST_SCHEME}
</VirtualHost>

<VirtualHost *:80>
    ServerName            apachedotnet.com
    ServerAlias           *.apachedotnet.com
    Redirect permanent     / https://apachedotnet.com
</VirtualHost>

<VirtualHost *:443>
    Protocols             h2 http/1.1
    ProxyPreserveHost     On
    ProxyPass             / http://127.0.0.1:5000/
    ProxyPassReverse      / http://127.0.0.1:5000/
    ServerName            apachedotnet.com
    ServerAlias           *.apachedotnet.com
    ErrorLog              ${APACHE_LOG_DIR}/apachedotnet.log
    CustomLog             ${APACHE_LOG_DIR}/apachedotnet.log common
    SSLEngine             on
    SSLProtocol           all -SSLv3 -TLSv1 -TLSv1.1
    SSLHonorCipherOrder   off
    SSLCompression        off
    SSLSessionTickets     on
    SSLUseStapling        off
    SSLCertificateFile    /etc/ssl/certs/server.crt
    SSLCertificateKeyFile /etc/ssl/private/server.key
    SSLCipherSuite        ECDHE-ECDSA-AES128-GCM-SHA256:ECDHE-RSA-AES128-GCM-SHA256:ECDHE-ECDSA-AES256-GCM-SHA384:ECDHE-RSA-AES256-GCM-SHA384:EC>
</VirtualHost>
We have added another VirtualHost block for 443 port. This is meant for SSL traffic. In the port 80 VirtualHost block we are redirecting the requests to our domain https://apachedotnet.com. Also see the SSL files location given by:
SSLCertificateFile    /etc/ssl/certs/server.crt
SSLCertificateKeyFile /etc/ssl/private/server.key
Restart Apache again for the new settings to take effect.
sudo systemctl restart apache2Now final thing is to add the entry of the domain in etc/hosts file. Run the nano command given below to open the file.
sudo nano /etc/hostsAt the end of this file add the below entry.
127.0.0.1 apachedotnet.comSave and exit. And now open the url – apachedotnet.com on your browser. First you will see a security warning, click Advanced button and then click Accept the risk and Continue button.
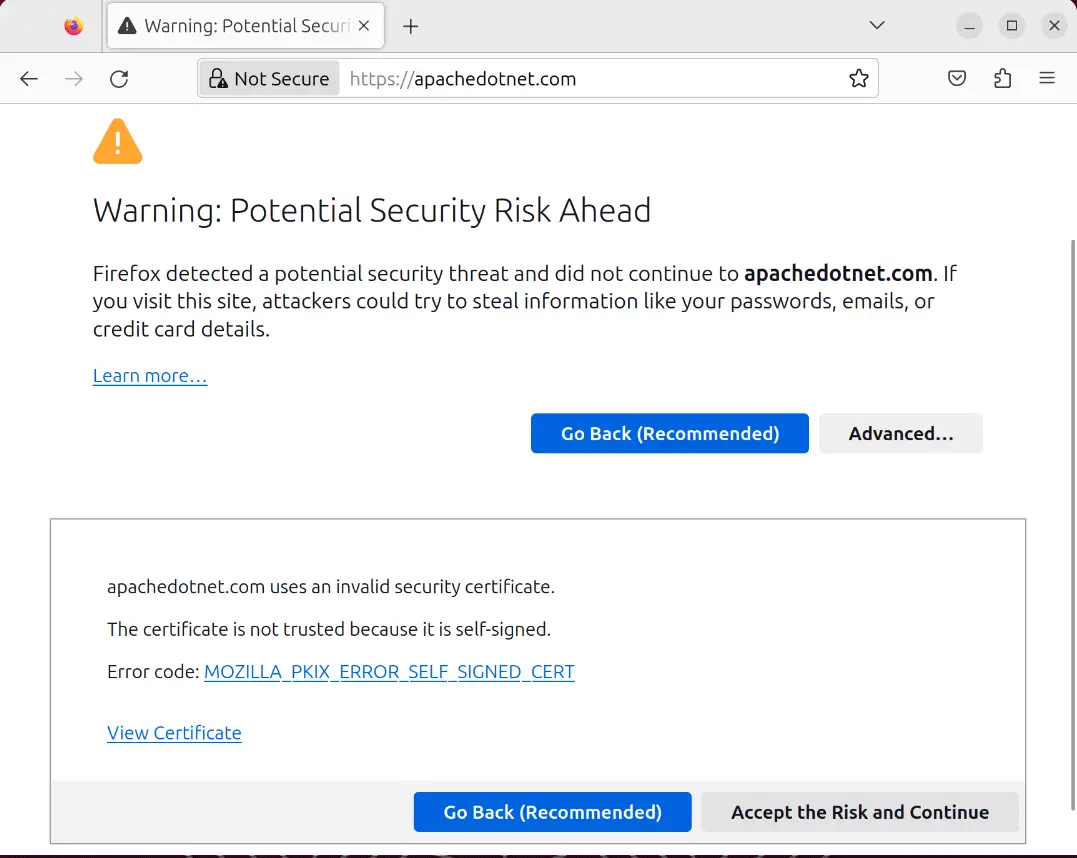
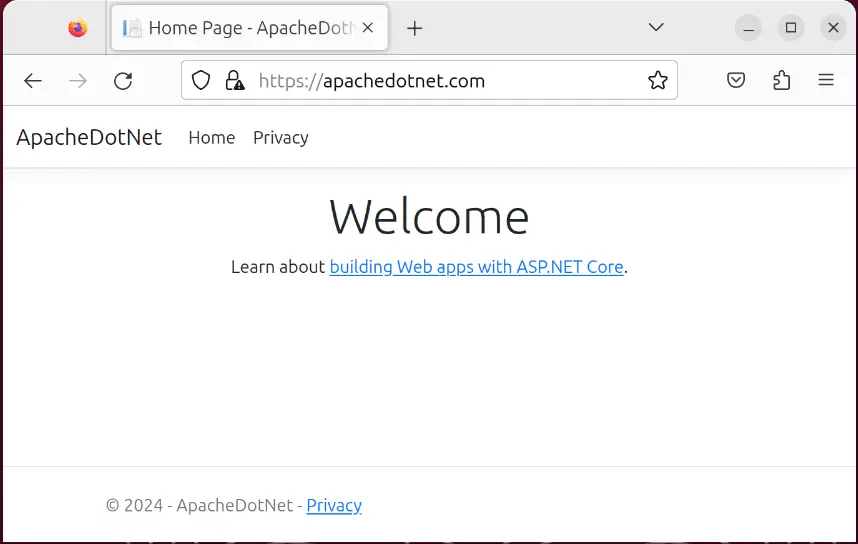
And voila, the .NET app opens in apache. Notice it is redirected to the https version which is https://apachedotnet.com.
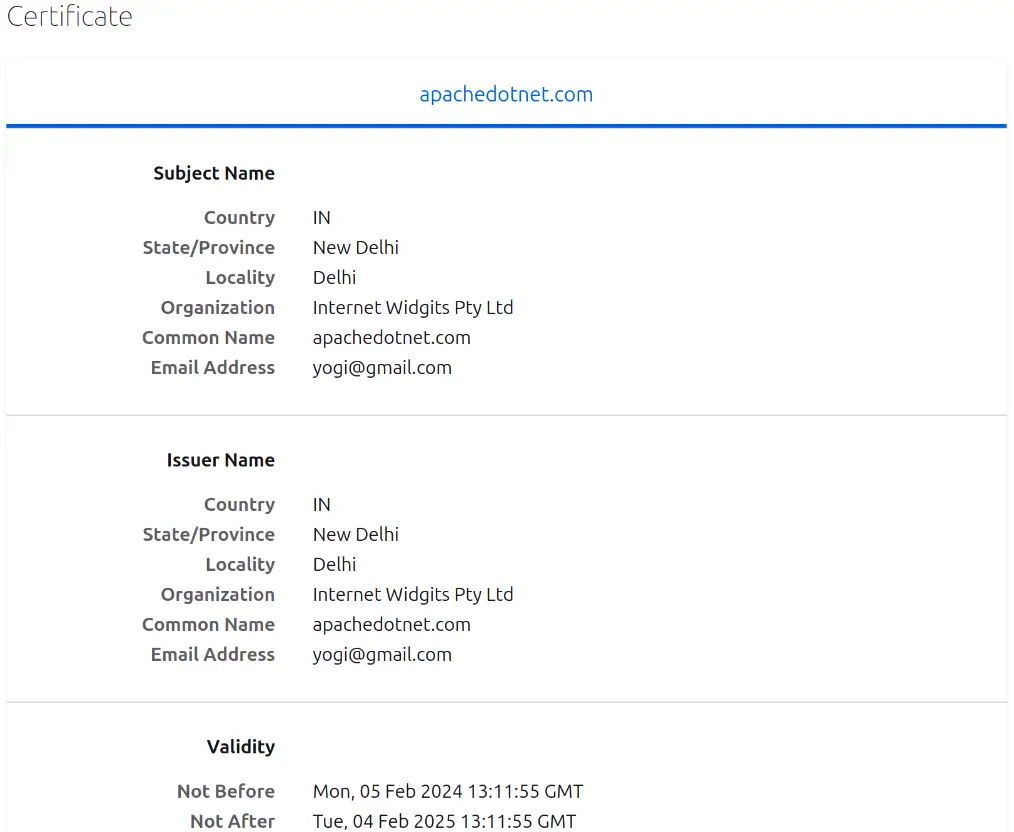
View the certificate on the browser which will show you all the details.
We successully install .NET, Apache and hosted our app on Apache as a reverse proxy. We did the whole process in Ubuntu Linus. At the end we created an SSL with openSSL and used it on Apache for our app. I hope you enjoyed learning from this tutorial. If you face any difficuly then use the comments section to message me.


 Welcome to YogiHosting - A Programming Tutorial Website. It is used by millions of people around the world to learn and explore about ASP.NET Core, Blazor, jQuery, JavaScript, Docker, Kubernetes and other topics.