ASP.NET Core Identity with MongoDB as Database {Detailed}

In this tutorial we will implement ASP.NET Core Identity with MongoDB as the database. So, the MongoDB will serve as the Identity Database instead of SQL Server. First, we will configure Identity to use MongoDB as the database and after that create an example project where Identity Users and Roles will be created. In the end, Login and Logout feature will be added so that users can be authenticated to secured portions of the website.
Page Contents
We will create a complete project from scratch and it’s source codes can be downloaded from my GitHub repository.
Configure Identity for MongoDB
Create a new ASP.NET Core (MVC) based app and name it IdentityMongo.

We will now add the name of the database, host and port values in the appsettings.json file. From here these values will be populated to a C# class in Program.cs. The appsettings.json file should now look –
{
  "MongoDbConfig": {
    "Name": "Identity",
    "Host": "localhost",
    "Port": 27017
  }
}
The name of the MongoDB database is kept as “Identity” and it will operate from localhost: 27017.
Next, create a class called MongoDbConfig.cs inside the Settings folder of the app. As discussed, the MongoDB settings in the configuration file will be populated to this class.
The MongoDbConfig.cs code should look like:
namespace IdentityMongo.Settings
{
    public class MongoDbConfig
    {
        public string Name { get; init; }
        public string Host { get; init; }
        public int Port { get; init; }
        public string ConnectionString => $"mongodb://{Host}:{Port}";
    }
}
Now go to the Program.cs and fetch the MongoDB configurations from appsettings.json file as shown below.
using IdentityMongo.Settings;
var builder = WebApplication.CreateBuilder(args);

var mongoDbSettings = builder.Configuration.GetSection(nameof(MongoDbConfig)).Get<MongoDbConfig>();

// Add services to the container.
builder.Services.AddControllersWithViews();

var app = builder.Build();

...
The AspNetCore.Identity.MongoDbCore package adds MongoDb UserStore and RoleStore adapter for ASP.NET Core Identity, and so we can use MongoDB instead of SQL server. So, add this package to the app by running the following command in the Package Manager Console window.
Install-Package AspNetCore.Identity.MongoDbCore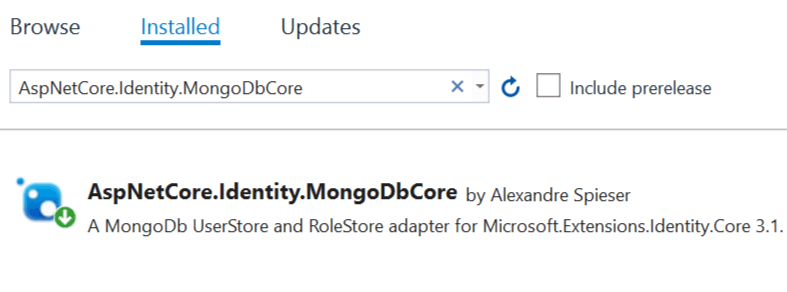
Note that MongoDB being NoSQL does not has tables and columns but instead there are Collections. We will create Identity User and Role classes and map them to these collections.
We will now define our Identity User and Role classes. The Identity User class will inherit from MongoIdentityUser class and will be mapped to “Users” collections. The Identity Role class will inherit from MongoIdentityRole class and will be mapped to “Roles” collections.
Create a new class called ApplicationUser.cs inside the Models folder. This class will serve as Identity User class for our app. The code of this class is given below.
using AspNetCore.Identity.MongoDbCore.Models;
using MongoDbGenericRepository.Attributes;

namespace IdentityMongo.Models
{
    [CollectionName("Users")]
    public class ApplicationUser : MongoIdentityUser<Guid>
    {
    }
}
Two things should be noted here:
- Attribute
[CollectionName("Users")]specifies that this class will be mapped to “Users” collection in MongoDB. - The use of Guid for the T type in MongoIdentityUser means the primary key of the collection will be a Guid type.
Similarly, create ApplicationRole.cs inside the Models folder and it will serve as Identity Role class. The code is given below.
using AspNetCore.Identity.MongoDbCore.Models;
using MongoDbGenericRepository.Attributes;

namespace IdentityMongo.Models
{
    [CollectionName("Roles")]
    public class ApplicationRole : MongoIdentityRole<Guid>
    {

    }
}
The final thing we need to do is register ASP.NET Core Identity in the Program class of the app. So, we need to register Identity to use these classes for users and roles.
We use the AddMongoDbStores() method of the AspNetCore.Identity.MongoDbCore package (which we installed earlier on the application) to add the MongoDB implementation of Identity. See the highlighted code below:
using IdentityMongo.Models;
using IdentityMongo.Settings;
var builder = WebApplication.CreateBuilder(args);

var mongoDbSettings = builder.Configuration.GetSection(nameof(MongoDbConfig)).Get<MongoDbConfig>();

builder.Services.AddIdentity<ApplicationUser, ApplicationRole>()
        .AddMongoDbStores<ApplicationUser, ApplicationRole, Guid>
        (
            mongoDbSettings.ConnectionString, mongoDbSettings.Name
        );

// Add services to the container.
builder.Services.AddControllersWithViews();

...
The third parameter is given as Guid because the primary keys of the “Users” and “Roles” Collections are defined as Guid.
With this we have successfully configured Identity with MongoDB database.
Installing MongoDB
You can install MongoDB Community Server on your system and then change the host and port values defined on the appsettings.json file with your MongoDB database.
In this tutorial I will be running MongoDB from Docker. I have also recently completed ASP.NET Core Docker series whose first tutorial is Create first ASP.NET Core App in a Docker Container. If you want to explore Docker then my Docker series will be “really helpful” to you.
There are 2 steps to run MongoDB from Docker:
- Install Docker Desktop on your system.
- Create a container and run MongoDB from it.
We create MongoDB container by creating a file called docker-compose.yml and add the following configurations to it.
version: "3.8"

services:
  mongo:
    image: mongo
    container_name: mongo
    ports:
      - 27017:27017
    volumes:
      - mongodbdata:/data/db
volumes:
  mongodbdata:
Next, we open command prompt and navigate to the directory of this file. Then we execute the following command.
docker-compose up -d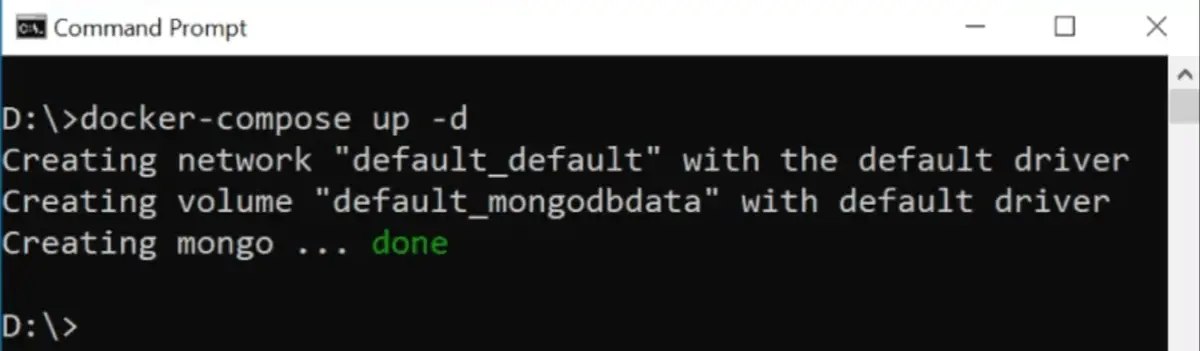
This will download the MongoDB image from Docker Hub and create a docker container from where the MongoDB will run.
At this point we have our database running. We can view the MongoDB database and it’s Collections by installing Compass which is a free MongoDB GUI tool for querying, optimizing, and analyzing your MongoDB data. On starting Compass, the connection string will be auto filled. Simply click the Connect button to connect with the MongoDB running on the Docker Container.

Congratulations, we are now ready to create Identity Users and Roles.
Earlier I wrote tutorials on how to create users and roles in Identity (SQL Server) version. I will be using the same code from these tutorials and will be doing some minor edits. These tutorials are very detailed and informative, you can see these tutorials if you wish to:
- How to Create, Read, Update & Delete users in ASP.NET Core Identity
- How to work with Roles in ASP.NET Core Identity
Creating Identity Users in MongoDB
Let us proceed with creating a feature to add Identity Users. So first create a class called User.cs inside the “Models” folder. This class will be used to transfer the form’s data from the View to the Controller. In the view we will have a form where we can fill out the details of a user, and on submitting the form, the application will create the Identity User.
The User.cs code is given below. It has only 3 fields – Name, Email and Password with validation attributes applied to each of them.
using System.ComponentModel.DataAnnotations;

namespace IdentityMongo.Models
{
    public class User
    {
        [Required]
        public string Name { get; set; }

        [Required]
        [EmailAddress(ErrorMessage = "Invalid Email")]
        public string Email { get; set; }

        [Required]
        public string Password { get; set; }
    }
}
Next, create a controller that will add Identity Users in the database. We created a new controller called OperationsController.cs inside the Controllers folder and added the following code to it.
using IdentityMongo.Models;
using Microsoft.AspNetCore.Identity;
using Microsoft.AspNetCore.Mvc;

namespace IdentityMongo.Controllers
{
    public class OperationsController : Controller
    {
        private UserManager<ApplicationUser> userManager;

        public OperationsController(UserManager<ApplicationUser> userManager)
        {
            this.userManager = userManager;
        }

        public ViewResult Create() => View();

        [HttpPost]
        public async Task<IActionResult> Create(User user)
        {
            if (ModelState.IsValid)
            {
                ApplicationUser appUser = new ApplicationUser
                {
                    UserName = user.Name,
                    Email = user.Email
                };

                IdentityResult result = await userManager.CreateAsync(appUser, user.Password);
                if (result.Succeeded)
                    ViewBag.Message = "User Created Successfully";
                else
                {
                    foreach (IdentityError error in result.Errors)
                        ModelState.AddModelError("", error.Description);
                }
            }
            return View(user);
        }
    }
}
The controller is injected with “UserManager” class of type “ApplicationUser” in the constructor. The Create action method simply creates the new Identity User in the database. The UserManager’s CreateAsync() method performs the task of user creation.
IdentityResult result = await userManager.CreateAsync(appUser, user.Password);Any errors encountered in the operations are added to the ModelState and shown on the View.
foreach (IdentityError error in result.Errors)
    ModelState.AddModelError("", error.Description);
We now add the Create.cshtml which is a Razor View inside the View ➤ Operations folder. It’s code is given below:
@model User

<h1 class="bg-info text-white">Create User</h1>
<div asp-validation-summary="All" class="text-danger"></div>

@if (ViewBag.Message != null)
{
    <div class="p-1 mb-2 bg-success text-white">@ViewBag.Message</div>
}
<form method="post">
    <div class="form-group">
        <label asp-for="Name"></label>
        <input asp-for="Name" class="form-control" />
    </div>
    <div class="form-group">
        <label asp-for="Email"></label>
        <input asp-for="Email" class="form-control" />
    </div>
    <div class="form-group">
        <label asp-for="Password"></label>
        <input asp-for="Password" class="form-control" />
    </div>
    <button type="submit" class="btn btn-primary">Create</button>
</form>
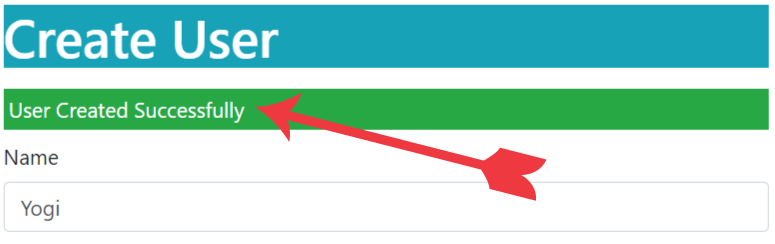
The View will simply present a form to add Identity User to the MongoDB database. With that said, it’s time to perform the practical. Start the app in Visual Studio and navigate to the url – https://localhost:44323/Operations/Create. The port will be different for your case.
You will be presented with a form to create a user. Fill it will the following values:
- Name – Yogi
- Email – yogi@yogihosting.com
- Password – Admin@123

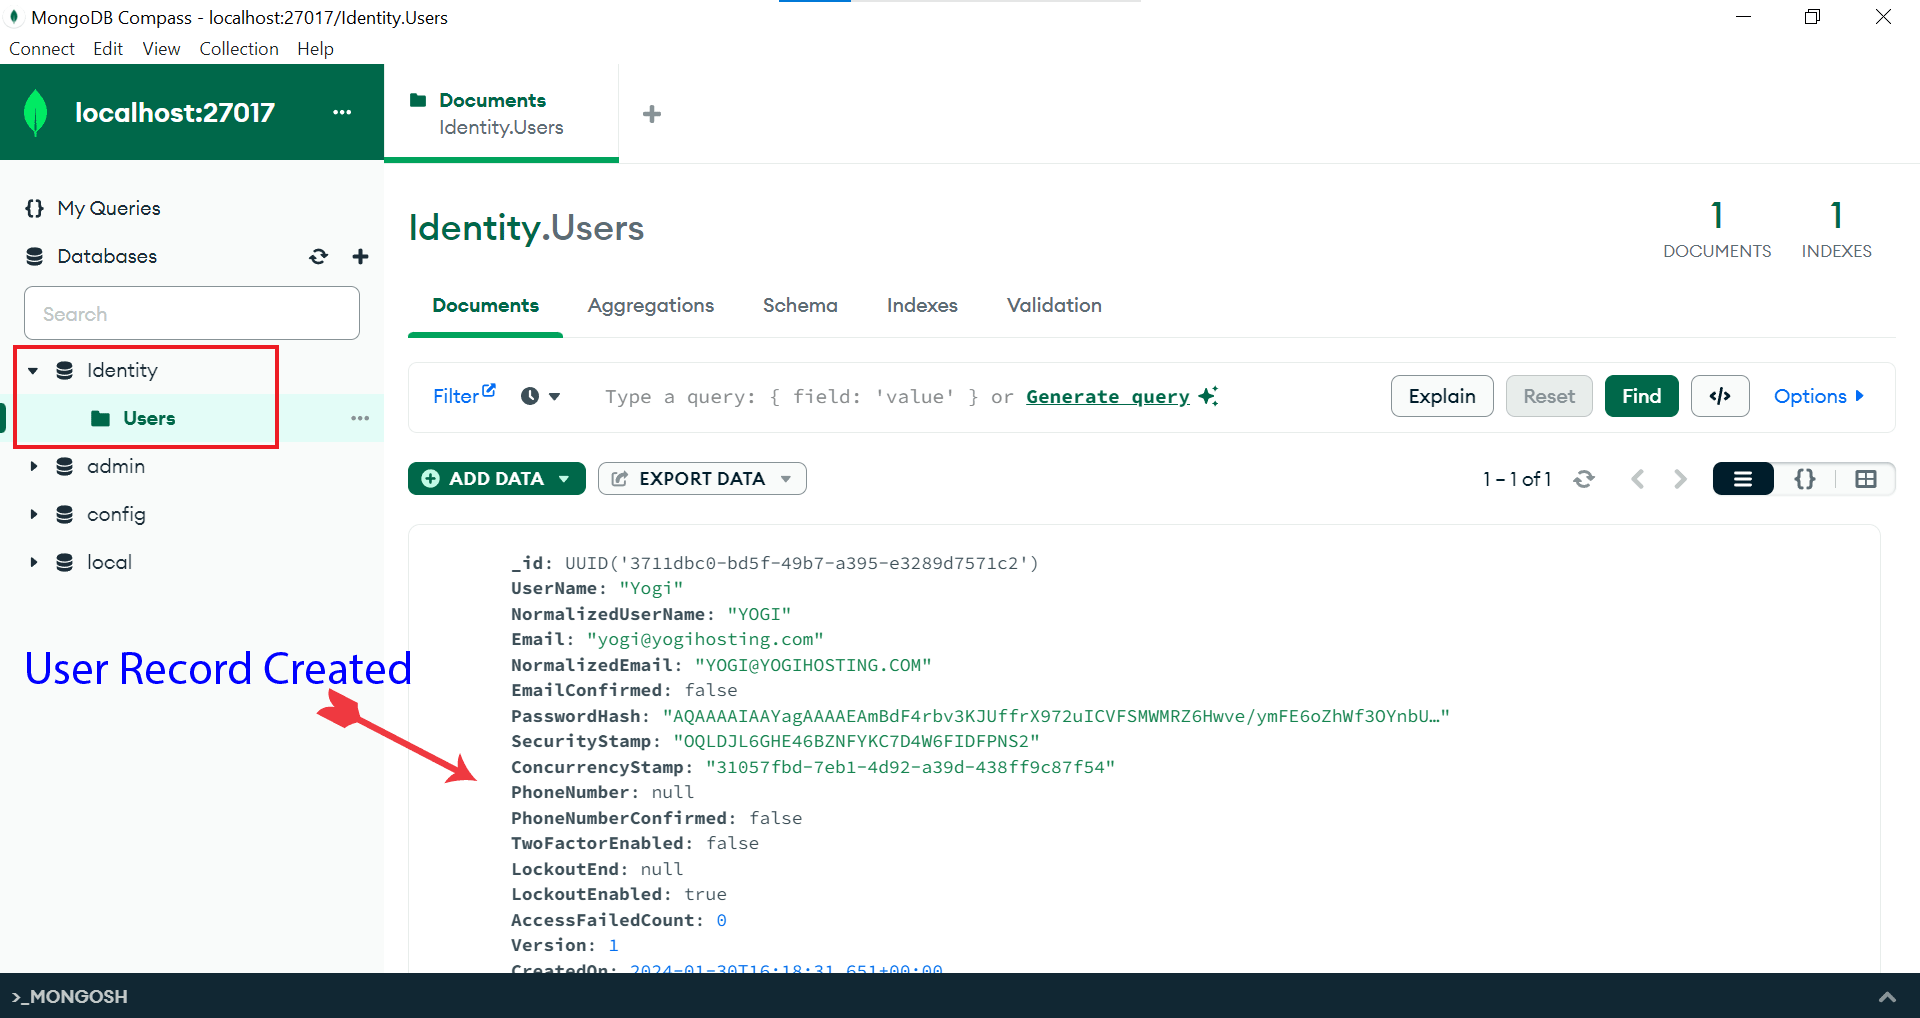
On submitting the form, you will get the message – User Successfully Created.
We can verify this user is created in the MongoDB database from Compass. Check the below image.
Creating Identity Roles in MongoDB
We now add the feature to create Identity Roles in MongoDB. For this we need to inject the RoleManager class of type ApplicationRole in the Controller’s constructor. Then by using CreateAsync method of RoleManager, we can create the Roles.
Add a new action method called CreateRole to the OperationsController.cs and make changes to the controller as we have shown by highlighting the codes.
using IdentityMongo.Models;
using Microsoft.AspNetCore.Identity;
using Microsoft.AspNetCore.Mvc;
using System.ComponentModel.DataAnnotations;

namespace IdentityMongo.Controllers
{
    public class OperationsController : Controller
    {
        private UserManager<ApplicationUser> userManager;
        private RoleManager<ApplicationRole> roleManager;

        public OperationsController(UserManager<ApplicationUser> userManager, RoleManager<ApplicationRole> roleManager)
        {
            this.userManager = userManager;
            this.roleManager = roleManager;
        }

        //..

        public IActionResult CreateRole() => View();

        [HttpPost]
        public async Task<IActionResult> CreateRole([Required] string name)
        {
            if (ModelState.IsValid)
            {
                IdentityResult result = await roleManager.CreateAsync(new ApplicationRole() { Name = name });
                if (result.Succeeded)
                    ViewBag.Message = "Role Created Successfully";
                else
                {
                    foreach (IdentityError error in result.Errors)
                        ModelState.AddModelError("", error.Description);
                }
            }
            return View();
        }
    }
}
Next, add the CreateRole.cshtml razor view file inside the Views ➤ Operations folder with the following code.
@model string

<h1 class="bg-info text-white">Create a Role</h1>
<div asp-validation-summary="All" class="text-danger"></div>

@if (ViewBag.Message != null)
{
    <div class="p-1 mb-2 bg-success text-white">@ViewBag.Message</div>
}

<form asp-action="CreateRole" method="post">
    <div class="form-group">
        <label for="name">Name:</label>
        <input name="name" class="form-control" />
    </div>
    <button type="submit" class="btn btn-primary">Create</button>
</form>
The View will present a small form that only asks for the Name of the Role to be created. Run the app and navigate to the url https://localhost:44323/Operations/CreateRole. Add role name as “Admin” and click the Create button.
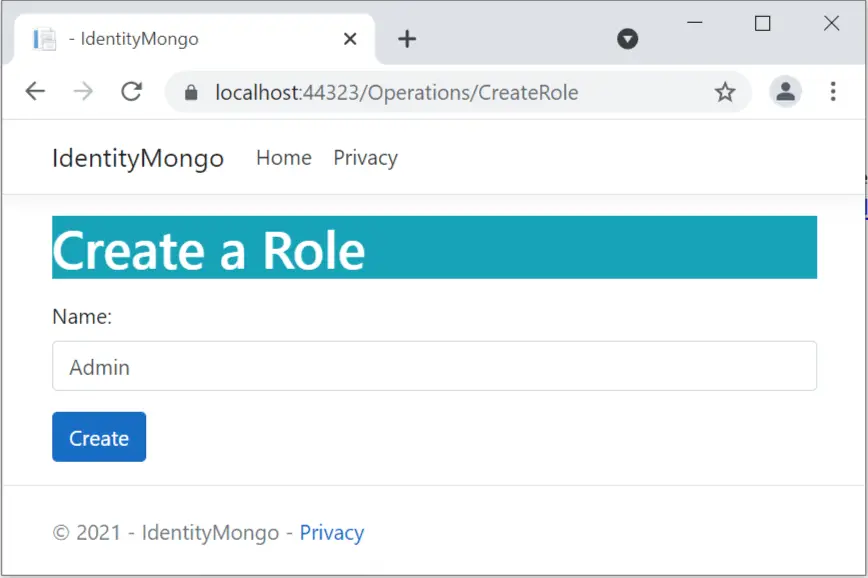
Let’s verify the Role in the database. So, in MongoDB Compass click the refresh button, then you will see “Roles” collections is added. Click the Roles collections to find the “Admin” role. We have shown this in the below image.

User Authentication : ASP.NET Core Identity in MongoDB
Secured areas of the website must be protected from anonymous user access. For this we need to add the authentication and authorization middlewares in ASP.NET Core app. Open the Program.cs class and add these 2 given middlewares after app.UseRouting.
app.UseRouting();
app.UseAuthentication();
app.UseAuthorization();
Next, add a new controller called SecuredController.cs in the app and secure it from anonymous user access by adding [Authorize] attribute over it.
using Microsoft.AspNetCore.Authorization;
using Microsoft.AspNetCore.Mvc;

namespace IdentityMongo.Controllers
{
    [Authorize]
    public class SecuredController : Controller
    {
        public IActionResult Index()
        {
            return View();
        }
    }
}
The controller has a single action “Index”. The Index view will show the authenticated user Claims and Properties. So add Index.cshtml razor view inside the Views ➤ Operations folder with the following code.
@using Microsoft.AspNetCore.Authentication

<h2>Claims</h2>

<dl>
    @foreach (var claim in User.Claims)
    {
        <dt>@claim.Type</dt>
        <dd>@claim.Value</dd>
    }
</dl>

<h2>Properties</h2>

<dl>
    @foreach (var prop in (await Context.AuthenticateAsync()).Properties.Items)
    {
        <dt>@prop.Key</dt>
        <dd>@prop.Value</dd>
    }
</dl>
Before creating the Login feature, we should discuss how this authentication works. When an anonymous user tries to visit the Secured Controller, the following things will happen:
- User will be redirected to the Login page.
- User enters his credentials and clicks the log in button.
- On successful login, user will be redirected to the secured controller and the secured information will be shown to him.
Theses things are shown in the below video, check them carefully.

The user must also have the option to login and logout to the website. Let’s create this feature in a new controller called AccountController.cs.
We will need to inject UserManager and SignInManager classes of type ApplicationUser to the constructor. SignInManager class is used to sign-in the user.
using IdentityMongo.Models;
using Microsoft.AspNetCore.Authorization;
using Microsoft.AspNetCore.Identity;
using Microsoft.AspNetCore.Mvc;
using System.ComponentModel.DataAnnotations;

namespace IdentityMongo.Controllers
{
    public class AccountController : Controller
    {
        private UserManager<ApplicationUser> userManager;
        private SignInManager<ApplicationUser> signInManager;

        public AccountController(UserManager<ApplicationUser> userManager, SignInManager<ApplicationUser> signInManager)
        {
            this.userManager = userManager;
            this.signInManager = signInManager;
        }

        // login and logout actions
    }
}
Next, add 2 actions “Login” and “Logout” to the controller.
- Login
- Logout
The login action will be used when user want’s to log in to the application.
public IActionResult Login()
{
    return View();
}

[HttpPost]
[AllowAnonymous]
[ValidateAntiForgeryToken]
public async Task<IActionResult> Login([Required][EmailAddress] string email, [Required] string password, string? returnurl)
{
    if (ModelState.IsValid)
    {
        ApplicationUser appUser = await userManager.FindByEmailAsync(email);
        if (appUser != null)
        {
            Microsoft.AspNetCore.Identity.SignInResult result = await signInManager.PasswordSignInAsync(appUser, password, false, false);
            if (result.Succeeded)
            {
                return Redirect(returnurl ?? "/");
            }
        }
        ModelState.AddModelError(nameof(email), "Login Failed: Invalid Email or Password");
    }

    return View();
}
Look at the above code, we first find the user in the database from UserManager class.
ApplicationUser appUser = await userManager.FindByEmailAsync(email);Next, we use SignInManager class to login the Application User.
Microsoft.AspNetCore.Identity.SignInResult result = await signInManager.PasswordSignInAsync(appUser, password, false, false);We will also need to create Login.cshtml view file which will serve for login purpose. Add this file inside the Views ➤ Account folder (code is shown below). The login view will show Email and Password text boxes, which the user has to fill in, in order to sign-in to the application.
<h1 class="bg-info text-white">Login</h1>
<div class="text-danger" asp-validation-summary="All"></div>

<form method="post">
    <div class="form-group">
        <label>Email</label>
        <input name="email" class="form-control" />
    </div>
    <div class="form-group">
        <label>Password</label>
        <input name="password" class="form-control" />
    </div>
    <button class="btn btn-primary" type="submit">Log In</button>
</form>
Last but not the least, add the Logout action to the controller. This action has been applied with [Authorize] attribute as only the logged in users can initiate this action.
[Authorize]
public async Task<IActionResult> Logout()
{
    await signInManager.SignOutAsync();
    return RedirectToAction("Index", "Home");
}
Show Logged in User Name and Logout button
The best place to show the username of logged in user along with the logout option, is the header section of the website. We add them to the _Layout.cshtml file as shown below:
<ul class="navbar-nav flex-grow-1">
    <li class="nav-item">
        <a class="nav-link text-dark" asp-area="" asp-controller="Home" asp-action="Index">Home</a>
    </li>
    <li class="nav-item">
        <a class="nav-link text-dark" asp-area="" asp-controller="Home" asp-action="Privacy">Privacy</a>
    </li>
    @{
        if (User?.Identity?.IsAuthenticated ?? false)
        {
            <li class="nav-item">
                <u>Welcome: @User.Identity.Name</u>
                <a asp-controller="Account" asp-action="Logout" class="btn btn-danger">Logout</a>
            </li>

        }
    }
</ul>
In the if condition we check the claims identity property “IsAuthenticated” to find out if the user is authenticated or not. If he is indeed authentication, then only his name and logout buttons are shown.
if (User?.Identity?.IsAuthenticated ?? false)
{
    // executes only when the user is authenticated
}Run the app in visual studio and then navigate to the url – https://localhost:44323/Account/Login. You will be shown the Login form.
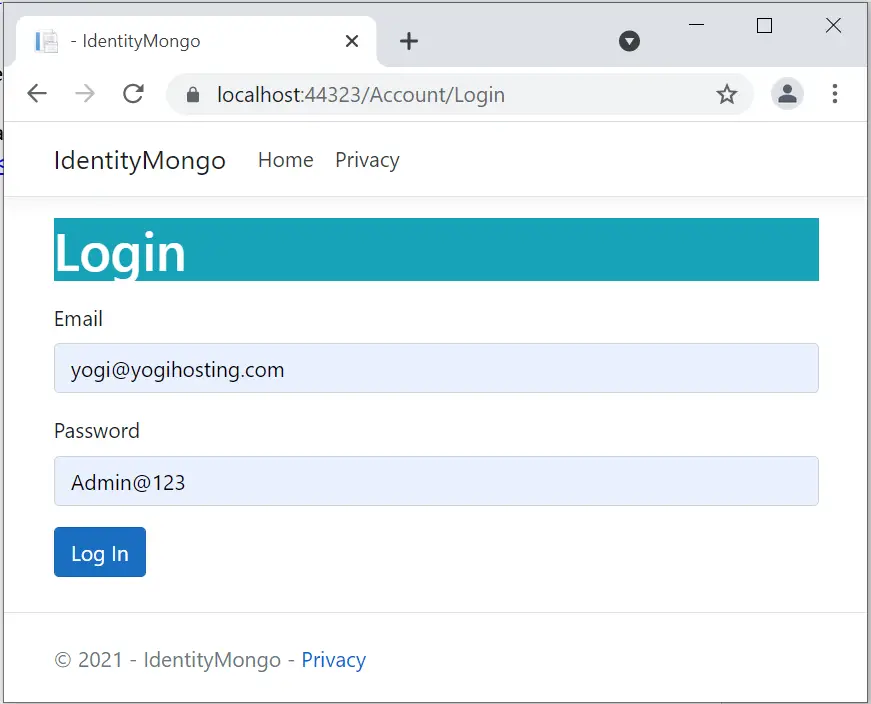
Login with the user we created earlier.
- Email – yogi@yogihosting.com
- Password – Admin@123
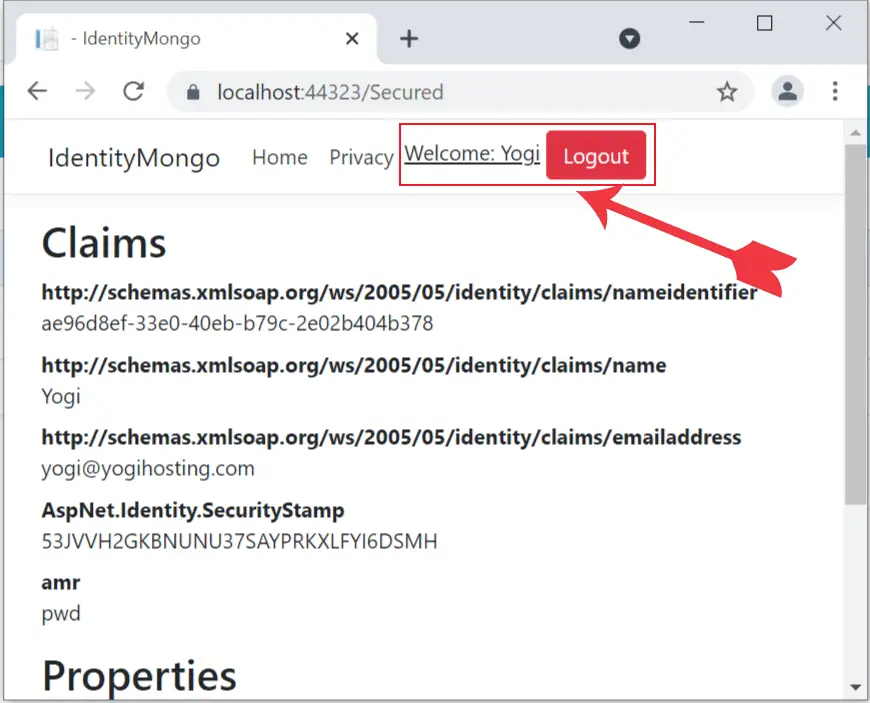
Next, go to the url – https://localhost:44323/Secured where we will see the user’s claims and properties. Also notice the username and logout button at the header area.
Authentication by Roles
We can also put a condition on the controller so that it can only be accessed by users in a given role. For example – we can say only users in “Admin” roles are allowed to view contents of the app. This is known as authentication by roles.
Change the Secured Controller authorize attribute to include only users of Admin role – [Authorize(Roles = “Admin”)].
[Authorize(Roles = "Admin")]
public class SecuredController : Controller
{
    public IActionResult Index()
    {
        return View();
    }
}
Now run the app and navigate to https://localhost:44323/Secured. We will get redirected to login page, login with the same user we created earlier.
- Email – yogi@yogihosting.com
- Password – Admin@123
After login you will not reach the Secured controller instead redirected to access denied page whose url is “/Account/AccessDenied”.
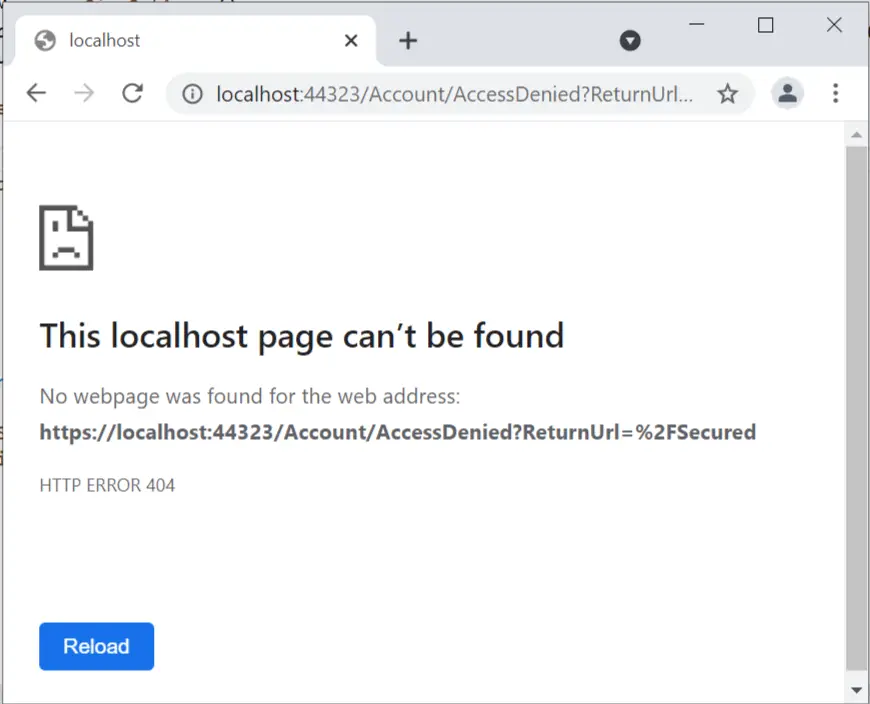
We haven’t created the AccessDenied action on the Account controller so we are getting 404 error. This thing you can do by yourself. Anyway, the point is – the logged in user is not in the “Admin” role so he can’t be authorized to view the Secured Controller.
Let us do a slight modification to the “Create” action of the “OperationsController.cs” so the new users are automatically added to “Admin” role. You just need to add a single line to it which is shown in highlighted color.
[HttpPost]
public async Task<IActionResult> Create(User user)
{
    if (ModelState.IsValid)
    {
        ApplicationUser appUser = new ApplicationUser
        {
            UserName = user.Name,
            Email = user.Email
        };

        IdentityResult result = await userManager.CreateAsync(appUser, user.Password);

        //Adding User to Admin Role
        await userManager.AddToRoleAsync(appUser, "Admin");

        if (result.Succeeded)
            ViewBag.Message = "User Created Successfully";
        else
        {
            foreach (IdentityError error in result.Errors)
                ModelState.AddModelError("", error.Description);
        }
    }
    return View(user);
}
Now create a new user which will be added to “Admin” role. Next login with this new user and navigate to the url of the secured user. This time we will be authorized to access the controller.
Note that more than one roles can be added to the [Authorize] attribute in comma separated manner.
[Authorize(Roles = "Admin, Teacher, Developer")]In this tutorial we applied MongoDB for Identity database, the users and roles were stored in the MongoDB database. We also created login and logout feature and then authenticated users to secured controllers along with their roles. If you like this tutorial kindly share it by using the below social buttons.
SHARE THIS ARTICLE
Related Tutorials:


ABOUT THE AUTHOR
I hope you enjoyed reading this tutorial. If it helped you then consider buying a cup of coffee for me. This will help me in writing more such good tutorials for the readers. Thank you.

HELLO EVERYONE
 Welcome to YogiHosting - A Programming Tutorial Website. It is used by millions of people around the world to learn and explore about ASP.NET Core, Blazor, jQuery, JavaScript, Docker, Kubernetes and other topics.
SUBSCRIBE TO NEWSLETTER
Enter your email address to subscribe to this blog and receive notifications of new posts by email.
Join 90K other subscribers