Implementing JWT Refresh Token in ASP.NET Core MVC

This tutorial is about JWT Refresh Token, what is does, how to generate it and how to use it with JWT Access Tokens. Most probable this tutorial will clear all your doubts about JWT access and refresh tokens. We are also going to implement it on our ASP.NET Core app. The source codes can be obtained by the download link which is given at the bottom of this tutorial.
Page Contents
What is JWT Refresh Token
What is a JWT Refresh Token when we already have Access Token? The JWT Refresh token is nothing but a combination of random strings and numbers. It gives added added security to our application. In a Nutshell, users should request a new JWT Access token in such a way that they don’t have to re-send their credentials (username and password) to the JWT Server again and again. This is done with the help of Refresh Token.
This tutorial is a part of series called JSON Web Token (JWT) in ASP.NET Core. There are 3 tutorials to master it:
- ASP.NET Core JWT Authentication and Authorization of Web API [Detailed]
- Implementing JWT Refresh Token in ASP.NET Core MVC
- How to call a JWT secured APIs with jQuery AJAX [with source codes]
We already know that there is only one page to enter credentials and it is the login page.
We all have been designing such login pages from our primary standards. Now coming to important part. We should design the JWT authentication and authorization procedure is such a way that:
- User is provided a JWT access token on the login page only after doing successful login with his username and password. Note that we can apply login mechanism with ASP.NET Core Identity.
- When this JWT access token expires and the user is still logged in to the website, then he should “not be” redirected to login page. In fact, he should be provided with a new access token “automatically” by the use of some mechanism. We will later see that this mechanism is nothing but the Refresh Token.
Facebook and other big websites also work in this way. They have access tokens which on expiring are automatically renewed. You don’t have to login again, I do not remember when the last time I logged in to facebook.
So where does Refresh Token comes here? It gives added security, let see what happens when access token is somehow stolen.
Are Refresh Tokens stored in DB? – It is a good practice to store the refresh tokens in a DB so that we can keep a track on them. We can limit their abuse by revoking their access in case of any security breach. We will see how this can be done in the latter half of this tutorial.
JWT Access Token Stolen
Suppose our access token is somehow stolen by a hacker. Now the hacker can access the secure pages of the website for that user as long as the Access Token is valid.
Consider 2 cases:
Suppose the stolen access token is going to expire not until a few days later. So, we have no option but to change the IssuerSigningKey so that all previously generated access tokens fail to validate. I have implemented all this stuff in ASP.NET Core JWT Authentication and Authorization of Web API [Detailed].
This will create downtime as we need to republish and deploy the app, thousands of current users on the site will have to re-login in order to generate new access token. This is a headache for the development team.
Suppose the stolen access token has an expiry time of just 1 minutes. So the unfortunate hacker will have just 1 minutes to stole valuable information from the user’s account and after that the token expires and everything becomes normal like before.
How long should a JWT Token last? – The JWT Token should last no more than 1 minute. This is because if it is somehow stolen then the poor hacker has only 1 minute to get the user’s data. After one minute the token will expire and the hacker will looose access to the site.
How long should a JWT Refresh Token last? – The JWT Refresh tokens have very long expiry time like a few days. Becuase of this users don’t have to re-login everytime they need to access their account on a site. Once again think about when the last time you logged in to facebook.
Invalidate a JWT Token in .NET Core
In your JWT access token is stolen then you can invalidate it by changing the IssuerSigningKey which is set under the AddJwtBearer method in the Program.cs class of your .NET application. Check the highlighted code below (I changed ‘MynameisJamesBond007_MynameisJamesBond007’ to ‘MynameisSuperman999999_MynameisSuperman999999’).
.AddJwtBearer(options =>
{
    options.SaveToken = true;
    options.RequireHttpsMetadata = false;
    options.TokenValidationParameters = new Microsoft.IdentityModel.Tokens.TokenValidationParameters()
    {
        ValidateIssuer = true,
        ValidateAudience = true,
        ValidAudience = "dotnetclient",
        ValidIssuer = "https://www.yogihosting.com",
        ClockSkew = TimeSpan.Zero,// It forces tokens to expire exactly at token expiration time instead of 5 minutes later
        IssuerSigningKey = new SymmetricSecurityKey(Encoding.UTF8.GetBytes("MynameisJamesBond007_MynameisJamesBond007")) //change this
    };
});
After change:
.AddJwtBearer(options =>
{
    options.SaveToken = true;
    options.RequireHttpsMetadata = false;
    options.TokenValidationParameters = new Microsoft.IdentityModel.Tokens.TokenValidationParameters()
    {
        ValidateIssuer = true,
        ValidateAudience = true,
        ValidAudience = "dotnetclient",
        ValidIssuer = "https://www.yogihosting.com",
        ClockSkew = TimeSpan.Zero,// It forces tokens to expire exactly at token expiration time instead of 5 minutes later
        IssuerSigningKey = new SymmetricSecurityKey(Encoding.UTF8.GetBytes("MynameisSuperman999999_MynameisSuperman999999")) //change this
    };
});
How to Generate a JWT Refresh Token
A Refresh Token is nothing but a combination of random strings and numbers which is difficult to guess. You can use a GUID for a Refresh Token. People generate the Refresh Token by a number of ways, I will use a built-in Crypto Function to generate a 32-byte string which will be just impossible to break except for a Quantum Computer.
This function generating the Refresh Token is going to be.
private string CreateRT()
{
    var randomNumber = new byte[32];
    using (var generator = new RNGCryptoServiceProvider())
    {
        generator.GetBytes(randomNumber);
        string token = Convert.ToBase64String(randomNumber);
        return token;
    }
}
I know you are disappointed to see it. Let me make you more disappointed by telling you that the tutorial is over now. You now just have to create your own logic to use this function and generated JWT Access Token from it.
Anyway, for those who are continuing, let us build this logic.
The Refresh Token will be stored in a Cookie. I have also created this function which is given below.
private void SetRTCookie(string refreshToken)
{
    var cookieOptions = new CookieOptions
    {
        HttpOnly = true,
        Expires = DateTime.UtcNow.AddDays(7), // one week expiry time
    };
    Response.Cookies.Append("refreshToken", refreshToken, cookieOptions);
}
Did you see 7 days expiry time? It is still smaller than facebook’s where we are not asked to login again for 1 month time.
Generating JWT Access Token with Refresh Token
How to refresh a JWT Token in Web API? – If the Web API respond with a 403 un-authorized error then we are sure the JWT Token is expired. In this case we use refresh token to generate a new JWT Access Token and use this newly generated token to access the Web API. We will now implement this feature in our app.
Now we have come to the implementation part. I am creating this feature in the same “JWTAPI” project which I created on my earlier tutorial on JWT. You can download the full source codes, which are given at the bottom of this tutorial. So don’t worry at all.
Start by creating a new controller in your project and name it LoginController.cs. Add the Index actions to it, these add a login feature to the website.
public IActionResult Index()
{
    return View();
}

[HttpPost]
public IActionResult Index(string username, string password)
{
    if ((username != "secret") || (password != "secret"))
        return View((object)"Login Failed");

    var accessToken = GenerateJSONWebToken();
    return RedirectToAction("FlightReservation", new { token = accessToken });
}
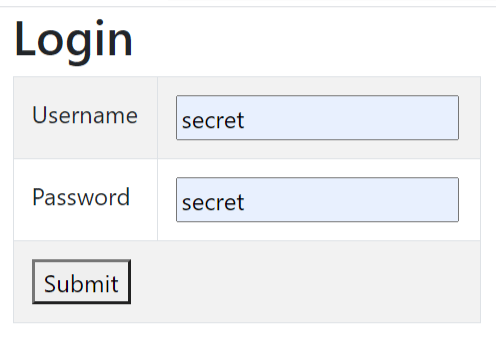
Here, users have to enter the word secret for both username and password in order to login. Obviously, you are going to change the login feature by including something like Identity Authentication in place of the below code:
if ((username != "secret") || (password != "secret"))
    return View((object)"Login Failed");
In the last 2 lines of code I am calling GenerateJSONWebToken() function and redirecting the use to the FlightReservation action and passing the access token in the route.
Now create the Index.cshtml razor view file inside the Views ➤ Login folder. It’s code is given below.
@{ ViewBag.Title = "Login";}
@model string
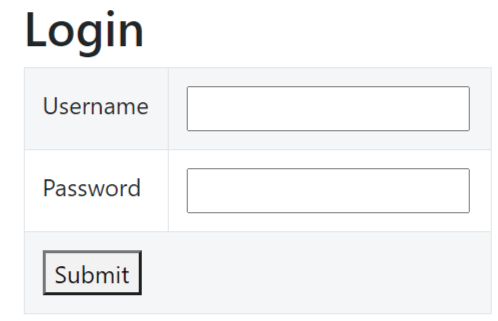
<h2>Login</h2>
@if (Model != null)
{
<div class="alert-danger">Login Failed</div>
}
<form method="post">
<table class="w-25 table table-striped table-bordered">
<tbody>
<tr>
<td>Username</td>
<td><input type="text" name="username" /></td>
</tr>
<tr>
<td>Password</td>
<td><input type="text" name="password" /></td>
</tr>
<tr>
<td colspan="2">
<button>Submit</button>
</td>
</tr>
</tbody>
</table>
</form>The View will present the Login UI which we have already seen.
Now, add GenerateJSONWebToken() method to the controller which will generate the JWT Access Token and also the Refresh token. The refresh token will be added to a cookie.
private string GenerateJSONWebToken()
{
    string rt = CreateRT();
    SetRTCookie(rt);

    var securityKey = new SymmetricSecurityKey(Encoding.UTF8.GetBytes("MynameisJamesBond007_MynameisJamesBond007"));
    var credentials = new SigningCredentials(securityKey, SecurityAlgorithms.HmacSha256);

    var token = new JwtSecurityToken(
        issuer: "https://www.yogihosting.com",
        audience: "dotnetclient",
        expires: DateTime.Now.AddMinutes(1),
        signingCredentials: credentials
        );

    return new JwtSecurityTokenHandler().WriteToken(token);
}
Here my security key is “MynameisJamesBond007_MynameisJamesBond007” and expiry time just 1 minute, you know why it is so small, haven’t you?
Remember the Refresh Token methods we created earlier? Add the CreateRT and setRTCookie methods to your controller. So this means both the Refresh Token and Access Token are created together, another security enhancer.
Now the full code of the LoginController.cs becomes:
using Microsoft.AspNetCore.Mvc;
using Microsoft.IdentityModel.Tokens;
using System.IdentityModel.Tokens.Jwt;
using System.Security.Cryptography;
using System.Text;

namespace JWTAPI.Controllers
{
    public class LoginController : Controller
    {
        public IActionResult Index()
        {
            return View();
        }

        [HttpPost]
        public IActionResult Index(string username, string password)
        {
            if ((username != "secret") || (password != "secret"))
                return View((object)"Login Failed");

            var accessToken = GenerateJSONWebToken();
            return RedirectToAction("FlightReservation", new { token = accessToken });
        }

        private string GenerateJSONWebToken()
        {
            string rt = CreateRT();
            SetRTCookie(rt);

            var securityKey = new SymmetricSecurityKey(Encoding.UTF8.GetBytes("MynameisJamesBond007_MynameisJamesBond007"));
            var credentials = new SigningCredentials(securityKey, SecurityAlgorithms.HmacSha256);

            var token = new JwtSecurityToken(
                issuer: "https://www.yogihosting.com",
                audience: "dotnetclient",
                expires: DateTime.Now.AddMinutes(1),
                signingCredentials: credentials
                );

            return new JwtSecurityTokenHandler().WriteToken(token);
        }

        private string CreateRT()
        {
            var randomNumber = new byte[32];
            using (var generator = new RNGCryptoServiceProvider())
            {
                generator.GetBytes(randomNumber);
                string token = Convert.ToBase64String(randomNumber);
                return token;
            }
        }

        private void SetRTCookie(string refreshToken)
        {
            var cookieOptions = new CookieOptions
            {
                HttpOnly = true,
                Expires = DateTime.UtcNow.AddDays(7), // one week expiry time
            };
            Response.Cookies.Append("refreshToken", refreshToken, cookieOptions);
        }
    }
}
Accessing the JWT Protected API
The FlightReservation action accesses the JWT protected API. It’s code is given below, add it to the same LoginController.cs file.
using JWTAPI.Models;
using System.Net.Http.Headers;
using Newtonsoft.Json;
using Microsoft.AspNetCore.Mvc;
using Microsoft.IdentityModel.Tokens;
using System.IdentityModel.Tokens.Jwt;
using System.Security.Cryptography;
using System.Text;

namespace JWTAPI.Controllers
{
    public class LoginController : Controller
    {
        // removed for brevity

        public async Task<IActionResult> FlightReservation(string token)
        {
            List<Reservation> reservationList = new List<Reservation>();

            using (var httpClient = new HttpClient())
            {
                httpClient.DefaultRequestHeaders.Authorization = new AuthenticationHeaderValue("Bearer", token);
                using (var response = await httpClient.GetAsync("https://localhost:7154/Reservation")) // change API URL to yours
                {
                    if (response.StatusCode == System.Net.HttpStatusCode.OK)
                    {
                        string apiResponse = await response.Content.ReadAsStringAsync();
                        reservationList = JsonConvert.DeserializeObject<List<Reservation>>(apiResponse);
                    }

                    if (response.StatusCode == System.Net.HttpStatusCode.Unauthorized)
                    {
                        return RedirectToAction("RefreshToken");
                    }
                }
            }

            return View(reservationList);
        }
    }
}
Points to note:
The FlightReservation action method gets the JWT access token on it’s parameter which is provided when the user is redirect by the index action.
return RedirectToAction("FlightReservation", new { token = accessToken });The JWT Access Token is added to the authorization header of the request by the below line:
httpClient.DefaultRequestHeaders.Authorization = new AuthenticationHeaderValue("Bearer", token);After that the Http Get request is made to the API located at https://localhost:7154/Reservation.
using (var response = await httpClient.GetAsync("https://localhost:7154/Reservation"))The api will provide a list of flight reservations when JWT access token is valid. If it is invalid then Unauthorized status code is sent. The below codes lines do this checking:
if (response.StatusCode == System.Net.HttpStatusCode.OK)
{
    string apiResponse = await response.Content.ReadAsStringAsync();
    reservationList = JsonConvert.DeserializeObject<List<Reservation>>(apiResponse);
}

if (response.StatusCode == System.Net.HttpStatusCode.Unauthorized)
{
    return RedirectToAction("RefreshToken");
}
In the if blocks, the status codes are checked. For OK case the Reservation list is filled and is returned to the view as a model, where it is shown in a html table.
So, create a new Razor View called FlightReservation.cshtml inside the Views ➤ Login folder. It will show the reservations in a table, see it’s code given below.
@model IEnumerable<Reservation>
@{ ViewBag.Title = "All Reservations";}

<h2>All Reservations</h2>
<table class="table table-sm table-striped table-bordered m-2">
    <thead><tr><th>ID</th><th>Name</th><th>Start Location</th><th>End Location</th></tr></thead>
    <tbody>
        @if (Model != null)
        {
            foreach (var r in Model)
            {
                <tr>
                    <td>@r.Id</td>
                    <td>@r.Name</td>
                    <td>@r.StartLocation</td>
                    <td>@r.EndLocation</td>
                </tr>
            }
        }
    </tbody>
</table>
When the status code send by the Web API is Unauthorized (which happens because the JWT access token is expired) then the user is redirected to the RefreshToken action method.
Add the RefreshToken action method’s code on the controller.
public IActionResult RefreshToken()
{
    string cookieValue = Request.Cookies["refreshToken"];

    // If cookie is expired then it will give null
    if (cookieValue == null)
        return RedirectToAction("Index");

    // If cookie value is not the same as stored in db it is Hacking Attempt
    if (!CheckCookieValue(cookieValue))
        return RedirectToAction("Index");

    // If cookie is revoked by admin
    if (!CheckCookieEnabled(cookieValue))
        return RedirectToAction("Index");

    var tokenString = GenerateJSONWebToken();
    return RedirectToAction("FlightReservation", new { token = tokenString });
}
The RefreshToken action makes sure if the Refresh Token is valid then the new JWT access token is generated for the user in such a way that he does not have to log in again. It does that by making several checks on the Refresh Token stored on the cookie named “refreshToken”. This is the main thing which the Refresh Token is all about.
The refresh token can become in-valid in 3 ways and these are handled by the 3 if blocks.
Refresh Token cookie will expire after 7 days in my case. So, user has no option but to re-login. In the ASP.NET Core code the expired cookies will give null value so the if block does the null check on the cookie’s value.
if (cookieValue == null)
return RedirectToAction("Index");A hacker can create a cookie by the name of “refreshToken” and try to generate JWT Access token with it. He will fail in the attempt as we have stored a 32 byte random number and encrypted by RNGCryptoServiceProvider class inside the cookie. This value he can never guess. So, the if block checks the cookie value by calling CheckCookieValue method.
if (!CheckCookieValue(cookieValue))
    return RedirectToAction("Index");
The CheckCookieValue method will have to make a call to the database which is storing the cookie value. Then it checks the value of the cookie with the stored value in the database. For any mismatch, the user is redirected to login page.
Suppose, for the user with username “Bobby”, the database record for the Refresh Cookie is:
| Id | Username | CookieValue | IsActive |
|---|---|---|---|
| 1 | Bobby | bGciOiJIUzI1NiIsInR5cCI6IkpXVCJ9 | true |
The CookieValue column stores the 32 byte random number stored in the cookie. So we can check for manipulated cookie value.
The CheckCookieValue method’s code, which is just a demo, is given below:
private bool CheckCookieValue(string cookieValue)
{
    // Check the cookie value with stored in the db. If No match then it is forged cookie so return false.
    return true;
}In case of security breach the admin can revoke the Refresh token which is checked by the CheckCookieEnabled method.
private bool CheckCookieEnabled(string cookieValue)
{
    // Check if the cookie is enabled in the database. If cookie is not enabled then probably the admin has revoked it so return false.
    return true;
}
In the database table for the Refresh Token, there is IsActive column. The admin can set it’s value to false to revoke the refresh token. And now you can easily check it in your code.
| Id | Username | CookieValue | IsActive |
|---|---|---|---|
| 1 | Bobby | bGciOiJIUzI1NiIsInR5cCI6IkpXVCJ9 | false |
Testing the JWT Refresh Token
Let us now test our code. Make sure you have the [Authorize] attribute applied on the Web API.
[Route("[controller]")]
[ApiController]
[Authorize]
public class ReservationController : ControllerBase
{
    [HttpGet]
    public IEnumerable<Reservation> Get() => CreateDummyReservations();

    ...
}
Make a small change to the expiry time of the Refresh Cookie, make it 5 minute as we do cannot wait for 7 days.
private void SetRTCookie(string refreshToken)
{
    var cookieOptions = new CookieOptions
    {
        HttpOnly = true,
        Expires = DateTime.UtcNow.AddMinutes(5),
    };
    Response.Cookies.Append("refreshToken", refreshToken, cookieOptions);
}
Make sure your Web API is in running state. Then open the Login page uri in your project which in my case is https://localhost:7154/Login. Login with word secret for both username and password.
You will be shown Flight Reservations coming from a JWT secured api. Notice it’s url contains the JWT access token in the query string. See the below image where I have marked it.
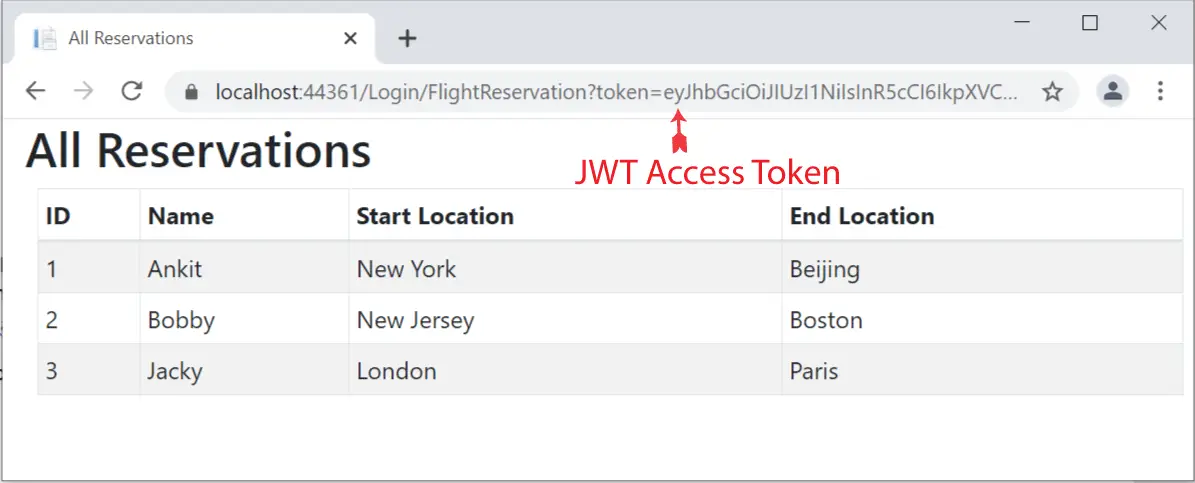
Wait for 1 minutes for the JWT Access Token to expire and then refresh the page. You will see that you remain on the same page and continue to see the reservations. The Refresh Token comes to picture as a new JWT token is provided to you.
You can validate this thing by matching the new JWT access token in the URL with the previous one.
Now wait for 5 minutes more and refresh the page. This time you will be redirected to the Login page as both the JWT access token and Refresh Tokens have expired.
Download the source code of this tutorial.
I hope this tutorial will clear all your doubts regarding JWT Refresh Token and Access Token. If you like this tutorial then kindly share it by using the below buttons.
SHARE THIS ARTICLE
Related Tutorials:


ABOUT THE AUTHOR
I hope you enjoyed reading this tutorial. If it helped you then consider buying a cup of coffee for me. This will help me in writing more such good tutorials for the readers. Thank you.

Comments
Leave a Reply
HELLO EVERYONE
 Welcome to YogiHosting - A Programming Tutorial Website. It is used by millions of people around the world to learn and explore about ASP.NET Core, Blazor, jQuery, JavaScript, Docker, Kubernetes and other topics.
SUBSCRIBE TO NEWSLETTER
Enter your email address to subscribe to this blog and receive notifications of new posts by email.
Join 90K other subscribers
Dear Yogi,
Thanks for your JWT Refresh Token tutorial. It is excellent!
Your tutorial helped me get the idea of how to implement JWT Refresh Token within 30 miniatures.
I have been using JWT Refers Token, but your tutorial has the most simple explanation with the “Noting but” statement. Thank you so much!
By the way, I received your emails about the Kubernetes tutorials, I will find a time to read them as I am sure the tutorials you made are always the best in their topics.
Best regards,
Kevin
Hello Kevin, Thank you so much for your kind words. Enjoy coding !