Multi File Upload with Progress Bar in ASP.NET CORE

Ever wonder how to show Real time Progress of files being upload to the server, well this tutorial will teach you all this in multiple ways. So make sure to read this tutorial in full and download the source code given at the bottom.
In this tutorial I will make a file upload feature that can upload multiple files to an ASP.NET Core Web API by the use of JavaScript. There will also be a progress bar to show real time progress of the files being uploaded.
Enable CORS
Since we will be calling Web API from JavaScript so we will have to deal with “same-origin policy” problem. This can be solved by Enabling Cross-Origin Requests (CORS) in our ASP.NET Core app hosting the Web APIs. CORS is a W3C standard that allows browsers to relax the same-origin policy.
We first install the NuGet package Microsoft.AspNetCore.Cors. Then on the ConfigureServices method of Startup.cs add CORS by adding services.AddCors().
public void ConfigureServices(IServiceCollection services)
{
    services.AddCors();
    services.AddControllersWithViews();
}
Next, we will add CORS middleware in the Configure method as shown by the highlighted code given below.
public void Configure(IApplicationBuilder app, IWebHostEnvironment env)
{
    //…
    app.UseRouting();

    //Shows UseCors with CorsPolicyBuilder.
    app.UseCors(builder =>
    {
        builder
        .AllowAnyOrigin()
        .AllowAnyMethod()
        .AllowAnyHeader();
    });
    //…
}
With CORS enabled, let us understand how the Web API will look.
The Web API Code
The Web API is fairly simple and will be called by AJAX. The API has a method called UploadFile and it’s work is to save the files that are sent by the client to the server. This method’s URL is http://localhost:8888/api/Xaero/UploadFile and it’s definition is given below:
[Route("api/[controller]")]
public class XaeroController : Controller
{
    private IWebHostEnvironment hostingEnvironment;
    public XaeroController(IWebHostEnvironment environment)
    {
        hostingEnvironment = environment;
    }

    [HttpPost("UploadFile")]
    public async Task<string> UploadFile([FromForm] IFormFile file)
    {
        string path = Path.Combine(hostingEnvironment.WebRootPath, "Images/" + file.FileName);
        using (var stream = new FileStream(path, FileMode.Create))
        {
            await file.CopyToAsync(stream);
        }
        return "http://localhost:8888/Images/" + file.FileName;
    }
}
Notice that this method has a parameter of IFormFile type and the client is supposed to send the file in the JavaScript FormData object. This is the reason why I used the [FromForm] attribute on the parameter of the method.
Create Multiple File Upload feature with Progress Bar
First you need to create a new html page and name it AddFile.html or anything you like. To this page, add an html input control of file type and provide it with multiple attribute so that you can upload multiple files through it. Also add an html Progress control whose work is to show the real time progress of the uploading files.
When this file upload feature is created, it will work as shown by the below video:
The full codes are provided below, just copy and paste it to your html page. I have also added some other html controls on the page whose jobs are described below:
- a. H3 tag called status to show the current percentage of uploaded files.
- b. Paragraph tag to shown total number of uploaded bytes.
- c. Div called fileDiv that will show total number of uploaded files along with their uploaded paths on the server.
<input type="file" id="File" multiple />
<button onclick="UploadFile()" type="submit">Add</button>

<progress id="progressBar" value="0" max="100" style="width: 300px;"></progress>
<h3 id="status"></h3>
<p id="loaded_n_total"></p>

<div id="fileDiv" style="display:none">
    <h2 id="total"></h2>
    <h3><u>Uploaded Paths</u></h3>
    <div id="pathDiv"></div>
</div>
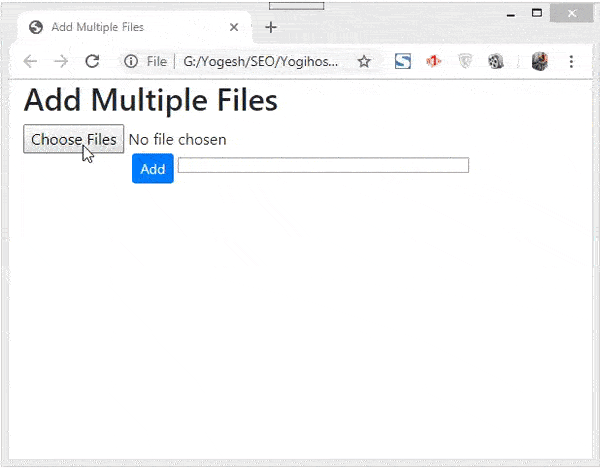
The image given below shows how the file upload controls & progress bar will look on the browser:

You may have noticed that the click of the button calls a JS function by the name of UploadFile(). This function is the backbone and Calls the Web API to upload the multiple files to the server. So, add this function in your html page, it’s full code are given below:
<script type="text/javascript">
    var counter = 0;
    function UploadFile() {
        var files = document.getElementById("File").files

        // Loop through files
        for (var i = 0; i < files.length; i++) {
            var file = files[i];

            var xhttp = new XMLHttpRequest();

            xhttp.open("POST", "http://localhost:8888/api/Xaero/UploadFile", true);
            data = new FormData();
            data.append("file", file);

            xhttp.upload.addEventListener("progress", progressHandler);
            xhttp.addEventListener("load", completeHandler);
            xhttp.addEventListener("error", errorHandler);
            xhttp.addEventListener("abort", abortHandler);

            xhttp.send(data);

            xhttp.onreadystatechange = function () {
                if (this.readyState == 4 && this.status == 200) {
                    counter++;
                    document.getElementById("fileDiv").style.display = "block";
                    document.getElementById("total").innerHTML = counter + " files uploaded successfully";
                }
            };
        }
    }
</script>
I first grab all the files added to the file control from this code:
var files = document.getElementById("File").filesNext with a for loop these files are grabbed one by one by the code:
var file = files[i];Then an AJAX request with XMLHttpRequest object is made to the API. Notice that each file is appended to the FormData object and this form data is added to the XMLHttpRequest object before making an AJAX call. The code lines that perform this work are given below:
var xhttp = new XMLHttpRequest();

xhttp.open("POST", "http://localhost:8888/api/Xaero/UploadFile", true);
data = new FormData();
data.append("file", file);
xhttp.send(data);
XMLHttpRequest provides the ability to listen to various events that can occur while the AJAX request is being processed. This includes periodic progress notifications, error notifications, and so forth. These events are added like this:
xhttp.upload.addEventListener("progress", progressHandler);
xhttp.addEventListener("load", completeHandler);
xhttp.addEventListener("error", errorHandler);
xhttp.addEventListener("abort", abortHandler);
When the AJAX response is received from the Web API (when all the files have uploaded to the server) then the onreadystatechange event is fired which displays the ‘total no of files’ and their uploaded path URLs.
Note that these details about the uploaded files are provided by the API in JSON response. See the below code which does this work.
xhttp.onreadystatechange = function () {
    if (this.readyState == 4 && this.status == 200) {
        counter++;
        document.getElementById("fileDiv").style.display = "block";
        document.getElementById("total").innerHTML = counter + " files uploaded successfully";
    }
};
Upload Progress event of XMLHttpRequest
The Upload Progress Event is triggers when something is uploaded to the server. It helps to track the upload progress of the files. It is added like this:
xhttp.upload.addEventListener("progress", progressHandler);The first parameter (i.e. progress) specifies the name of the event and the second parameter specifies the function that will be called when this event fires. Here this function to be called is ‘progressHandler’.
Next, add the progressHandler function to your html page. It’s code is given below:
function progressHandler(event) {
    document.getElementById("loaded_n_total").value = "Uploaded " + event.loaded + " bytes of " + event.total;
    var percent = (event.loaded / event.total) * 100;
    document.getElementById("progressBar").value = Math.round(percent);
    document.getElementById("status").innerHTML = Math.round(percent) + "% uploaded... please wait";
}
Inside this function I get the number of bytes uploaded i.e. from event.loaded object. I then use it to calculate the % of upload currently done is at the present moment, and show it on the progress bar accordingly.
var percent = (event.loaded / event.total) * 100;|
document.getElementById("progressBar").value = Math.round(percent);
A text message is shown, about the upload currently done, on the ‘loaded_n_total’ & ‘status’ controls:
document.getElementById("loaded_n_total").value = "Uploaded " + event.loaded + " bytes of " + event.total;
document.getElementById("status").innerHTML = Math.round(percent) + "% uploaded... please wait";
”load, error, abort” events of XMLHttpRequest
The load, error and abort events of XMLHttpRequest are called when:
- load – upload finished successfully.
- error – non-HTTP error occurs.
- abort – upload aborted.
These are defined as:
xhttp.addEventListener("load", completeHandler);
xhttp.addEventListener("error", errorHandler);
xhttp.addEventListener("abort", abortHandler);
So add the 3 JS functions in your page for including these events:
function completeHandler(event) {
    document.getElementById("pathDiv").innerHTML += event.target.responseText + "<br/>";
}

function errorHandler(event) {
    document.getElementById("status").innerHTML = "Upload Failed";
}

function abortHandler(event) {
    document.getElementById("status").innerHTML = "Upload Aborted";
}
That’s all, your Multiple File Upload feature is ready to use. Next I will discuss some programming scenarios where you have to modify the file upload to suit your requirement.
Upload All files together to the API
Suppose the API requests to send all the files together and not one by one as I did in the previous code. Then in such a scenario the API method’s definition will look something like shown below.
[HttpPost("UploadAllFile")]
public async Task<string> UploadFiles([FromForm] List<IFormFile> files)
{
    string savedFiles = "";
    foreach (IFormFile file in files)
    {
        string path = Path.Combine(hostingEnvironment.WebRootPath, "Images/" + file.FileName);
        using (var stream = new FileStream(path, FileMode.Create))
        {
            await file.CopyToAsync(stream);
        }
        savedFiles += "http://localhost:8888/Images/" + file.FileName + "<br/>";
    }
    return savedFiles;
}
Notice that this method has a List<IFormFile> parameter. So, in the JS code you simply have to add all the files to the FormData object as shown below.
var files = document.getElementById("File").files

data = new FormData();
for (var i = 0; i < files.length; i++) {
    data.append("files", files[i]);
}
I am providing the full updated code of the UploadFile JS function. You can see there are just some slight changes.
function UploadFile() {
    var files = document.getElementById("File").files

    if (files.length != 0) {
        var xhttp = new XMLHttpRequest();

        xhttp.open("POST", "http://localhost:8888/api/Xaero/UploadAllFile", true);
        data = new FormData();
        for (var i = 0; i < files.length; i++) {
            data.append("files", files[i]);
        }

        xhttp.upload.addEventListener("progress", progressHandler, false);
        xhttp.addEventListener("load", completeHandler, false);
        xhttp.addEventListener("error", errorHandler, false);
        xhttp.addEventListener("abort", abortHandler, false);

        xhttp.send(data);

        xhttp.onreadystatechange = function () {
            if (this.readyState == 4 && this.status == 200) {
                document.getElementById("fileDiv").style.display = "block";
            }
        };
    }
}
Uploading a File with additional Parameters
Let us consider a situation where you want to upload a file and also send additional parameters to the Web API. Add the below given method to your API which does the exact same thing i.e. wants a file and a Student’s object.
[HttpPost("SubmitForm")]
public string AddStudent([FromForm] IFormFile studentImage, [FromForm] Student student)
{
    //...
    return "Student Added";
}
Also add the student class given below to your models folder of the API project:
public class Student
{
    public int Id { get; set; }
    public string Name { get; set; }
    public float Marks { get; set; }
}
Now create a new html page and call it AddStudent.html. In this page create a student form that accepts student’s info like Student Id, Name, Marks and his photo.
<h1>Add a Student</h1>
<h2 class="text-warning" id="message"></h2>
<div class="form-group">
    <label>Id:</label>
    <input type="text" class="form-control" id="StudentId" />
</div>
<div class="form-group">
    <label>Name:</label>
    <input type="text" class="form-control" id="StudentName" />
</div>
<div class="form-group">
    <label>Marks:</label>
    <input type="text" class="form-control" id="StudentMarks" />
</div>
<div class="form-group">
    <label>Image:</label>
    <input type="file" class="form-control" id="File" />
</div>
<div class="text-center panel-body">
    <button onclick="AddStudent()" type="submit" class="btn btn-sm btn-primary">Add</button>
    <progress id="progressBar" value="0" max="100" style="width: 300px;"></progress>
    <h3 id="status"></h3>
    <p id="loaded_n_total"></p>
</div>
Finally, add the following JavaScript method to call the Web API. This method also submits the student’s information to the API. I am providing the full JS code below:
<script type="text/javascript">
    function AddStudent() {
        var sImage = document.getElementById("File").files[0];

        var xhttp = new XMLHttpRequest();

        xhttp.open("POST", "http://localhost:8888/api/Xaero/SubmitForm", true);
        data = new FormData();
        data.append("studentImage", sImage);
        data.append("student.Id", document.getElementById("StudentId").value);
        data.append("student.Name", document.getElementById("StudentName").value);
        data.append("student.Marks", document.getElementById("StudentMarks").value);

        xhttp.upload.addEventListener("progress", progressHandler, false);
        xhttp.addEventListener("load", completeHandler, false);
        xhttp.addEventListener("error", errorHandler, false);
        xhttp.addEventListener("abort", abortHandler, false);

        xhttp.send(data);

        xhttp.onreadystatechange = function () {
            if (this.readyState == 4 && this.status == 200) {
                document.getElementById("message").innerHTML = "Student's record saved successfully";
            }
        };
    }

    function progressHandler(event) {
        document.getElementById("loaded_n_total").value = "Uploaded " + event.loaded + " bytes of " + event.total;
        var percent = (event.loaded / event.total) * 100;
        document.getElementById("progressBar").value = Math.round(percent);
        document.getElementById("status").innerHTML = Math.round(percent) + "% uploaded... please wait";
    }

    function completeHandler(event) {
        document.getElementById("pathDiv").innerHTML += event.target.responseText + "<br/>";
    }

    function errorHandler(event) {
        document.getElementById("status").innerHTML = "Upload Failed";
    }

    function abortHandler(event) {
        document.getElementById("status").innerHTML = "Upload Aborted";
    }
</script>
The only necessary thing to note is how the student’s information is added to FormData object. This is like student.Id for adding id of the student, student.Name for adding name and studentImage for adding the student’s photo.
data = new FormData();
data.append("studentImage", sImage);
data.append("student.Id", document.getElementById("StudentId").value);
data.append("student.Name", document.getElementById("StudentName").value);
data.append("student.Marks", document.getElementById("StudentMarks").value);
You’re your page in the browser and check how it works. It will work as shown by the given video:

Uploading multiple Files with Parameters in List form
I explain this by creating a scenario where you have to enter information’s of 3 employees in a form which is located on your page. Each employee has his id, name and image.
So, create a new method to your API that expects a List of employee object.
[HttpPost("AddEmployeeList")]
public string AddEmployees([FromForm] List<Employee> employee)
{
    //...
    return "Employees Added";
}
Also add the employee class inside the Models folder.
public class Employee
{
    public int Id { get; set; }
    public string Name { get; set; }
    public IFormFile Image { get; set; }
}
To create a Multi File upload feature, first create a new page and add the below HTML to it.
<h2 class="text-warning" id="message"></h2>
<h1>Employee 1</h1>
<div class="form-group">
    <label>Employee 1 Id:</label>
    <input type="text" class="form-control" id="EmpId1" />
</div>
<div class="form-group">
    <label>Employee 1 Name:</label>
    <input type="text" class="form-control" id="EmpName1" />
</div>
<div class="form-group">
    <label>Employee 1 Image:</label>
    <input type="file" class="form-control" id="EmpFile1" />
</div>
<h1>Employee 2</h1>
<div class="form-group">
    <label>Employee 2 Id:</label>
    <input type="text" class="form-control" id="EmpId2" />
</div>
<div class="form-group">
    <label>Employee 2 Name:</label>
    <input type="text" class="form-control" id="EmpName2" />
</div>
<div class="form-group">
    <label>Employee 2 Image:</label>
    <input type="file" class="form-control" id="EmpFile2" />
</div>
<h1>Employee 3</h1>
<div class="form-group">
    <label>Employee 3 Id:</label>
    <input type="text" class="form-control" id="EmpId3" />
</div>
<div class="form-group">
    <label>Employee 3 Name:</label>
    <input type="text" class="form-control" id="EmpName3" />
</div>
<div class="form-group">
    <label>Employee 3 Image:</label>
    <input type="file" class="form-control" id="EmpFile3" />
</div>
<div class="text-center panel-body">
    <button onclick="UploadFile()" type="submit" class="btn btn-sm btn-primary">Add</button>
    <progress id="progressBar" value="0" max="100" style="width: 300px;"></progress>
    <h3 id="status"></h3>
    <p id="loaded_n_total"></p>
</div>
The html creates a form to accept employee details of 3 employees of a company.
Next, add the following JS code to your page:
<script type="text/javascript">
    function UploadFile() {
        var xhttp = new XMLHttpRequest();

        xhttp.open("POST", "http://localhost:8888/api/Xaero/AddEmployeeList", true);
        data = new FormData();
        data.append("employee[0].Id", document.getElementById("EmpId1").value);
        data.append("employee[0].Name", document.getElementById("EmpName1").value);
        data.append("employee[0].Image", document.getElementById("EmpFile1").files[0]);
        data.append("employee[1].Id", document.getElementById("EmpId2").value);
        data.append("employee[1].Name", document.getElementById("EmpName2").value);
        data.append("employee[1].Image", document.getElementById("EmpFile2").files[0]);
        data.append("employee[2].Id", document.getElementById("EmpId3").value);
        data.append("employee[2].Name", document.getElementById("EmpName3").value);
        data.append("employee[2].Image", document.getElementById("EmpFile3").files[0]);

        xhttp.upload.addEventListener("progress", progressHandler, false);
        xhttp.addEventListener("load", completeHandler, false);
        xhttp.addEventListener("error", errorHandler, false);
        xhttp.addEventListener("abort", abortHandler, false);

        xhttp.send(data);

        xhttp.onreadystatechange = function () {
            if (this.readyState == 4 && this.status == 200) {
                console.log(this.response);
            }
        };
    }

    function progressHandler(event) {
        document.getElementById("loaded_n_total").value = "Uploaded " + event.loaded + " bytes of " + event.total;
        var percent = (event.loaded / event.total) * 100;
        document.getElementById("progressBar").value = Math.round(percent);
        document.getElementById("status").innerHTML = Math.round(percent) + "% uploaded... please wait";
    }

    function completeHandler(event) {
        document.getElementById("message").innerHTML = event.target.responseText;
    }

    function errorHandler(event) {
        document.getElementById("status").innerHTML = "Upload Failed";
    }

    function abortHandler(event) {
        document.getElementById("status").innerHTML = "Upload Aborted";
    }
</script>
The only thing of importance is adding these 3 employee details to the FormData object as shown below:
data = new FormData();
data.append("employee[0].Id", document.getElementById("EmpId1").value);
data.append("employee[0].Name", document.getElementById("EmpName1").value);
data.append("employee[0].Image", document.getElementById("EmpFile1").files[0]);
data.append("employee[1].Id", document.getElementById("EmpId2").value);
data.append("employee[1].Name", document.getElementById("EmpName2").value);
data.append("employee[1].Image", document.getElementById("EmpFile2").files[0]);
data.append("employee[2].Id", document.getElementById("EmpId3").value);
data.append("employee[2].Name", document.getElementById("EmpName3").value);
data.append("employee[2].Image", document.getElementById("EmpFile3").files[0]);
To add the first employee details, I used employee[0].xxx, 2nd employee is added like employee[1].xxx, etc.
Open the HTML page in your browser and see how it works.
Download the full codes:
We just built an amazing file upload feature with shows real time progress of the files that are currently being upload. Use this freely in your projects. I would love if you share this tutorial in your reddit, facebook & twitter accounts to let others also know about it. Also make sure to read some other great tutorials on ASP.NET which I have written.
SHARE THIS ARTICLE
Related Tutorials:


ABOUT THE AUTHOR
I hope you enjoyed reading this tutorial. If it helped you then consider buying a cup of coffee for me. This will help me in writing more such good tutorials for the readers. Thank you.

HELLO EVERYONE
 Welcome to YogiHosting - A Programming Tutorial Website. It is used by millions of people around the world to learn and explore about ASP.NET Core, Blazor, jQuery, JavaScript, Docker, Kubernetes and other topics.
SUBSCRIBE TO NEWSLETTER
Enter your email address to subscribe to this blog and receive notifications of new posts by email.
Join 90K other subscribers