How to use CKEditor in ASP.NET MVC – Developers Guide with Sample Codes to Download

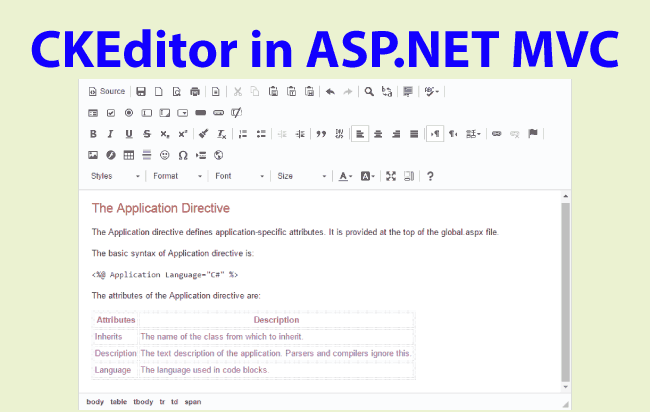
You can create a feature in your MVC site where a user can enter HTML contents for a certain field. This can be achieved using CKEditor which you can download from CKEditor’s Website.
Let us now create a View that uses CKEditor.
I will create a fully functional View, in ASP.NET MVC Website, which will have CKEditor for inserting & editing HTML contents in the database. I will also perform both server side and client side validation on the View.
First create a Model and add 2 string properties in it. Provide them the [Required] attribute.
public class CKEditor
{
    [Required]
    public string name { get; set; }

    [Required]
    public string description { get; set; }
}
Note: In the ‘description’ field the HTML contents will be entered.
Create a Controller and add the following code to it:
public ActionResult Index(string edit)
{
    if (edit != null)
    {
        Models.CKEditor ckEditor = new Models.CKEditor();
        ckEditor.name = ((MyStruct)Session["MySession"]).name;
        ckEditor.description = ((MyStruct)Session["MySession"]).description;
        return View(ckEditor);
    }
    return View();
}

[HttpPost]
[ValidateInput(false)]
public ActionResult Index(Models.CKEditor ckEditor)
{
    if (ModelState.IsValid)
    {
        MyStruct myStruct;
        myStruct.name = ckEditor.name;
        myStruct.description = ckEditor.description;
        Session["MySession"] = myStruct;
        ViewBag.StudentData = BindDataTable();
        ViewBag.Result = "Form Submitted Successfully";
    }
    else
        ViewBag.Result = "Invalid Entries, Kindly Recheck.";
    return View();
}

struct MyStruct
{
    public string name;
    public string description;
}

string BindDataTable()
{
    string table = "<table>";
    table += "<tr><td class=\"red\">Name: </td></tr><tr><td>" + ((MyStruct)Session["MySession"]).name + "</td></tr>";
    table += "<tr><td class=\"red\">Description: </td></tr><tr><td>" + ((MyStruct)Session["MySession"]).description + "</td></tr>";
    table += "</table>";
    return table;
}

[HttpPost]
public ActionResult Edit()
{
    return RedirectToAction("Index", "CKEditor", new { edit = "edit" });
}
Explanation:
- I have taken a Session variable for storing the form’s submitted values (name and description). For this I created a Struct and added 2 string fields to it.
- Index Get Action: I am checking whether the edit value is ‘not null’. In that case adding name and description values from the Session to the Model, and then returning the Model it to the View. The reason for this is the Index Action will be called when the edit button is clicked.
- Index Post Action: I added the attribute called [ValidateInput(false)] so that HTML contents can be posted to the server (this is disabled by default).
- If both the fields are filled by the user the I am adding then to the Struct variable, and saving it in the Session.
- Next calling the BindDataTable() function, which converts the stored session data in HTML table format. The ViewBag.Result variable will store this value and will be shown in the View.
- Edit Action: It redirects to the Index Action passing on edit value to the URL (URL formed will be Controller/Index/edit). This edit value will tell the Index Action that ‘this is the turn of data editing’ and bind the Model from the Session Value.
Also make sure to add the below edit rule to the RouteConfig.cs file.
routes.MapRoute(
    name: "Edit",
    url: "CKEditor/Index/{edit}",
    defaults: new { controller = "CKEditor", action = "Index", edit = "" },
    constraints: new { edit = "edit" }
);
Next go to your view and enable ClientValidationEnabled and UnobtrusiveJavaScriptEnabled by adding the below code on top of it:
@{
    HtmlHelper.ClientValidationEnabled = true;
    HtmlHelper.UnobtrusiveJavaScriptEnabled = true;
}
Next give the reference of the ckeditor.js on the View:
<script src="~/Content/Component/ckeditor/ckeditor.js" type="text/javascript" language="javascript"></script>
Next add these code lines to the View:
@model demo.MVC.Models.CKEditor

<h3>@ViewBag.Result</h3>
<div id="viewContent">
    @if (ViewBag.StudentData == null)
    {
        using (Html.BeginForm(null, null, FormMethod.Post, new { id = "CKEditorForm" }))
        {
            <div id="studentFormDiv" class="studentForm">
                <table>
                    <tbody>
                        <tr>
                            <td>
                                @Html.LabelFor(model => model.name)
                                @Html.EditorFor(model => model.name)
                                @Html.ValidationMessageFor(model => model.name)
                            </td>
                        </tr>
                        <tr>
                            <td>
                                @Html.LabelFor(model => model.description)
                                @Html.TextAreaFor(model => model.description)
                                @Html.ValidationMessageFor(model => model.description)
                                <script type="text/javascript" language="javascript">
                                    CKEDITOR.replace(@Html.IdFor(model => model.description));
                                </script>
                            </td>
                        </tr>
                        <tr><td colspan="2"><button id="submitButton">Submit</button></td></tr>
                    </tbody>
                </table>
            </div>
        }
    }
    else
    {
        <div id="studentDataDiv" class="studentForm">
            @(new HtmlString(ViewBag.StudentData))
        </div>

        using (Html.BeginForm("Edit", "CKEditor"))
        {
            <button>Edit</button>
        }
    }
</div>
Inside the div called viewContent the main work is happening. I am checking if the ViewBag.StudentData is null or not. If it is null I will show the form else show what the Session contains (i.e. inside the studentDataDiv div).
I have added a script below the description field. This will show the CKEditor for the description field.
<script type="text/javascript" language="javascript">
    CKEDITOR.replace(@Html.IdFor(model => model.description));
</script>
At the last, edit button is created which will call the Edit Action, so that user can edit the name and description values.
@Scripts.Render("~/jQuery")
@Scripts.Render("~/jQueryValidate")
@Scripts.Render("~/Unobtrusive")
<script>
    $(document).ready(function () {
        $("#submitButton").click(function () {
            CKEDITOR.instances["description"].updateElement();
            $("#description").show();
        });
    });
</script>
Here I have given the reference of jQuery, jQuery Validation and jQuery Unobtrusive files. These references are need for client side validation to take place.
I have also added a submitButton’s client side event, to call the CKEditor’s updateElement() method, and showing the description field in the view.
This will make sure the client side validations work perfection on the view. Download the full source codes:


 Welcome to YogiHosting - A Programming Tutorial Website. It is used by millions of people around the world to learn and explore about ASP.NET Core, Blazor, jQuery, JavaScript, Docker, Kubernetes and other topics.